Category Archives: Computer

Steam Desktop Authenticator

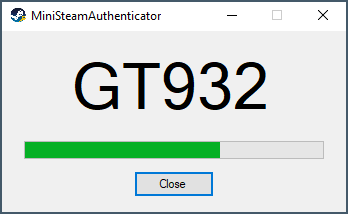
I made an application for windows that can generate 2FA codes for Steam. Available on github:

https://github.com/manatails/MiniSteamAuthenticator

Usage

MiniSteamAuthenticator accepts Base32 encoded Steam shared secret as used in Aegis or andOTP. You can use steamctl to generate the shared secret. https://github.com/ValvePython/steamctl

  1. Install steamctl

    pip install steamctl

  2. Generate an authentication token using steamctl

    steamctl authenticator add

  3. Export saved authentication token as a QR code

    steamctl authenticator qrcode YOUR_USERNAME

  4. Scan the QR code with an external application. It will be formatted like this:

    otpauth://steam/steamctl:YOUR_USERNAME?secret=XXXXXX&issuer=Steam

  5. Copy the secret value and add it to the configuration .ini file.

Screenshot


Backing up SHSH2 blobs with Apple Silicon M1 Mac

I’m posting this because the process wasn’t as straightforward as it did for Intel macs where you could simply use precompiled packages or run brew install libimobiledevice. Here is what I did:

1. Install Xcode from App Store

2. Install Xcode command line tools

sudo xcode-select --install

3. Install Homebrew

/bin/bash -c "$(curl -fsSL https://raw.githubusercontent.com/Homebrew/install/master/install.sh)"

echo 'eval "$(/opt/homebrew/bin/brew shellenv)"' >> /Users/manatails/.zprofile
eval "$(/opt/homebrew/bin/brew shellenv)"

4. Install required tools

brew update
brew install --HEAD usbmuxd

brew install --HEAD libimobiledevice

brew install --HEAD libirecovery

5. Use libimobiledevice to collect necessary information

ideviceinfo // get device information

ideviceenterrecovery (UniqueDeviceID from ideviceinfo) //put the device into recovery mode

irecovery -q //you can get NONC and ECID from this command

irecovery -n //return your device to normal mode

6. Back up blobs using TSS Saver: https://tsssaver.1conan.com/v2/
Input your ECID and apnonce(NONC) and you’re done.

—-
I also kept getting strange zsh: process killed message when I first started any of the brew packages, but I fixed it by completely uninstalling brew using the uninstall script then removing the installation folder, then reinstalling homebrew.

/bin/bash -c "$(curl -fsSL https://raw.githubusercontent.com/Homebrew/install/master/uninstall.sh)"
sudo rm -rf /opt/homebrew

I also recommend saving the entire output of ideviceinfo and irecovery -q command somewhere just in case.

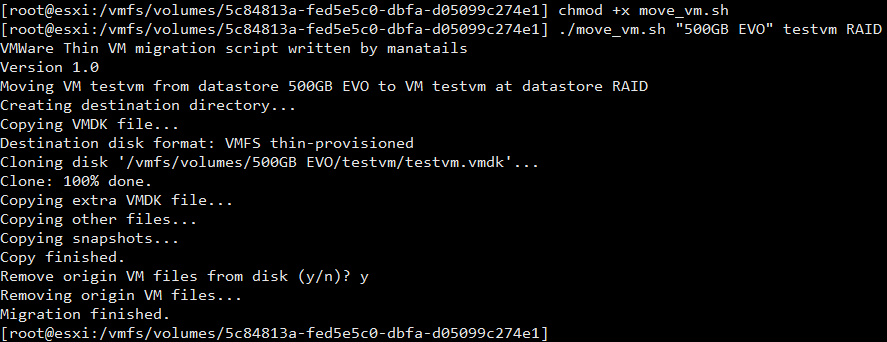
Quickly move/copy thin-provisioned VMs in VMware ESXi

It’s a script I’ve been using often but I forgot to write a post about this

In VMware ESXi copying thin provisioned VMs using the web interface or console consumes a lot of time and disk IO as it defaults to allocate the new VM as a thick provisioned one.
So I created a special script that avoids default copy operations and copy files as you normally would expect.

https://git.mananet.net/manatails/vmware-thin-mover

Screenshot:

I hope this simple script saves you much of your precious time.

Compiling new Linux Kernel

Those are the commands I used to create custom kernel packages for Debian/Ubuntu based systems.

1. Install required packages

sudo apt-get install build-essential libncurses-dev bison flex libssl-dev libelf-dev

2. Extract source code and import config from current kernel

cd linux-5.x.x
cp -v /boot/config-$(uname -r) .config

make olddefconfig

3. Edit  .config file and set the following variables

CONFIG_SYSTEM_TRUSTED_KEYS = ""
CONFIG_DEBUG_INFO=n

Building without black SYSTEM_TRUSTED_KEYS will fail the build.
Building with debug info will take much more time and space

Compile code and generate deb package, add LOCALVERSION if you want to add a kernel suffix

make clean
make -j8 deb-pkg LOCALVERSION=-custom


UefiSeven: Easily boot Windows 7 on UEFI class 3 devices

I’ve been following some threads about installing Windows 7 on pure EFI systems.

Then I found out about VgaShim which I thought to be the best solution.
But the project was deserted a long time ago, it was buggy and was not compatible with my newest devices

After playing around with OVMF firmware and some hardware, I came up with many fixes and improvements.
I decided to take this a bit further and forked my own project named UefiSeven

https://git.mananet.net/manatails/uefiseven

It aims to be the straightforward solution for installing Windows 7 on UEFI class 3 devices.

-Easy to install
-Informative logs
-Configurable verbose mode
-Serial debug console from VGA ROM for debugging
-Experimental, hack-ish support for non-1024×768 capable screens

Usage Instructions:

1. Prepare Windows 7 installation USB Drive
2. Rename bootx64.efi at (UsbDrive)\EFI\Boot\ to bootx64.original.efi
3. Unpack bootx64.efi from UefiSeven archive and copy it to (UsbDrive)\EFI\Boot\
4. (Optional) Copy UefiSeven.verbose to the same directory to enable verbose mode
5. Install Windows
6. Rename bootmgfw.efi at (HDD)\EFI\Microsoft\Boot\ to bootmgfw.original.efi
7. Copy UefiSeven bootx64.efi to (HDD)\EFI\Microsoft\Boot\bootmgfw.efi using EFI shell

Download:
https://git.mananet.net/manatails/uefiseven/-/releases

PoC

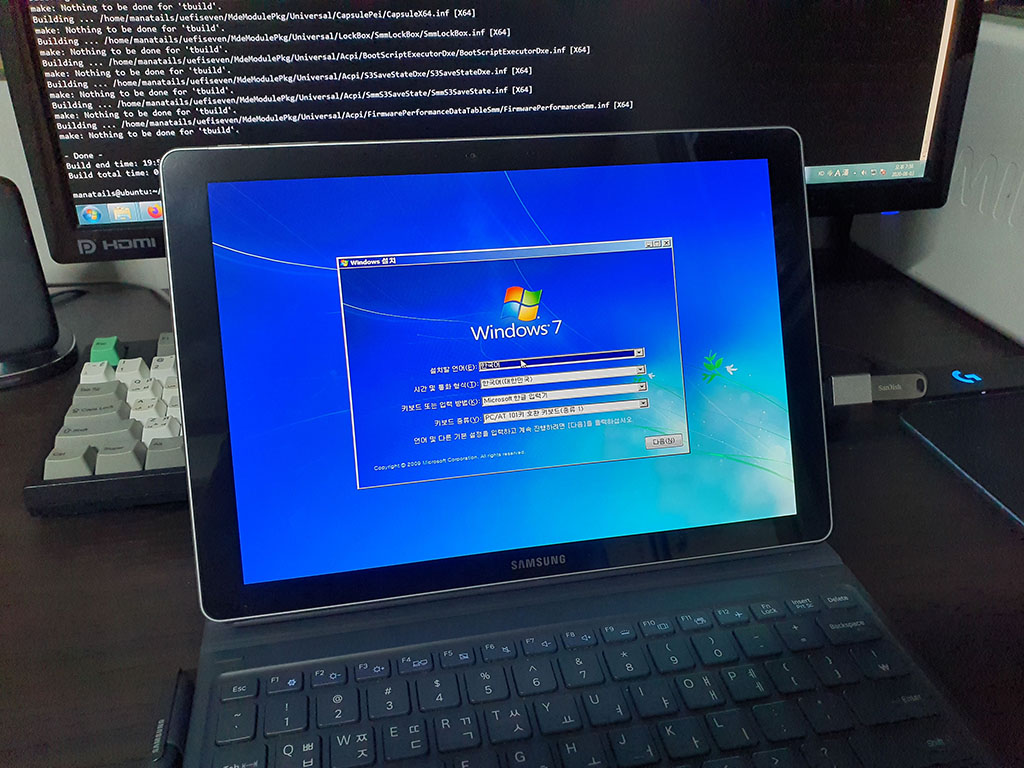
Windows 7 running on a Samsung Galaxy Book 12 (Kaby Lake SoC), 2160×1440 screen with native 1024×768 GOP support

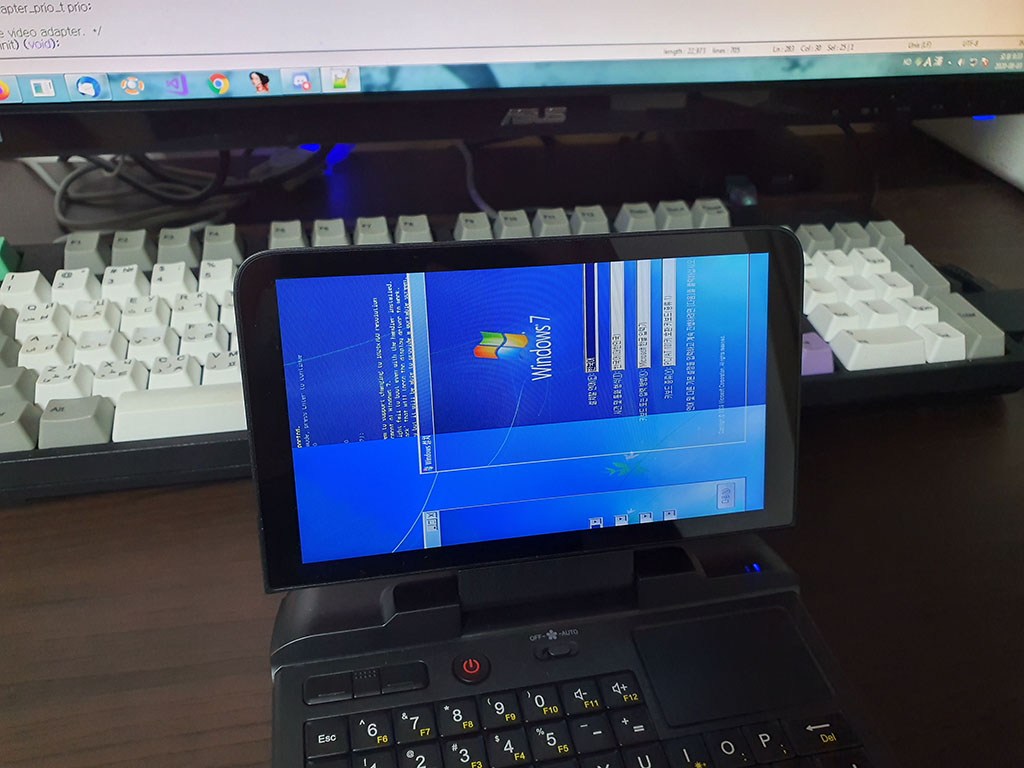
Windows 7 running on a GPD MicroPC (Gemini Lake SoC), 720×1280 rotated portrait screen holding 1024×768 framebuffer (Glitchy but useful enough to complete the setup)

I hope this makes life easier for many people who do not want to accept Windows 10 tyranny.

Compiling OVMF from source

I used Debian Buster for the environment

sudo apt-get install build-essential git uuid-dev iasl nasm git
git clone git://github.com/tianocore/edk2.git
cd edk2
git submodule init
git submodule update
source ./edksetup.sh
make -C BaseTools/
build -a X64 -t GCC5 -b RELEASE -p OvmfPkg/OvmfPkgX64.dsc

Find the resulting binary at Build/OvmfX64/RELEASE_GCC5/FV/OVMF.fd

Setting up a dedicated spamassassin server

Default Spamassassin install from Ubuntu is a little bit misconfigured and is not suitable for remote Anti-Spam service. So I am writing up the config changes I had to make in order to make it work flawlessly.

1. Make a dedicated user for Spamassassin, default config runs Spamassassin as root, then the executable itself would complain about it and fall back to nobody.

sudo adduser spamd --disabled-login

2. Open /etc/default/spamassassin and edit the following line

OPTIONS="--create-prefs --max-children 5 --username spamd --helper-home-dir /home/spamd/ --listen=0.0.0.0 --allowed-ips=(your_server_ip)"

3. Edit /etc/spamassassin/local.cf and Add/Uncomment the following lines to suit your needs

rewrite_header Subject [SPAM]
use_bayes 1

bayes_path /var/spamassassin/bayes_db/bayes
bayes_file_mode 0775

bayes_auto_learn 1

bayes_auto_learn_threshold_nonspam -0.001
bayes_auto_learn_threshold_spam 10.0

4.Make directories for Bayes database and give appropriate permissions

sudo mkdir -p /var/spamassassin/bayes_db
sudo chown -R spamd:spamd /var/spamassassin

5.Start Spamassassin Service

sudo systemctl daemon-reload
sudo systemctl restart spamassassin


Here are some convenient commands to manage your Spamassassin service:

1. Restore Bayes backup data

sudo -H -u spamd sa-learn --restore spamassassin.backup

2. Sync Bayes database

sudo -H -u spamd sa-learn --sync

3. Learn mail in folder as spam:

sudo -H -u spamd sa-learn --spam --showdots --dir /home/manatails/mail/spam

4. Learn mail in folder as ham

sudo -H -u spamd sa-learn --ham --showdots --dir /home/manatails/mail/ham

5. Print bayes database stats:

sudo -H -u spamd sa-learn --dump magic

In ubuntu logs are stored at /var/log/mail.log
디스코드 한글봇

한글 입력이 지원되지 않는 게임에서 디스코드에 한글 채팅을 할 수 있게 해주는 봇입니다.

카스글옵, 에이펙스 등등 많은 게임에서 한글 키보드가 활성화 되지 않아

매번 알트탭을 눌러서 불편하게 채팅을 치셨나요?

이젠 오버레이 상에서 그대로 하면 됩니다.

한글봇이 영타를 한글로 자동으로 바꾸어 줍니다.

사용예:

봇 홈페이지

https://hangulbot.mananet.net/

한글봇을 초대하시고, 편리하게 한국어로 디스코드를 이용하세요

Converting Killer LAN / WLAN cards to Atheros cards

If you feel frustrated by buggy drivers and softwares of Killer ethernet cards that come with your new gaming laptop or motherboard, it is possible to get rid of them by force replacing the drivers. I experienced continuous disconnection while creating a testnet with this card and it was unacceptable. I honestly have no idea why manufacturers even use this chipset even though people were complaining about this for a long time.

Killer chipsets are basically rebranded versions of existing Atheros chipsets, so  you can simply override the default driver settings to make it function as an Atheros card.


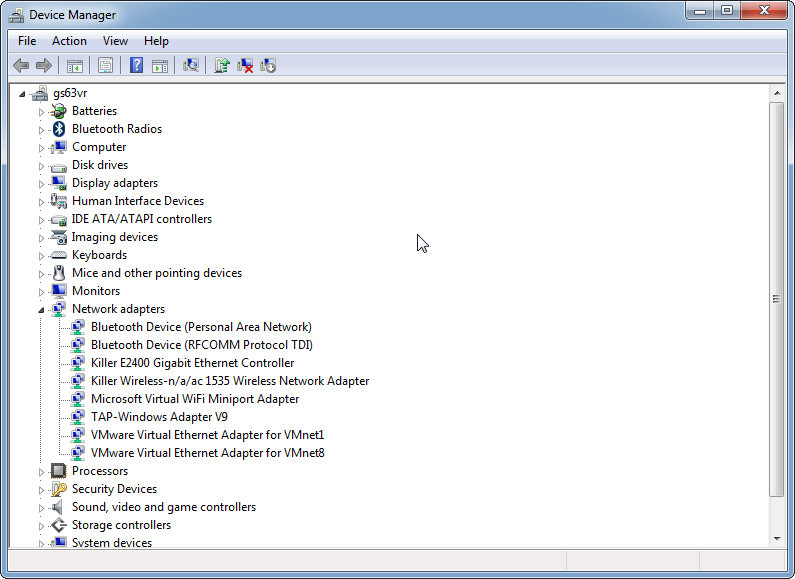
1. Open the device manager
2018-11-23 02_07_04-Device Manager


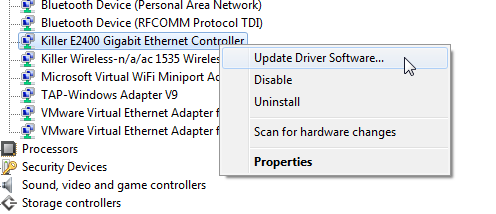
2. Right click on the LAN card and choose to update driver software
2018-11-23 02_07_50-NVIDIA GeForce Overlay

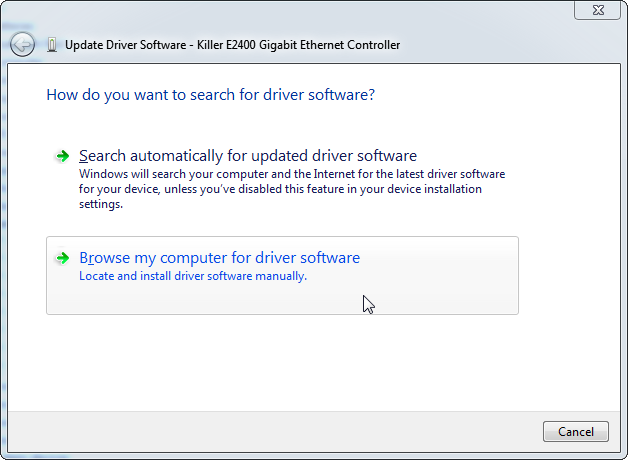
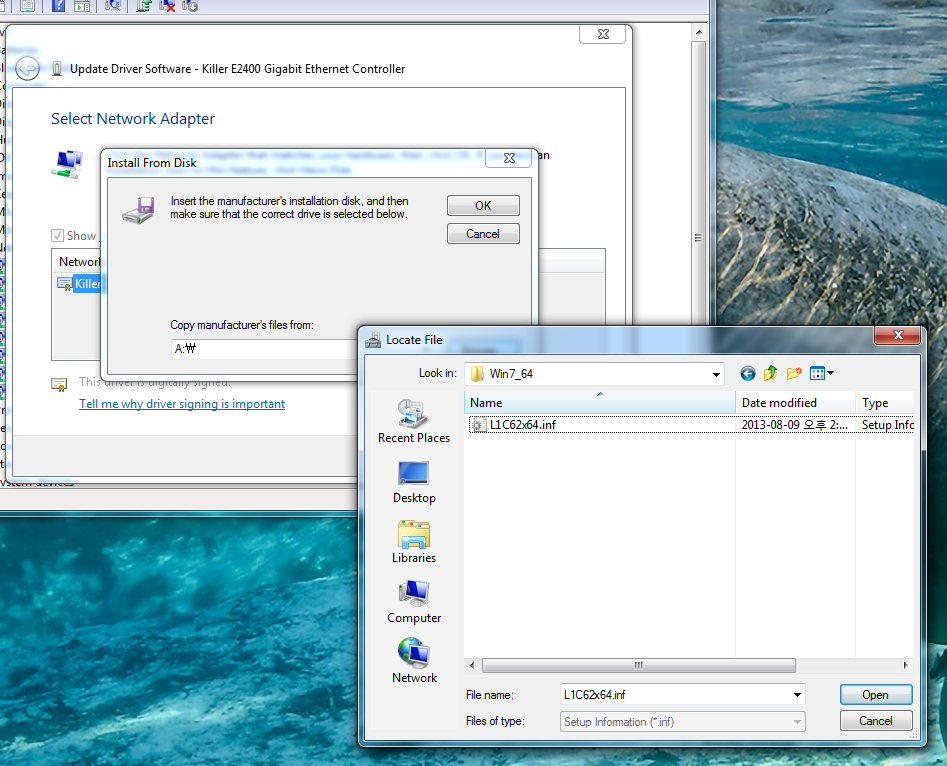
3. Browse my computer for drivers
2018-11-23 02_08_11-Update Driver Software - Killer E2400 Gigabit Ethernet Controller

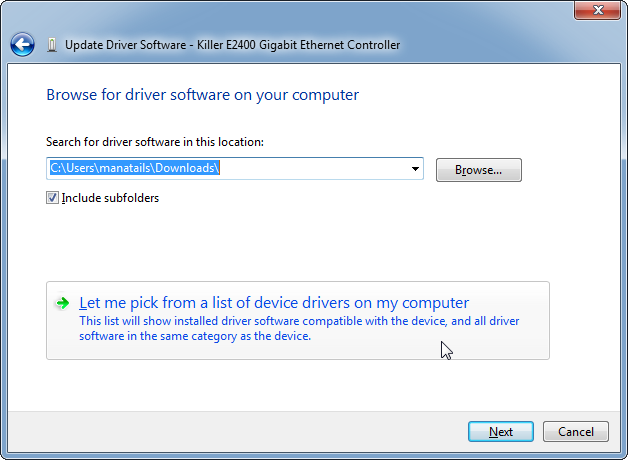
4. Pick from a list on my computer
2018-11-23 02_08_45-Update Driver Software - Killer E2400 Gigabit Ethernet Controller

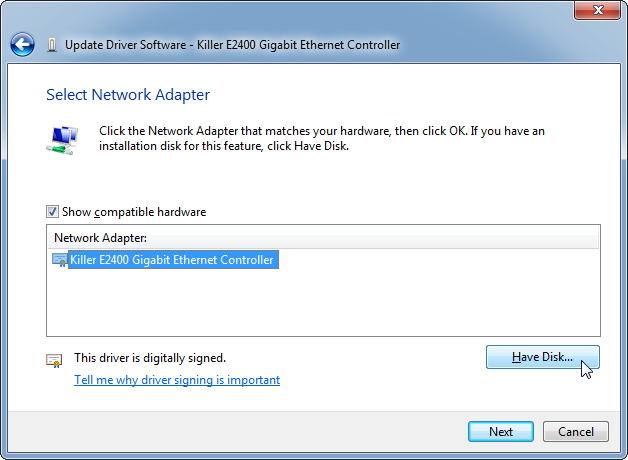
5. Have driver disk
2018-11-23 02_09_04-Update Driver Software - Killer E2400 Gigabit Ethernet Controller

6. Choose the appropriate inf file for your device. There is a list of compatible drivers at the end of this article
2018-11-23 02_09_43-Device Manager

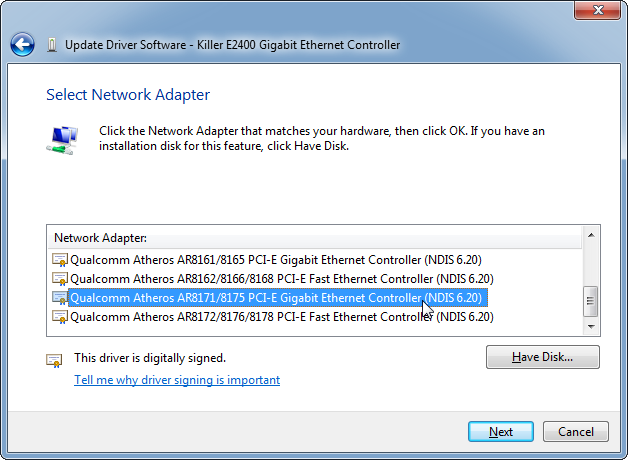
7. If the inf file contains multiple definitions, choose the appropriate model
2018-11-23 02_10_04-Update Driver Software - Killer E2400 Gigabit Ethernet Controller

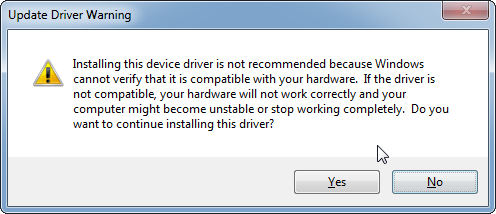
8. Ignore the warning and proceed
2018-11-23 02_10_15-Update Driver Warning

9.You have a functional Atheros card now, goodbye retarded Killer drivers
2018-11-18 13_13_00-Device Manager

10. Remove the Killer suite from Add/Remove Programs if you installed them


List of compatible drivers:

Killer E2200 – Atheros AR8151
Killer E2400 – Atheros AR8171

Killer Wireless 1535 – Qualcomm QCA61x4A


Please tell me if you know any other compatible pairs, I’ll add them to this list.

Adding a startup script as a service in Ubuntu

I write this up because I don’t want to look it up everytime I need it. This will create a simple service that executes a script in Ubuntu systemd.


1. Create a file: /etc/systemd/system/service-name.service

[Unit]
Description=Some Description of your service
After=network.target
After=systemd-user-sessions.service
After=network-online.target

[Service]
User=root
Type=simple
ExecStart=/path/to/your/script/start-all.sh
Restart=on-failure
RestartSec=30
StartLimitInterval=350
StartLimitBurst=10

[Install]
WantedBy=multi-user.target

2. Reload systemd

systemctl daemon-reload

3. Make that your script executable with:

chmod u+x /path/to/your/script/start-all.sh

4. Start it:

sudo systemctl start service-name

5. Enable it to run at boot

sudo systemctl enable service-name

tip: #!/bin/sh is necessary at the beginning of the script or startup will fail with error 203