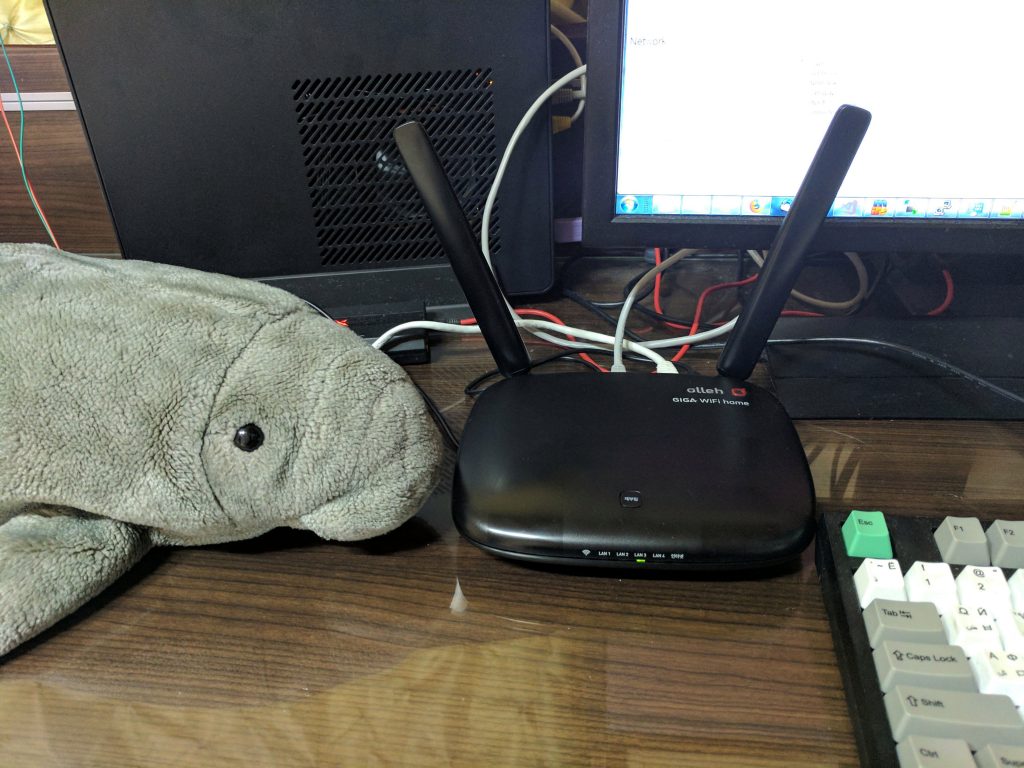
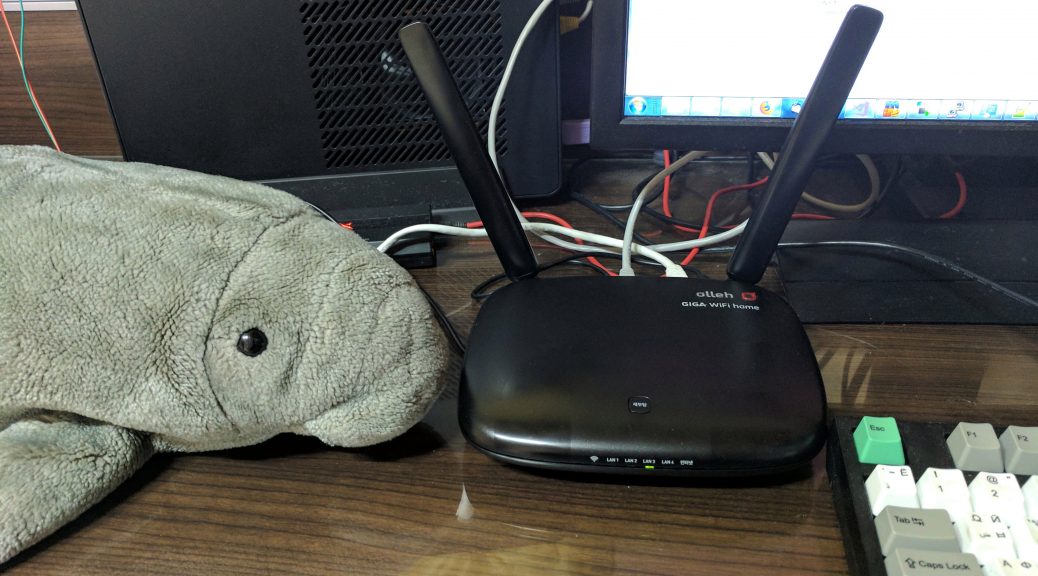
이번에 아는 사람에게서 남는 KT 공유기를 받았습니다.
딱히 쓸데는 없고 해서 분해해 보았는데, 생각보다 사양이 좋습니다.
이 기기가 그냥 통신사 공유기로 남는것은 아깝다고 생각하여 한번 해킹을 시도해 보았습니다.
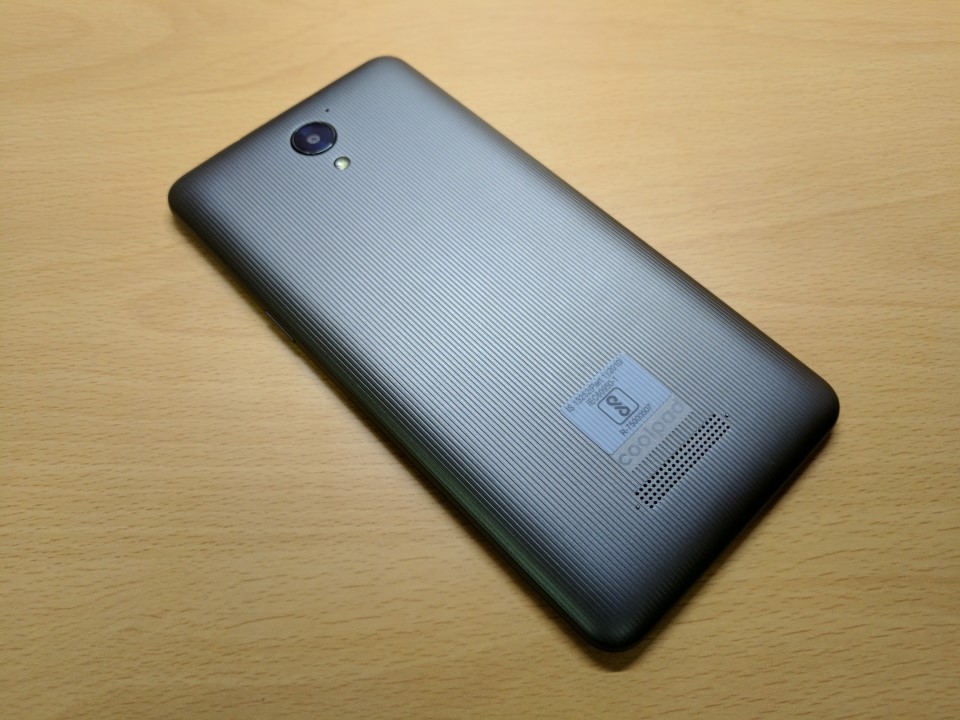
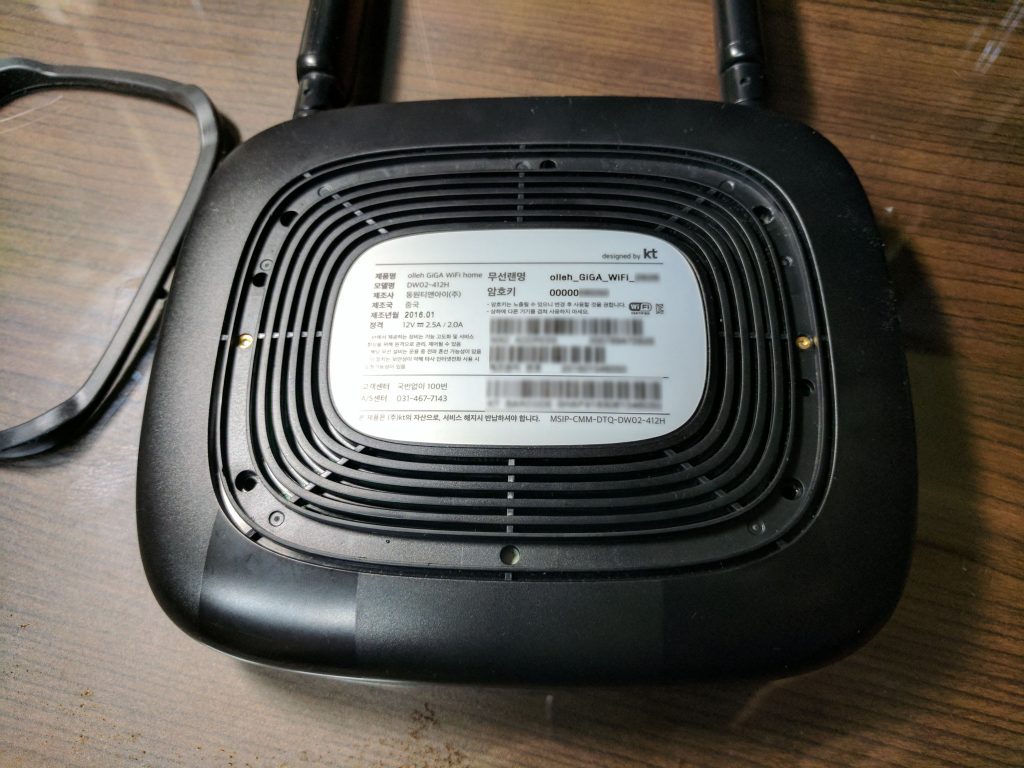
모델명은 DW02-412H 으로 기가인터넷 가입 시 같이 주는 공유기인것 같네요.
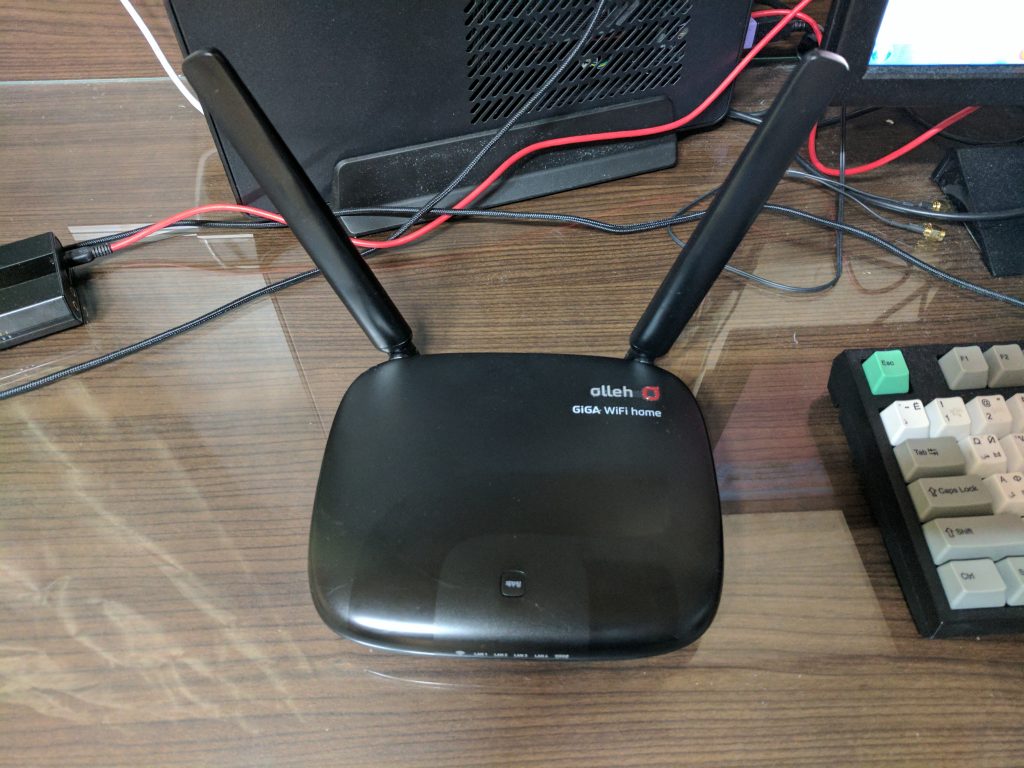
외형은 별 볼일 없는 평범한 공유기입니다.
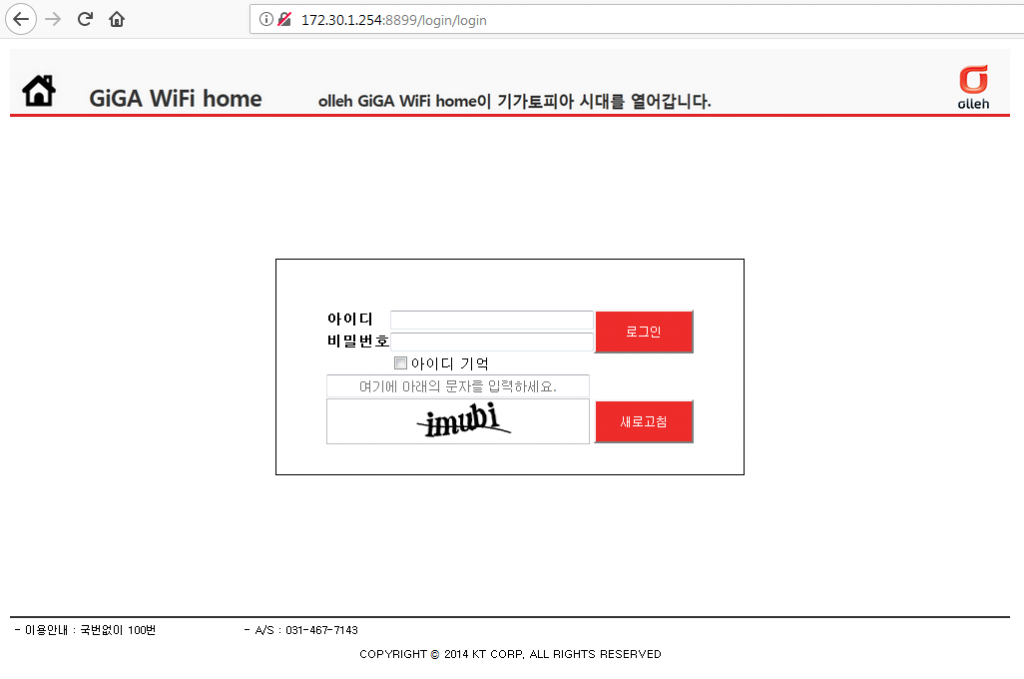
공유기의 주소로 로그인을 해 보면 재미없는 kt 인터페이스가 우리를 반깁니다.
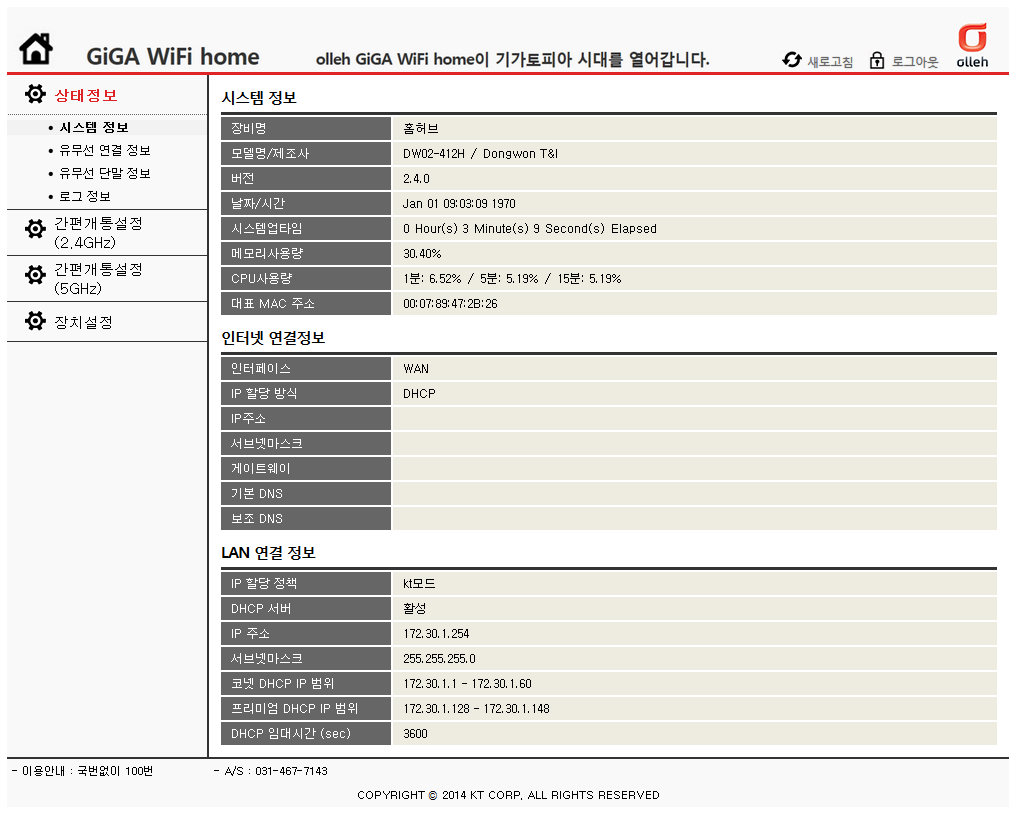
할 수 있는것도 거의 없습니다.
이제 이 공유기에게 새로운 힘을 줘 봅시다.
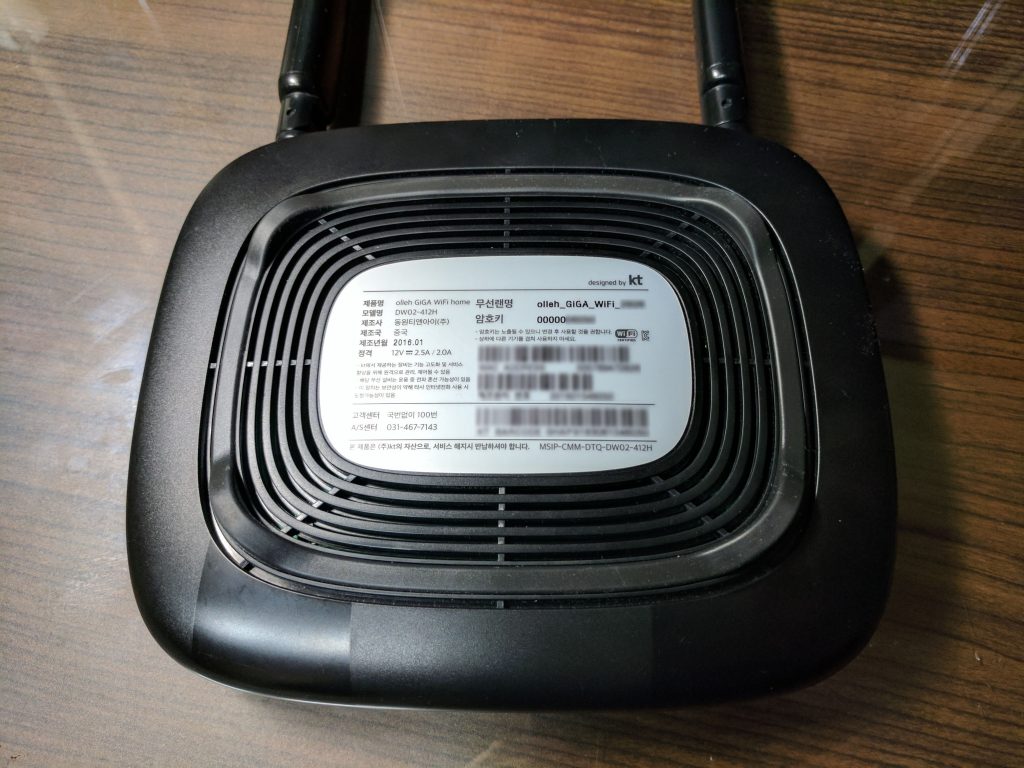
우선 뒷면을 봅시다.
딱 봐도 고무 밑에 나사가 있게 생겼군요
고무패킹을 떼고 나사를 풀어줍니다.
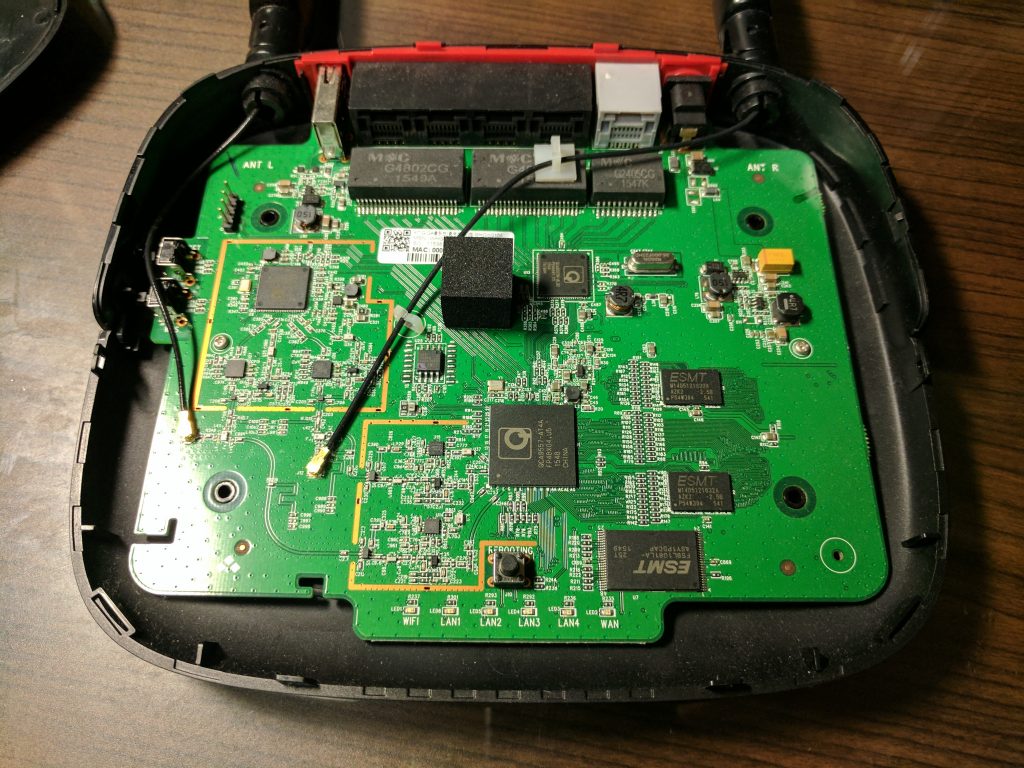
뚜껑을 여니 기판이 보이네요.
QCA9557 칩셋과 ESMT사의 1기가비트(128메가바이트) 메모리 모듈이 눈에 띕니다.
해당 칩셋은 720Mhz의 MIPS기반 CPU를 사용합니다.
720Mhz CPU에 128MB 램, 128MB 낸드면 공유기로 살기에는 좀 아깝죠.
저가형 iptime 공유기들은 32메가 램에 8메가 낸드 장착 이런것도 흔합니다.
가장자리에 수상한 핀들이 보이네요.
보통 이런 핀들이 직렬 연결을 위해 쓰입니다.
전압을 측정하여 각각의 핀이 무슨 핀인지 알아봅니다.
어려운거 할필요 없이 전압계 하나면 충분합니다…

가장 아래 핀은 3.3v 나오네요. VCC입니다.

바로 위에 핀은 전압이 계속 바뀌는걸 보니 TX인듯 합니다.
맨끝에 핀은 0볼트 나오니 GND이고 중간에 끼인것이 RX이겠죠
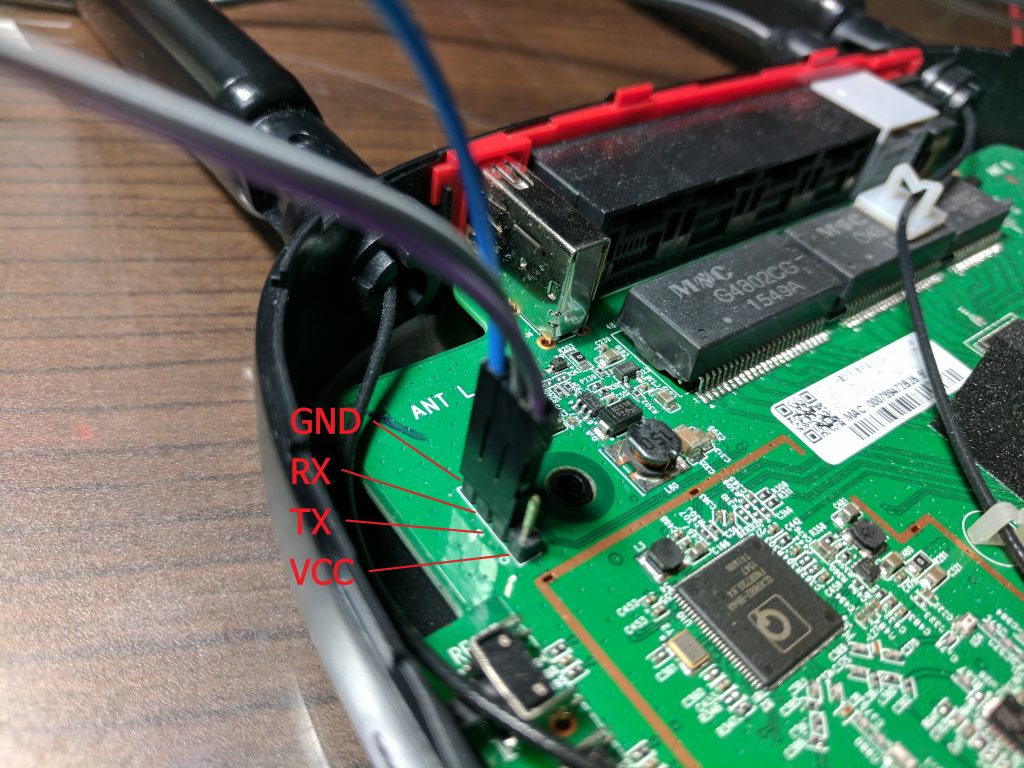
정리되었으니 USB 직렬 컨트롤러를 이용하여 컴퓨터와 연결합니다.
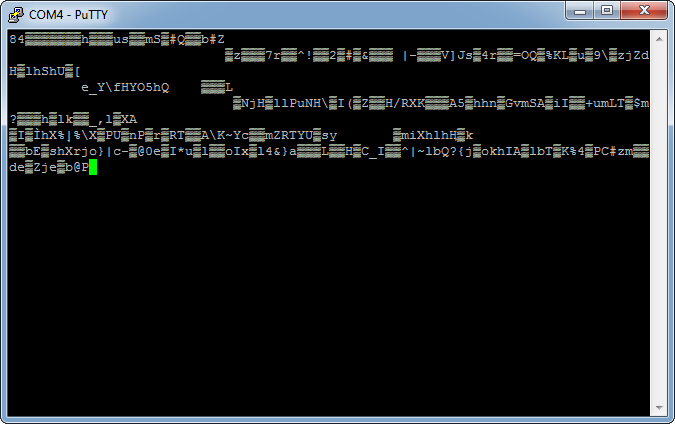
PuTTY를 쓰니 연결이 되긴 된것 같은데.. baudrate가 틀린지 글자가 깨집니다.
주로쓰는 baudrate인 57600, 115200 등을 적용해서 확인합니다.
115200이였네요
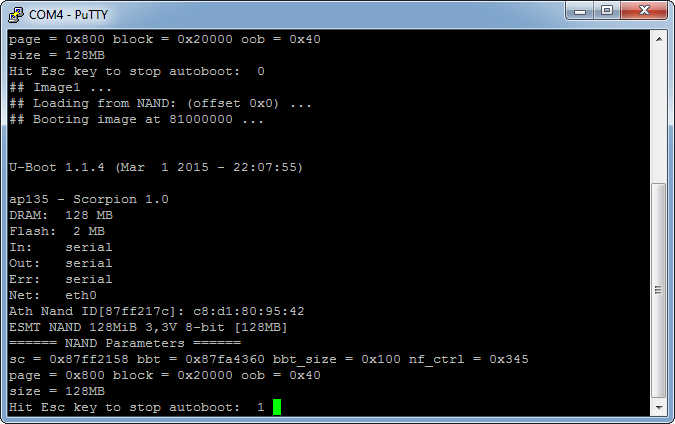
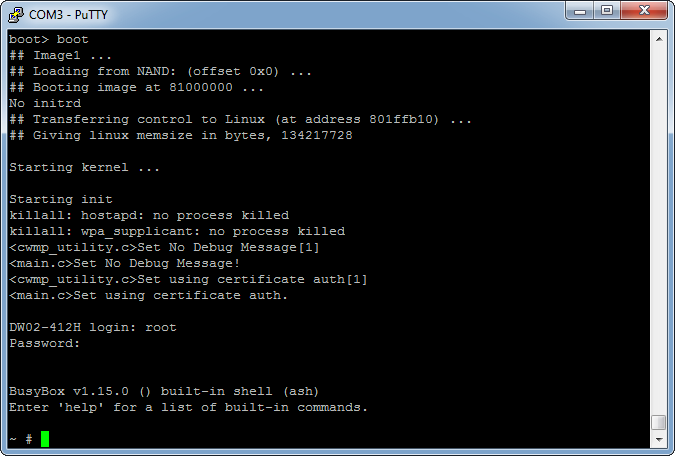
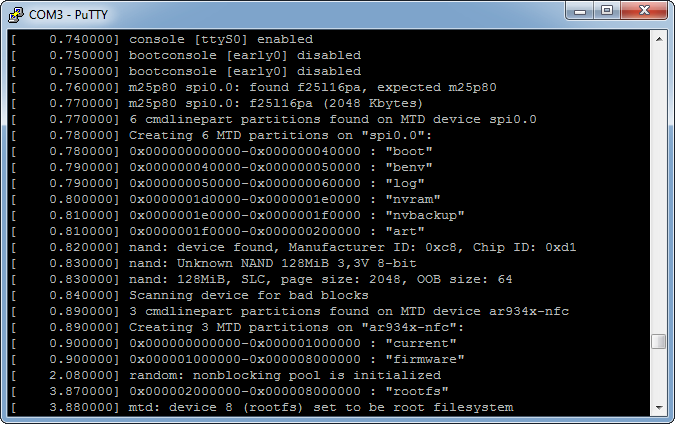
이제 부트로더와 콘솔에 접근할 수 있습니다.
uboot를 사용하고 Atheros 사의 ap135 SoC 기반인 것을 알 수 있습니다.
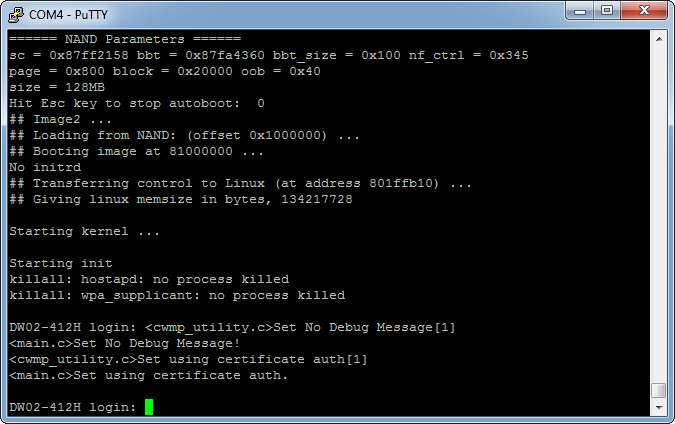
부팅이 완료되니 콘솔로 로그인이 가능하네요. 하지만 알려진 비밀번호를 다 대입해봐도 로그인이 되지는 않습니다.
우선 다른 작업에 들어가기 전에 펌웨어를 덤프합니다.
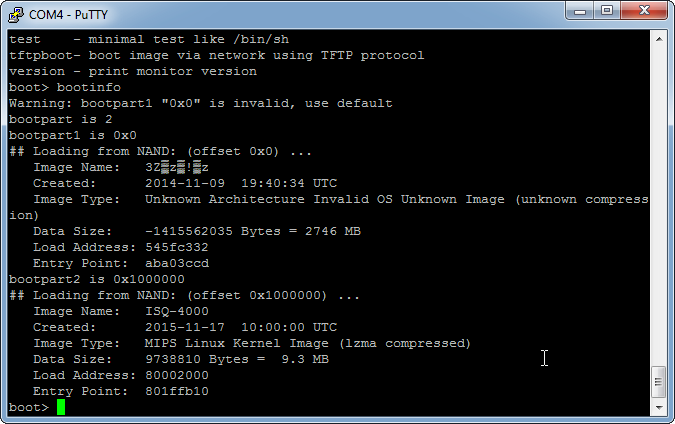
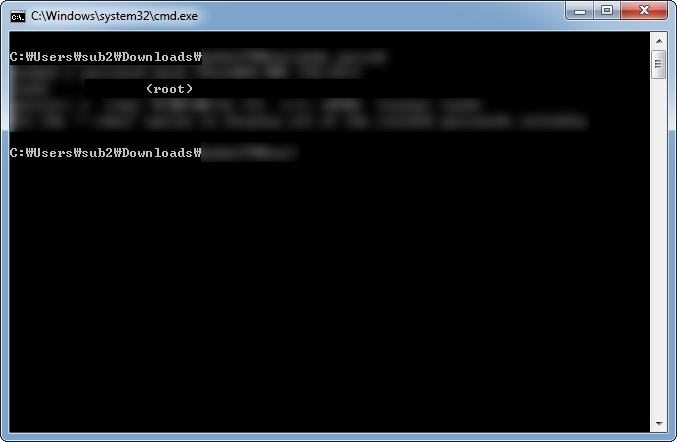
일단 bootinfo 명령어가 있으니 시스템 이미지의 정보는 알 수 있습니다.
낸드에 저장된 주소, 사이즈까지 다 알려주니 작업하기 좋네요
그런데 nand의 정보를 컴퓨터로 마땅히 가져올 방법이 없네요. 부트로더가 tftp 업로드를 지원하지 않습니다.
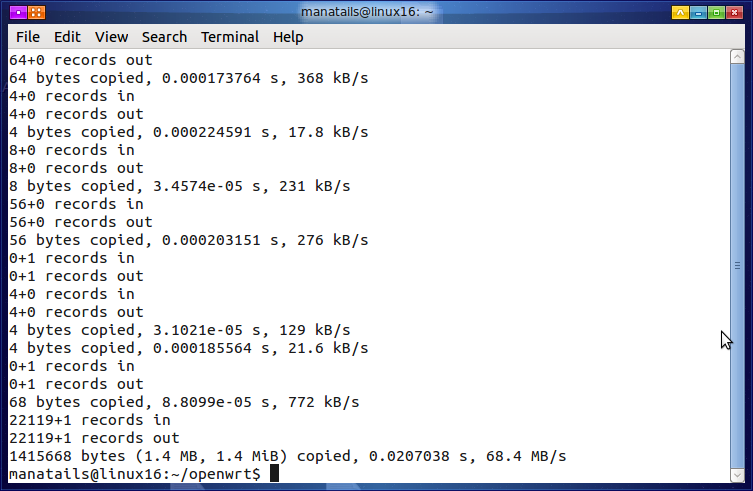
어쩔수없이 nand의 정보를 터미널에 출력한 다음 수동으로 헥사 파일로 변환해야겠습니다.
리눅스를 사용할 때가 왔군요.
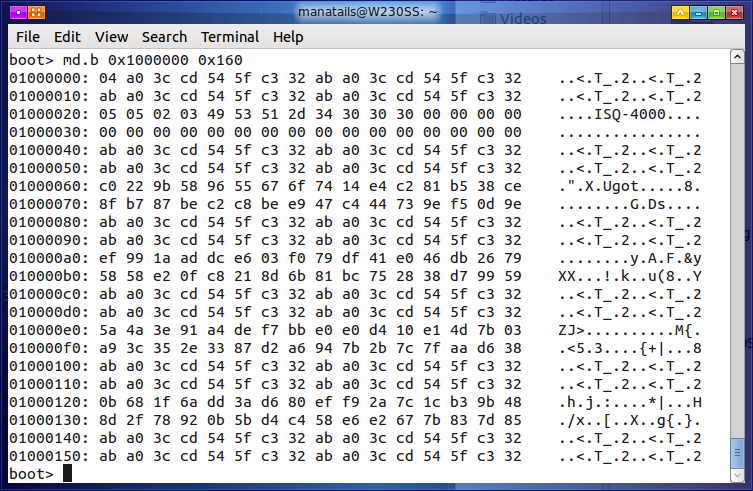
다행히 md 명령어가 있어 시리얼 콘솔로 낸드의 내용을 출력할 수가 있습니다.
이를 저장한다음 파이썬 스크립트를 사용하여 바이너리로 바꾸어 줍니다.
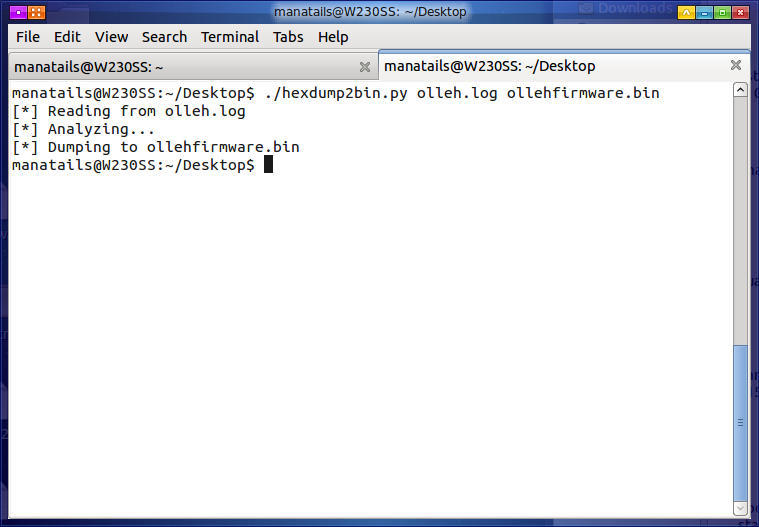
이렇게 펌웨어 덤프가 완료되었습니다. 이제 공유기가 벽돌되기라도 하면 이 덤프 파일을 사용해서 원 상태로 복구하는것이 가능합니다.
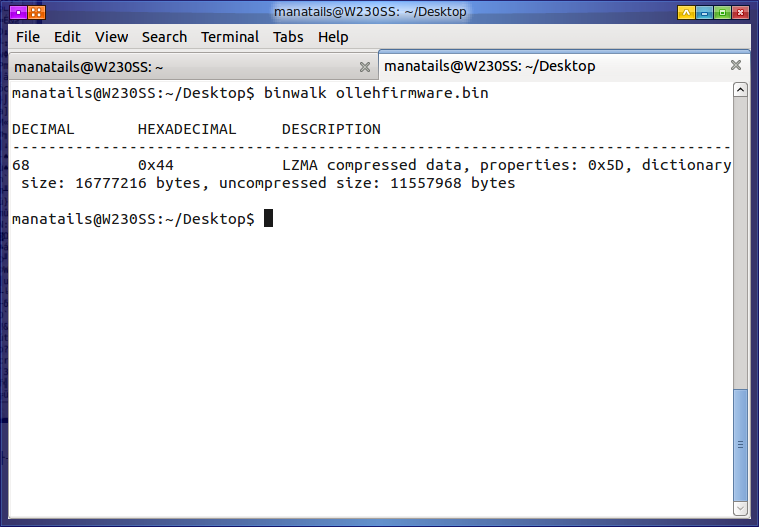
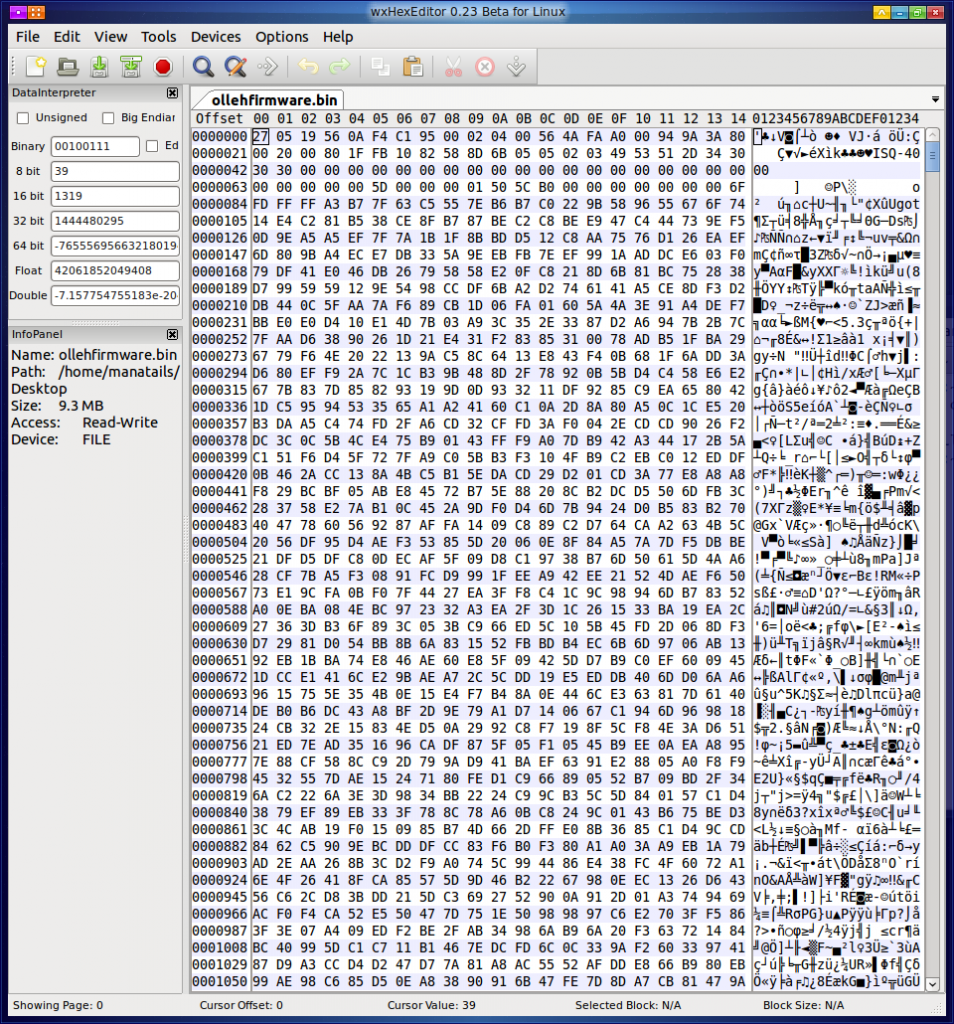
binwalk 로 lzma 압축된 시스템 파일을 확인합니다.
0x44 까지는 헤더부분인것 같네요
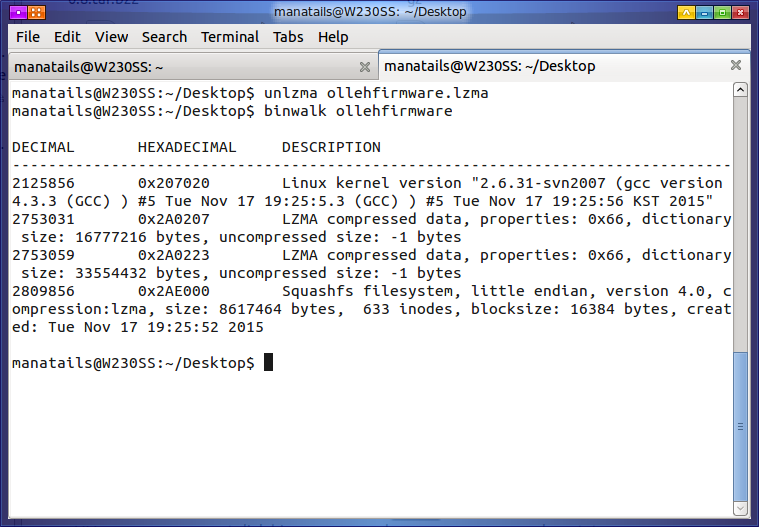
헤더부분을 제거하고 LZMA 압축을 푼 후에 다시 바이너리를 확인합니다.
커널과 루트 파일시스템이 보이기 시작하네요
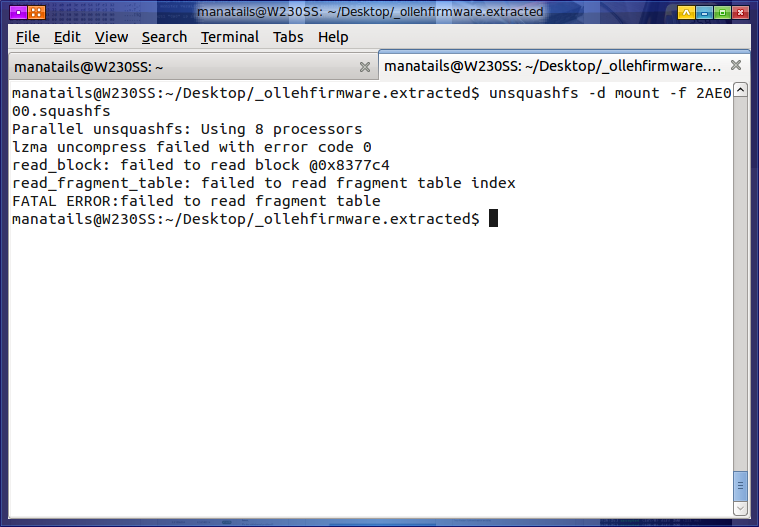
Unsquashfs를 사용하여 파일시스템을 봅니다…만 파일을 읽을수가 없다네요?
아마 비표준 squashfs를 사용하는 듯 합니다.
그래도 다행히 이런 임베디드 제조사들이 쓰는 비표준 squashfs 규격을 모아놓은 sasquatch가 있습니다.
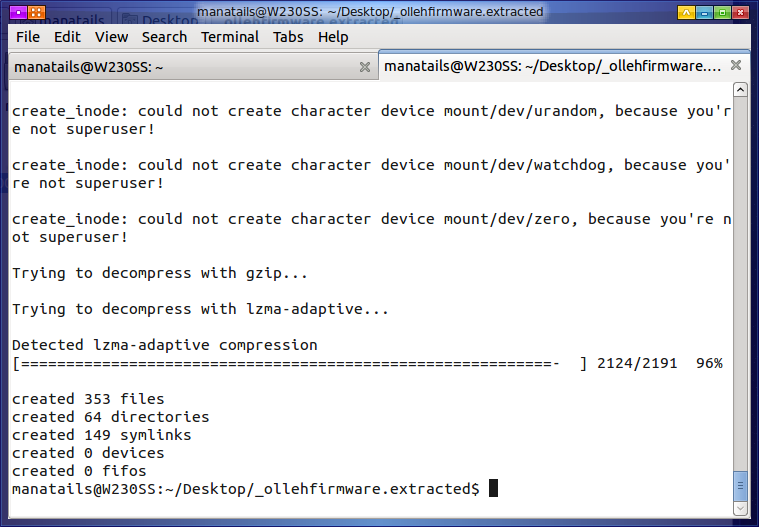
이제 파일시스템의 내용도 다 볼 수 있습니다.
하지만 여기에 시스템의 암호는 없네요. 메모리 어딘가에 감추어져 있는 모양입니다.
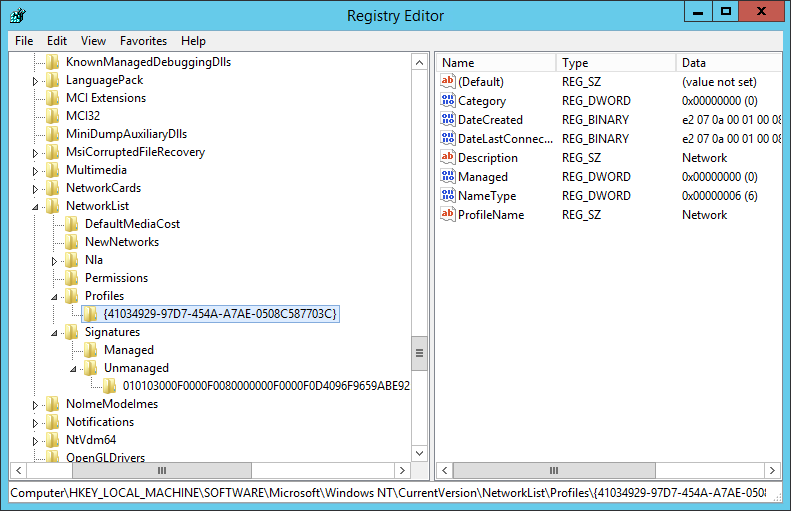
공유기를 싱글유저 모드로 부팅해봅시다.
먼저 부팅 이미지를 메모리에 로드 한 뒤 setenv로 커널 파라미터를 수정하고 부팅하면 됩니다.
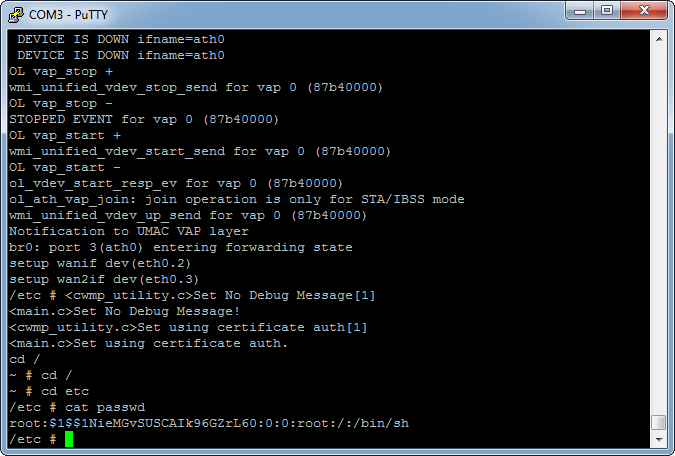
rc를 진행하여 시스템을 마저 준비시키면 passwd 파일을 열 수 있습니다.
섀도 형식으로 되어있네요
섀도 파일의 형식은 $Hashid $Salt $Hash value 로 되어있는데
위 파일의 해쉬 형식은 다음 표와 같군요
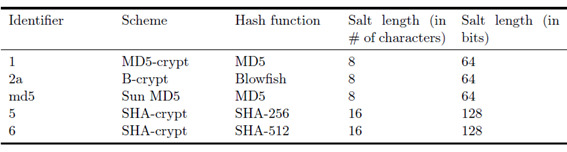
MD5-crypt 를 사용하여 솔트 없이 암호화되었으므로 어렵지 않게 비밀번호를 알아낼 수 있습니다.
올레 공유기의 관리자 비밀번호는 ********였습니다. (KT측 요청으로 마스킹 처리 합니다.)
올레 개발자가 이 글을 보고 있다면 화들짝 놀라면서 보안 업데이트를 준비하겠죠
관리자 로그인 성공!
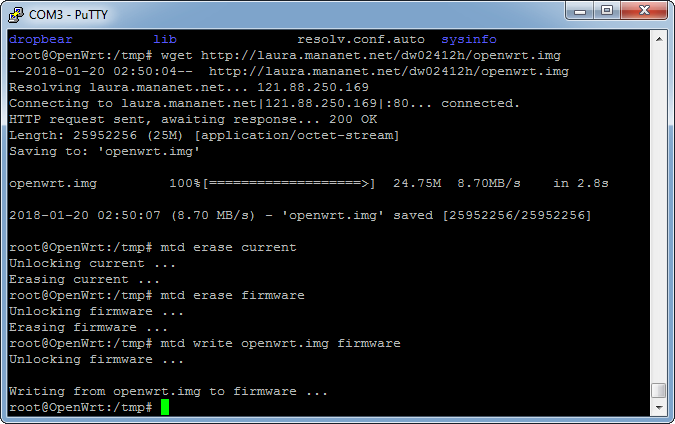
슬슬 여기에 설치할 새로운 펌웨어를 준비해 볼 시간입니다.
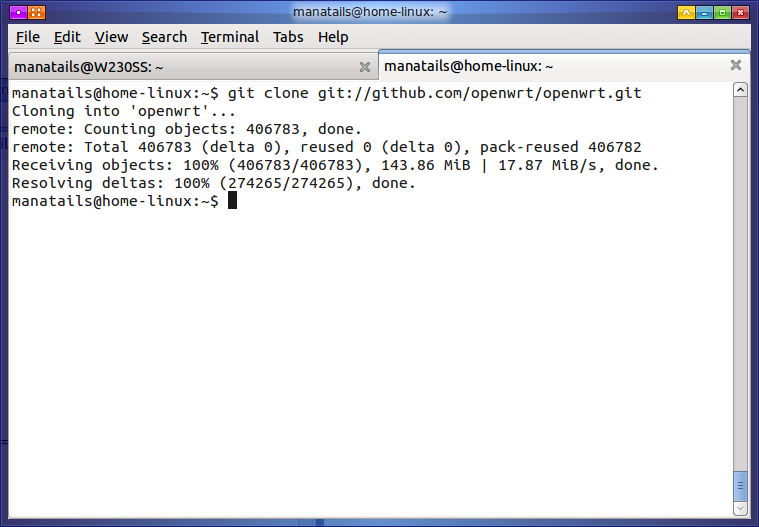
OpenWRT는 공유기 등에 설치를 위한 리눅스 배포판의 일종입니다.
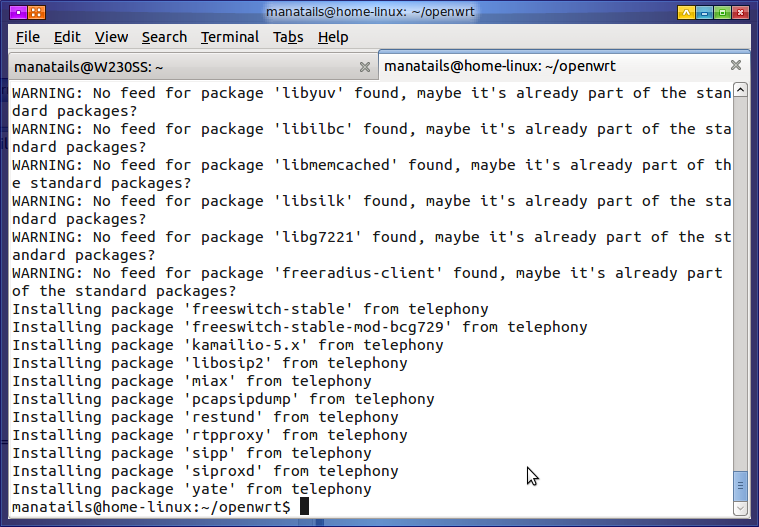
필요한 모듈들도 다 준비하고
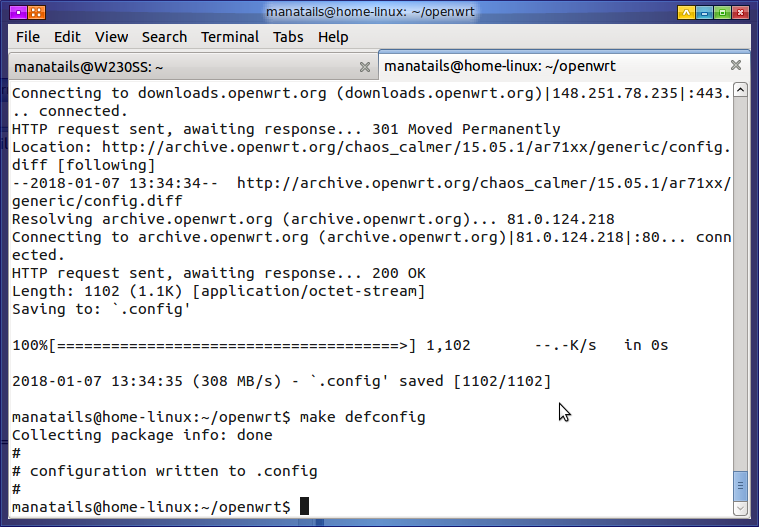
배포판에서 기본 설정을 가져옵니다.
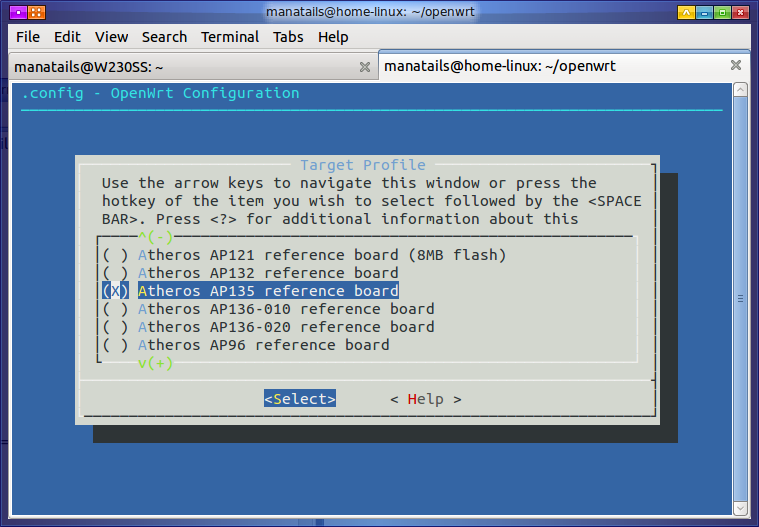
보드 설정을 들어갑니다.
이 공유기의 기반이 되는 AP135 레퍼런스 보드를 위한 프리셋이 있긴 하네요
선택해줍니다.
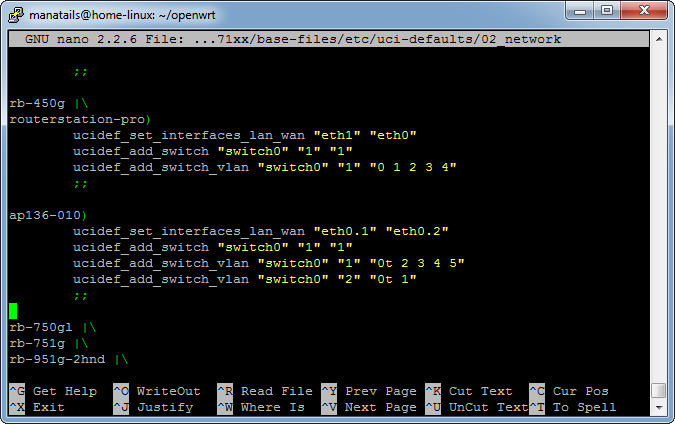
이후에 알아낸 일이긴 하지만 AP136-010에 내장 스위치 관련 커널 설정이 들어가있어서 그걸 사용하는게 더 지름길입니다…
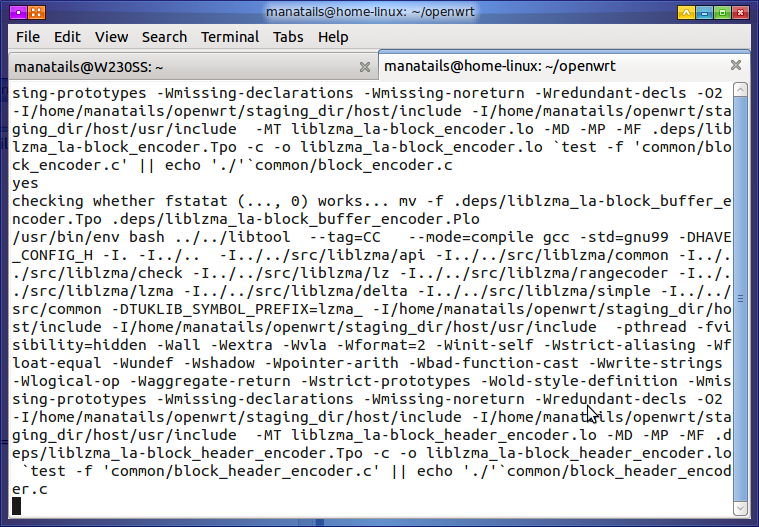
이것저것 컴파일을 거쳐
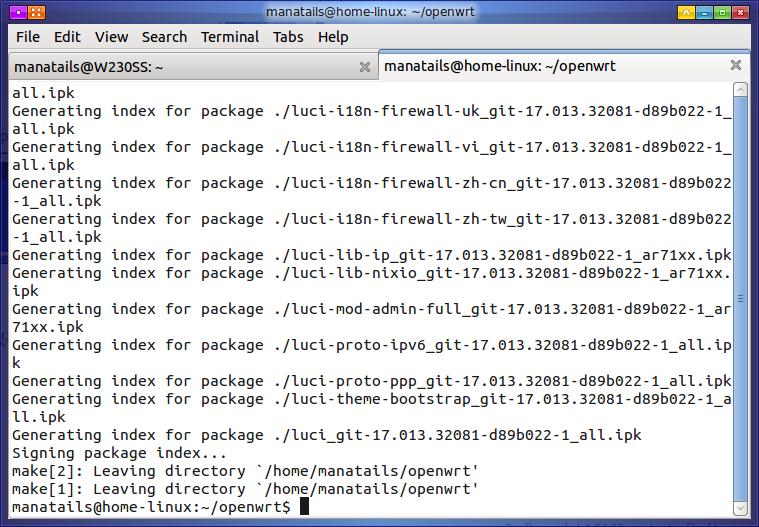
드디어 완료되었군요
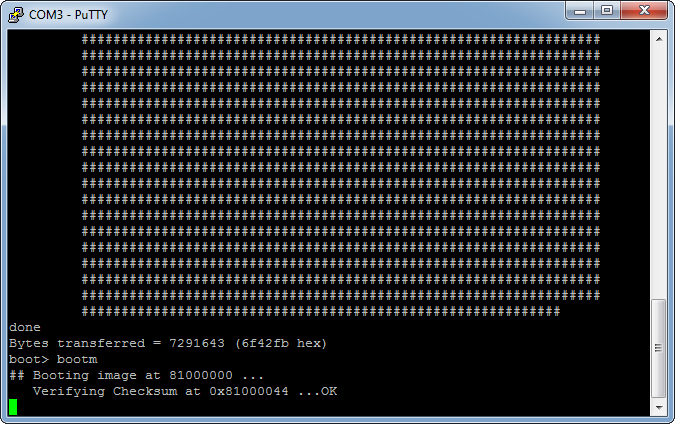
부트로더의 tftpboot을 이용해서 새로운 펌웨어를 올려 봅시다.
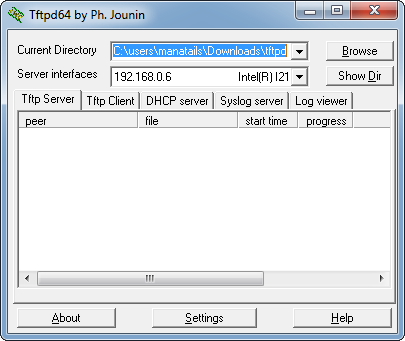
부트로더에서 tftp 접속 주소를 알 수 있으 니 부트로더의 환경변수를 보고 그에 맞게 서버를 열면 됩니다.
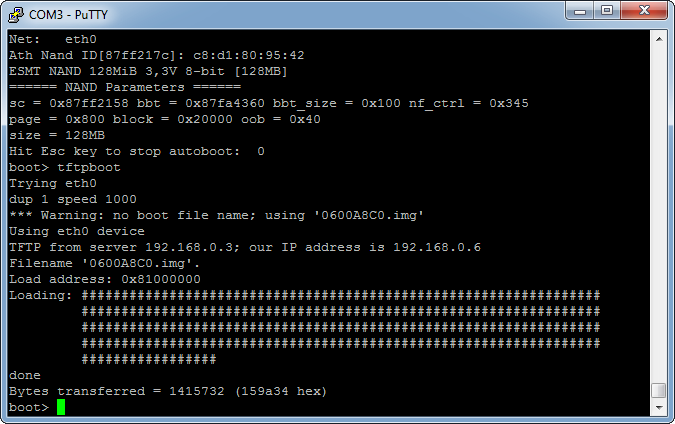
그리고 tftp로 펌웨어를 메모리에 올리고 부팅을 시도했는데 체크섬 문제로 실패했네요
그러고보니 올레 펌웨어의 데이터 부분이 0x44부터 시작했었죠.
원래 uboot의 헤더 크기는 0x40일텐데…?
uboot의 소스코드를 확인해 보았습니다.
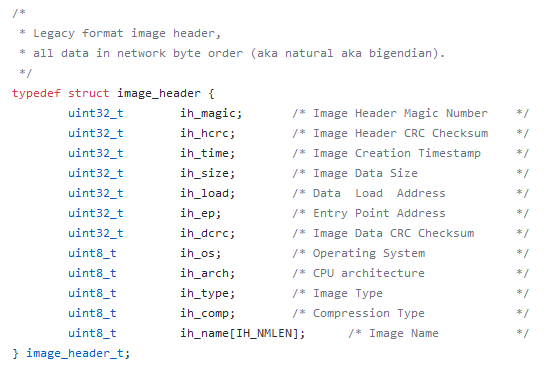
펌웨어 파일의 형식도 확인합니다.
![2018-01-08 20_49_11-HxD - [C__Users_sub2_Downloads_tftpd_0600A8C0.img]](http://manatails.net/blog/wp-content/uploads/2018/01/2018-01-08-20_49_11-HxD-C__Users_sub2_Downloads_tftpd_0600A8C0.img_.png)
그림으로 대충 이렇게 나타낼 수 있겠네요
그리고 올레 펌웨어의 헤더부분을 봅시다.
![2018-01-08 20_48_28-HxD - [C__Users_sub2_Downloads_tftpd_ollehfirmware.bin]](http://manatails.net/blog/wp-content/uploads/2018/01/2018-01-08-20_48_28-HxD-C__Users_sub2_Downloads_tftpd_ollehfirmware.bin_.png)
중간에 00 02 04 00 이란 이상한 값이 헤더에 포함되어있네요. 중요한 값 같지는 않고 매직넘버의 연장같네요.
그래서 원래 헤더를 추출하여 해당 값을 더한 후 다시 다시 CRC를 계산하여 새로운 헤더를 만들어주는 스크립트를 만들어 보았습니다.
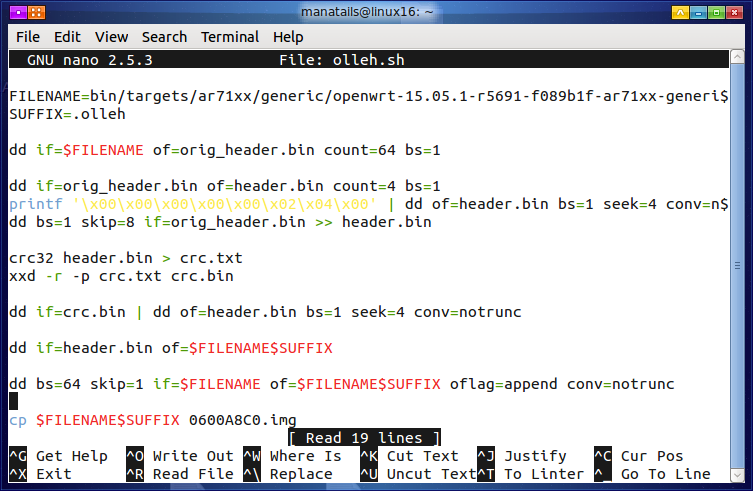
대충 쉘스크립트를 짜고
파일에 헤더를 새로쓰는 처리를 하고
커널로 부팅하는데 성공했습니다.
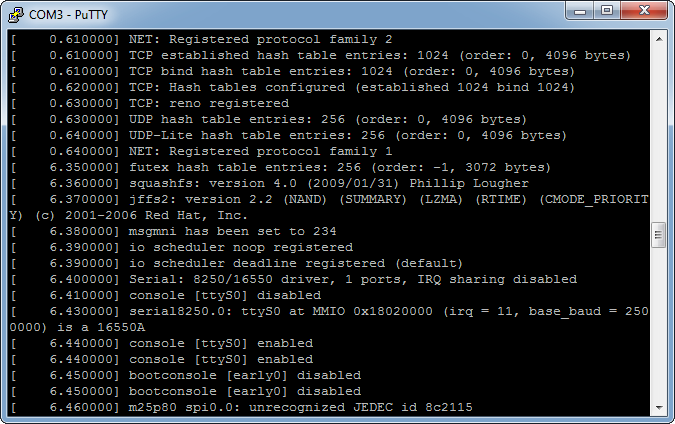
하지만 이내 불만을 토로하는군요.
SPI로 작동하는 NOR 플래쉬 메모리를 인식하지 못합니다.
기판을 들여다봅시다.
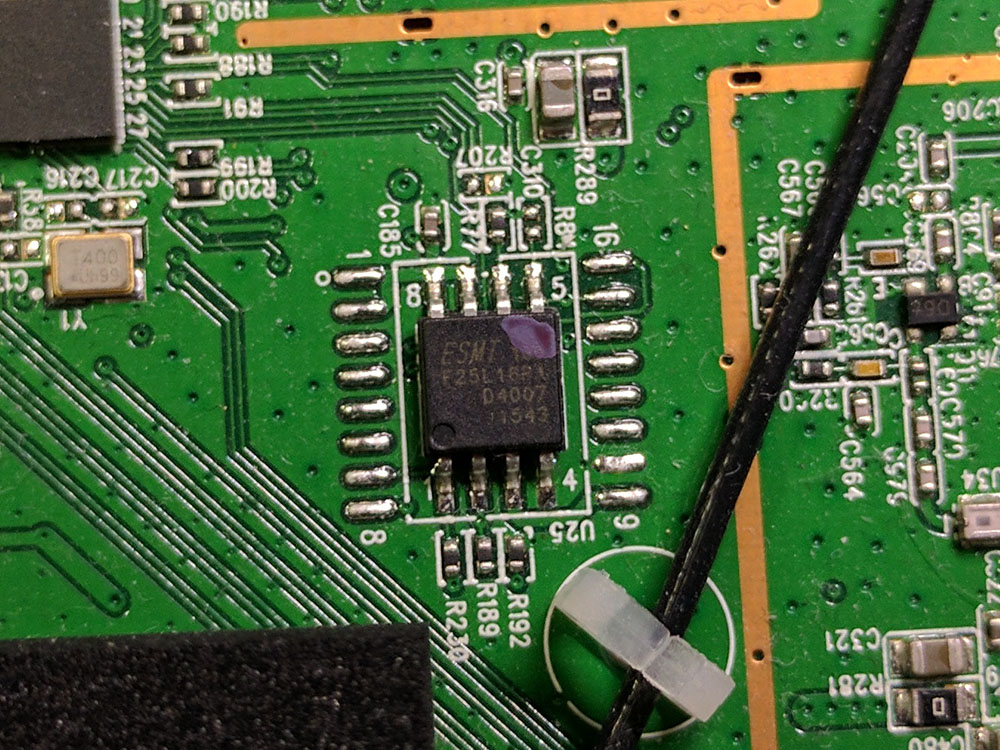
ESMT 사의 F25L16PA라는 메모리를 사용중이네요
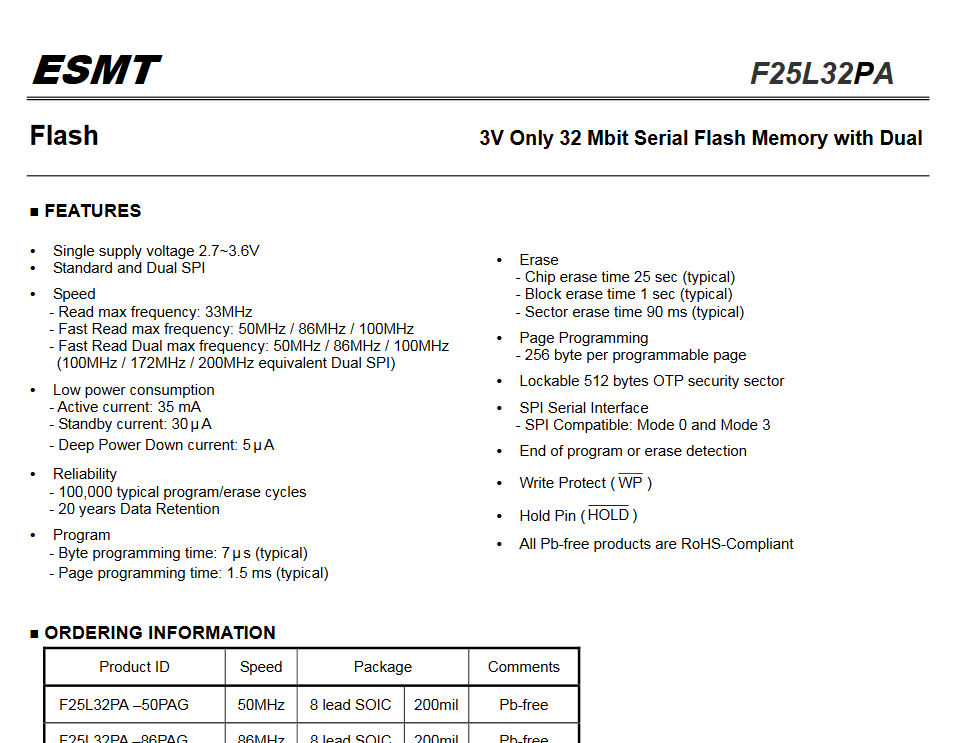
데이터시트를 참조하여
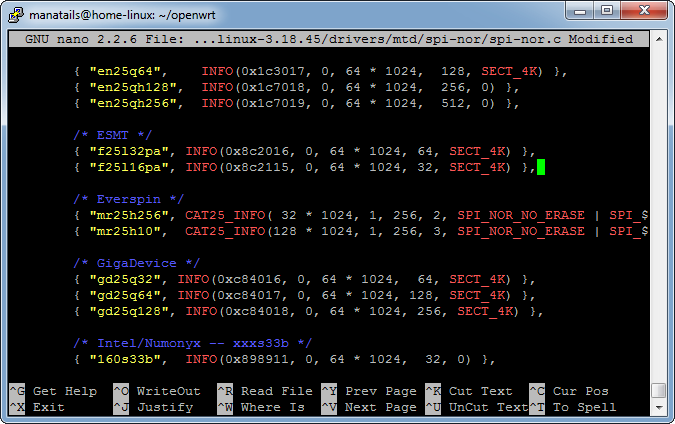
커널 NOR 플래쉬 드라이버에 해당 칩셋이 인식될수 있게 칩ID, 섹터크기와 정보를 입력해줍니다.
무선 관련 설정 등이 저장되는 ART영역이 NOR플래쉬에 탑재되어있기 때문에 해당 작업이 필요합니다.
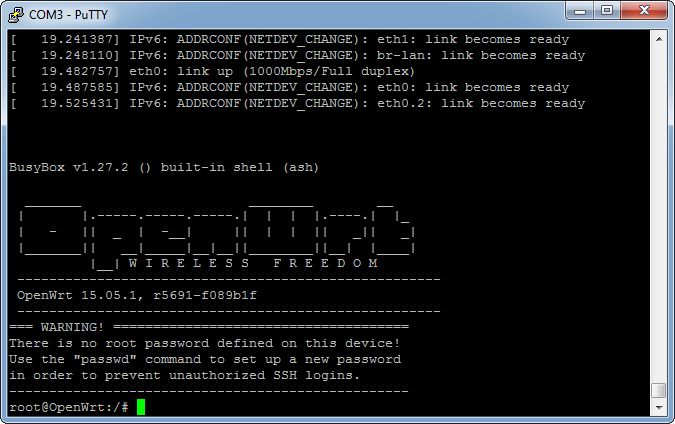
우선 부팅에 성공했습니다. 지금은 initramfs 이미지를 사용하였기 때문에 NAND 플래쉬는 사용하지 않습니다.
NAND도 일단 ECC오류를 발생하는 것을 보아 커널 수정이 필요해 보입니다.
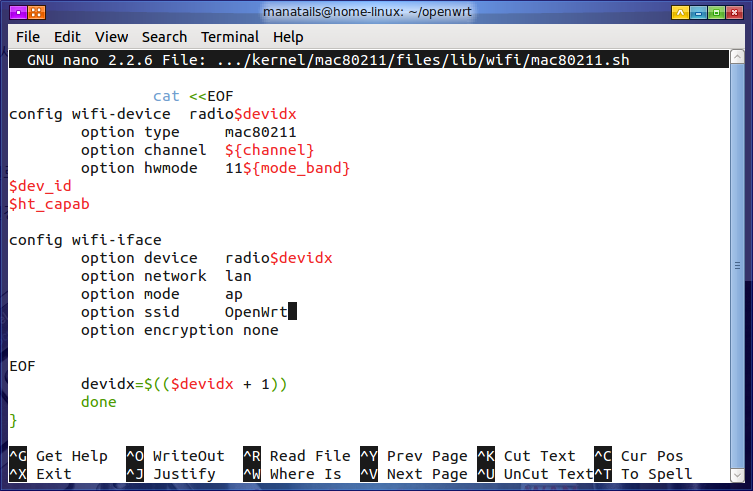
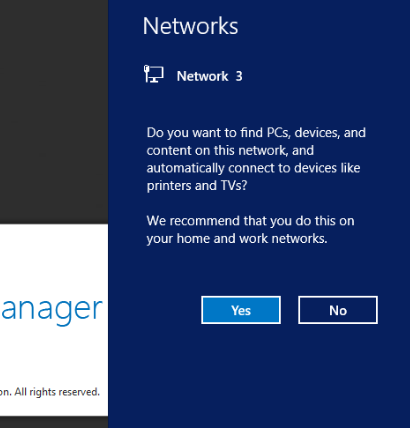
우선 이미지에서 기본 무선 설정을 활성화시킵니다.
일단 무선 연결로 설정창은 잘 뜨나 유선 연결이 되지 않네요.
아마 스위치 설정이 잘못된것 같습니다.
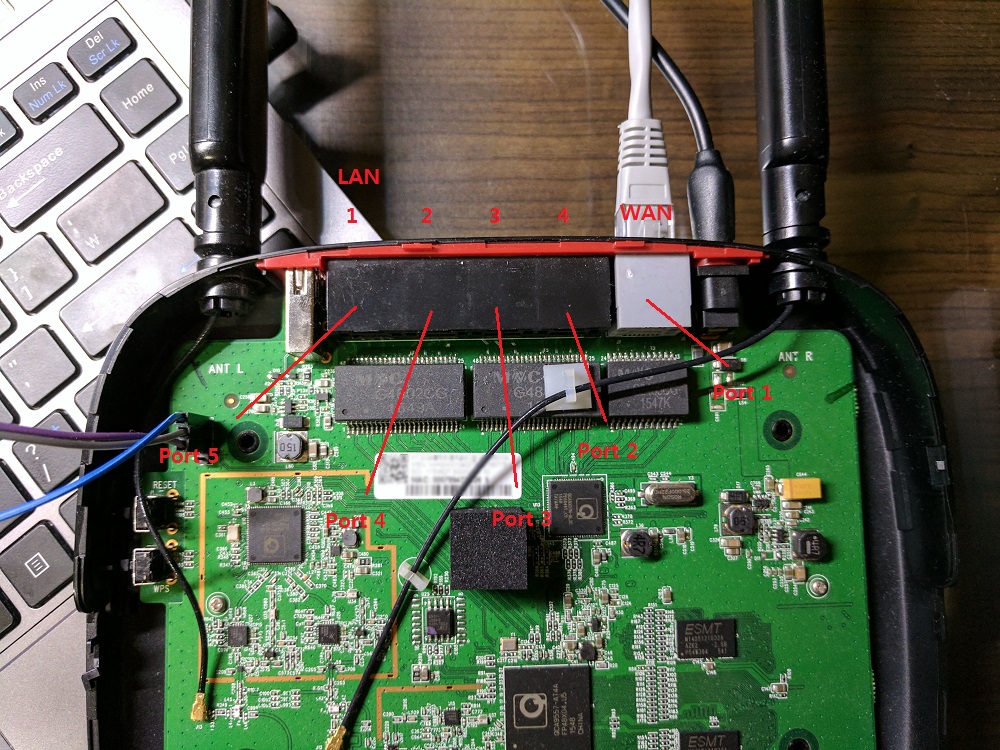
스위치 칩셋은 QCA8337(AR8337)칩셋을 사용중이며 위 사진과 같이 포트가 구성되어 있습니다.
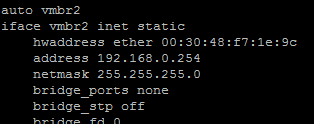
저는 VLAN tagging을 사용하여 LAN과 WAN 포트를 분리했습니다.
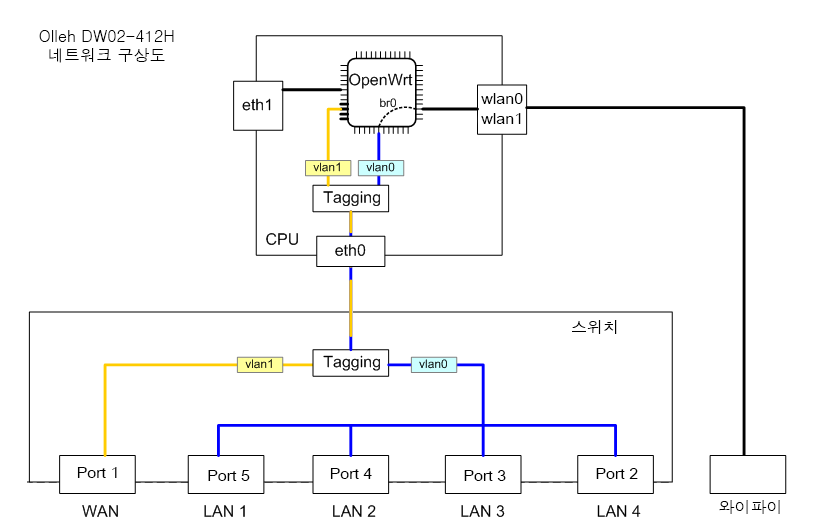
그림으로 나타내면 이쯤 되겠네요.
스위치에서 tagging을 이용하여 WAN 과 LAN 포트를 CPU 포트에 연결합니다.
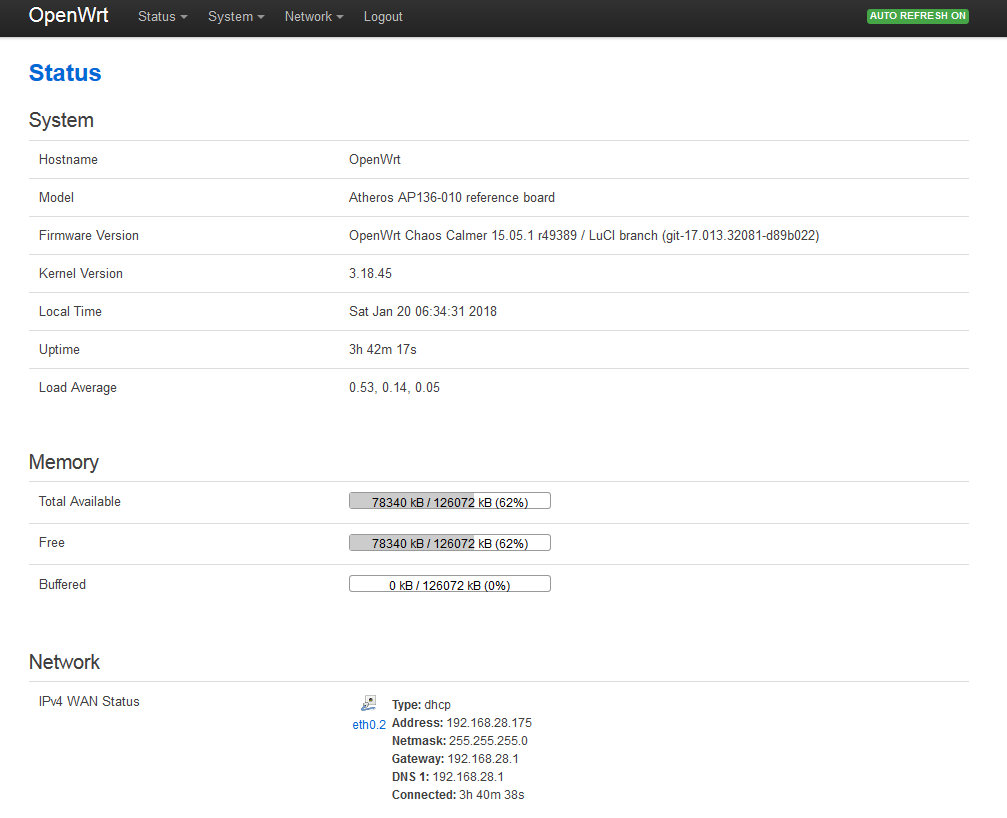
WAN은 eth0.2 LAN은 eth0.1으로 사용하게 됩니다.
위에서 구상한대로 새로 스위치 설정 스크립트를 맞춰줍니다.
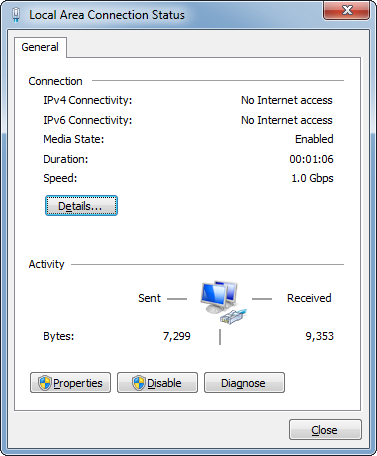
유선 인터넷 연결도 성공하였습니다.
이제 다 된건가 생각했었는데… 생각해보니 와이파이가 2.4G만 잡히고 5G가 안잡히네요

커널 로그를 보니 5Ghz 칩셋 드라이버인 ath10k_pci가 오류를 내고 있었습니다.
캘리브레이션 정보를 불러오기 실패했네요.
시작에서 잠시 언급했었지만, NOR 플래쉬에 저장되는 정보 중 하나가 이 5Ghz 칩셋의 캘리브레이션 데이터입니다.

NOR 플래쉬의 ART 영역에서 데이터를 추출해서 적용해주는 코드를 추가해줍니다.
이제 대충 모든 기능은 다 활성화되었고, 배포 가능한 펌웨어를 만들기 위해서 NAND를 활성화시켜 봅시다.
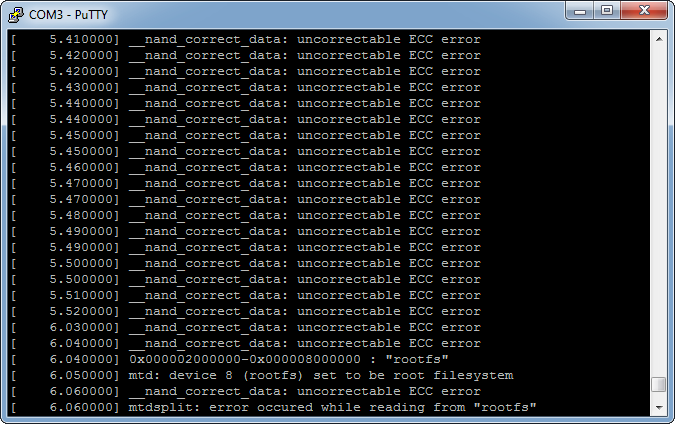
순정상태에서는 ECC오류때문에 NAND읽기가 불가능합니다.
사실 이부분이 시간을 가장 많이 썼던 부분이긴 한데, 실패한 시도를 다 생략하니 결국은 몇 줄의 글로 요약되는게 슬프군요.
관련 메일링 리스트 정독하고 다른 공유기 소스참조 등 별 시도를 다 했지만 소용이 없었고…
커널의 NAND 드라이버가 자동으로 ECC를 활성화 해 주지 않던게 문제였습니다.
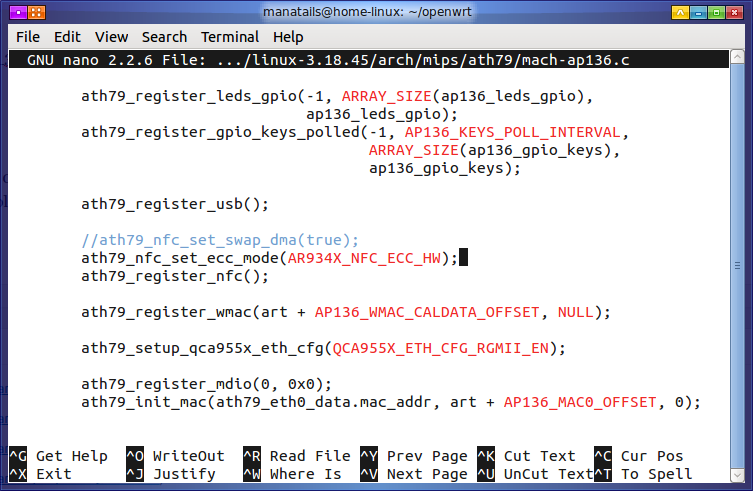
커널 수정으로 해결하였습니다.
자 이제 실제로 설치가 가능한 이미지를 만들기 위해 플래쉬 영역에 대한 구상을 해 봅시다.
기존의 플래쉬 사용은 다음과 같습니다.
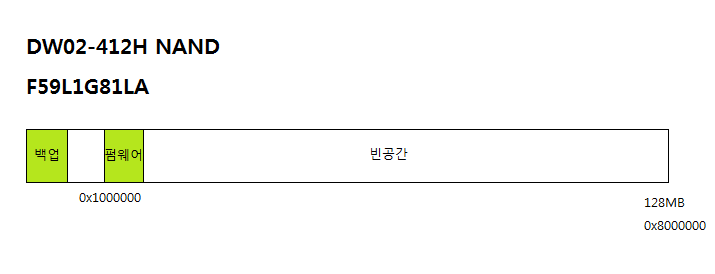
환경설정은 NOR 플래쉬의 200kb 남짓한 공간에 저장되고
128MB의 NAND 플래쉬는 펌웨어와 백업펌웨어가 차지하는 18MB를 제외한 공간이 전부 빈 공간이였습니다.
이럴거면 128메가짜리를 왜 단건지도 잘 모르겠네요.
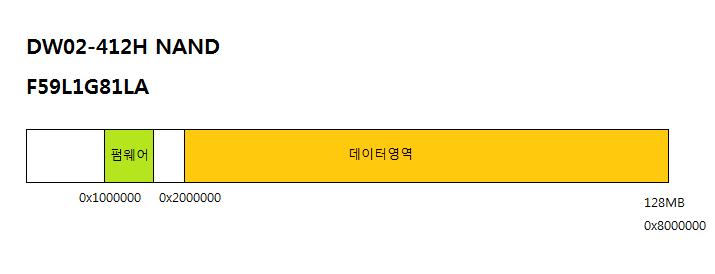
이제 새로운 이미지에서는 뒤에 여분의 공간을 하드디스크처럼 활용하여 프로그램을 설치할 수 있도록 하였습니다.
데이터영역의 포맷은 보통 NAND에서 많이 쓰는 squashfs+jffs2로 할려했으나 그렇게 할 시 96MB에서는 오버레이 마운트 시간이 오래걸려 단일 jffs2만 사용하기로 하였습니다.
이제 깔끔하게 마운트가 되고 구성이 완료되었습니다.
설정이나 설치한 프로그램 등은 전부 NAND에 저장되게 됩니다.
설정 인터페이스
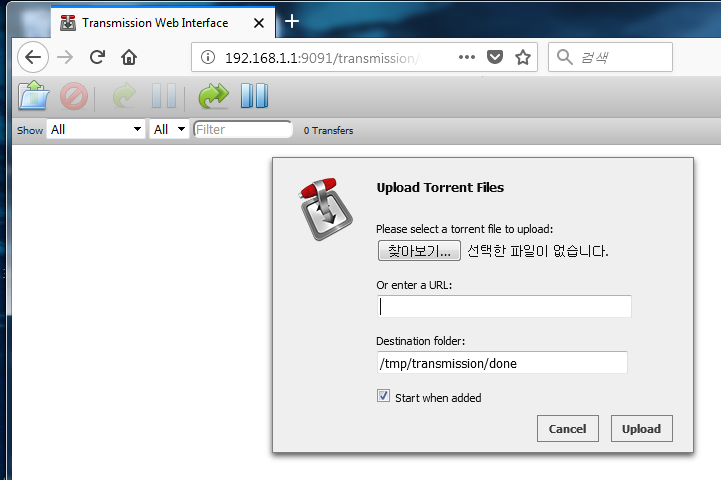
토렌트 서버
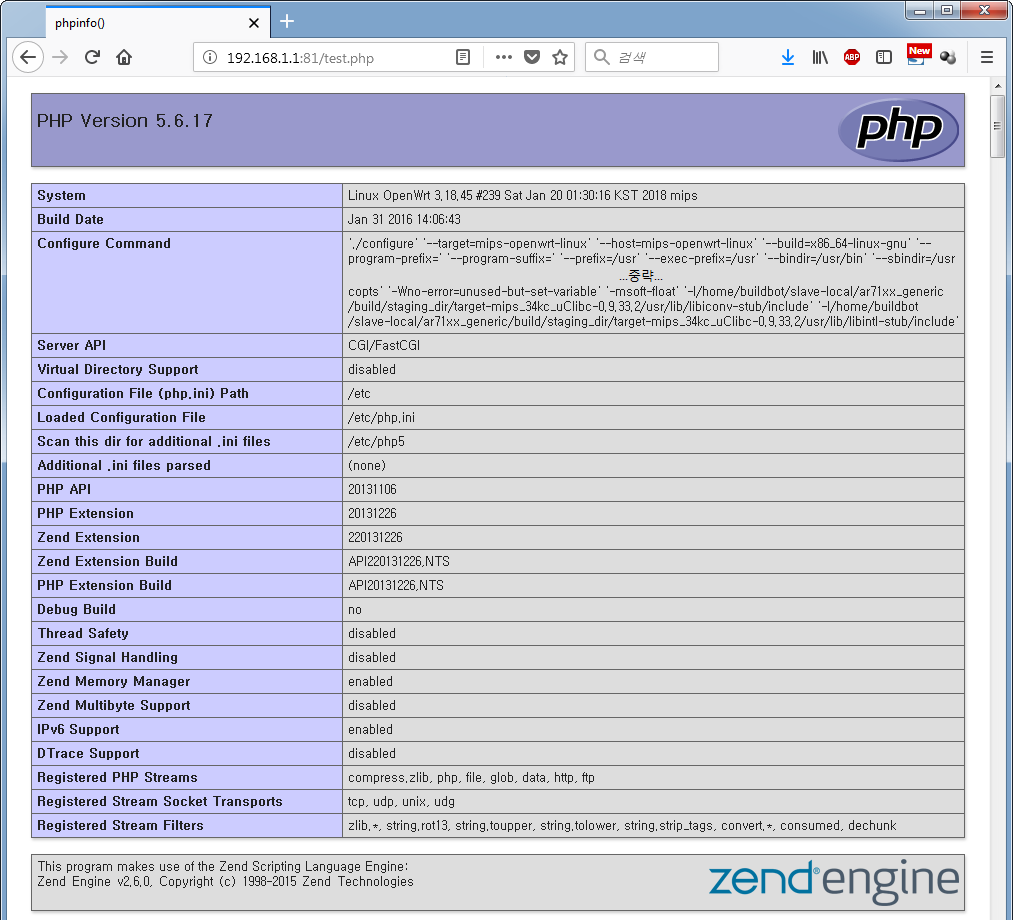
PHP가 적용된 웹서버
이제 올레 공유기는 라즈베리 파이와 같은 사실상 작은 리눅스 컴퓨터라고 보시면 됩니다.
opkg를 이용해 원하는 프로그램을 설치할 수 있고 위의 사진과 같이 웹서버, FTP서버 혹은 토렌트 서버 등 활용성이 무궁무진합니다.
별볼일없던 공유기가 작은 서버가 된 것입니다.
iptime과 같은 국내 공유기들은 개발진들의 부재로 이런 커스텀 펌웨어가 거의 없는데, 앞으로 국내산 공유기에도 이런 개발들이 활발히 이루어지길 희망합니다.
장단점이 있긴 하지만 고사양 공유기들이 순정 펌웨어만으로 살아가는것은 자원의 낭비라고 생각합니다.
혹시 동일 모델의 올레 공유기를 가지고 있으신 분들을 위해서, 블로그에 커펌 적용법을 올려 놓겠습니다.
매너티는 최고 존엄입니다.


__Amazon.in__Electronics.png)