All posts by manatails

Radeon Pro WX 4100 Review

Last month I bought Radeon Pro WX 4100 graphics card.

Not that I needed a gpu for professional tasks, but it seemed to be the best low profile single slot graphics card available at the moment.

I could not find any kind of reviews about this peculiar graphics card, so I am posting some pictures and benchmarks here.

IMG_3702

This is the box, quite fancy.

IMG_3706

IMG_3707

In the box are the actual card and 4 of miniDP to DP converters.

IMG_3708

A page from the manual

IMG_3712

This must be the fanciest low profile card ever created.

IMG_3719

Installed the card in my microserver. The following are some benchmarks that I have run.

This is the test computer : Xeon E3-1265L V2, Radeon WX4100 on Windows Server 2016 under VMware ESXi with 8GB RAM
And my desktop for comparison : i7-6700T, GTX1080 on Windows 7 on Windows 7 with 32GB RAM.

…doesn’t look like a good comparison but still it is enough to show the strong aspects of Radeon Pro anyway.

The first table is the result of GTX1080 and the second is of WX 4100

creo

Creo_shadedEdges

Creo_085_planeHidden

On creo Radeon WX struggled with tasks involving shaders because of the GTX1080’s general rendering power.
But on wireframe views Radeon WX beat GTX1080 by far.

snx

NX8_suvAdvancedStudio

On Siemens NX the gaming graphics card was no match for a professional graphics card. WX 4100 outperformed GTX1080 by multiple times of framerate.

sw

SW2012_rallyCar_ShadedEdges

On Solidworks similar to Creo using only the shaders favored GTX1080 but anytime when wireframe is involved WX4100 kept stable framerate but GTX1080 was hampered.

So this is about it for this review and please leave a comment should there be any questions. But please do remember the golden rule that you must NOT buy a professional card in any case if you are thinking of playing games.

Installing OpenWRT Build Environment

Here are the procedures and required packages for installing an OpenWRT build environment on Ubuntu.

Consult the OpenWRT Wiki first then issue the commands.


sudo apt-get install git openssl libssl-dev unzip build-essential binutils flex bison autoconf gettext texinfo sharutils subversion libncurses5-dev ncurses-term zlib1g-dev gawk python

git clone git://git.openwrt.org/15.05/openwrt.git

NEW: git clone https://github.com/openwrt/openwrt

./scripts/feeds update -a

./scripts/feeds install -a

wget -O .config https://downloads.openwrt.org/chaos_calmer/15.05.1/ar71xx/generic/config.diff

make defconfig

make menuconfig

make prereq

and we have 2 ways to reduce the build time:

sed --in-place=.bak -e 's/=m$/=n/g' .config

to disable all optional modules in the beginning

or


make -j4 V=s IGNORE_ERRORS=m

to ignore all broken packages while building.

Deleting Unnecessary Network profiles in Windows

Windows creates a profile for every single network it connects to. The function itself is not a bad idea but over time or when there is a network problem those network profiles may build up excessively and present you with some unpleasant name like ‘Network 139’. I surfed the internet in search for a way to remove all those, tumbled on numerous but useless responses by Microsoft support agents  suggesting to Open network and sharing center and Blah Blah. But now finally I have a proper fix.

I’ll keep it short:

HKEY_LOCAL_MACHINE\SOFTWARE\Microsoft\Windows NT\CurrentVersion\NetworkList\Profiles

Simply erase the above key with Regedit.

Basic Squid SSLBump configuration

To use SSLBump with Squid you need to rebuild Squid with SSL flags enabled as the default debian package does not contain them.

$ sudo apt-get install devscripts build-essential fakeroot libssl-dev

And uncomment the deb-src from main repository as we need to download the source. After that download the squid3 source package and edit the rules file:

$ cd ~
$ apt-get update
$ apt-get source squid3
$ sudo apt-get build-dep squid3

$cd squid3-3.5.12
$sudo nano debian/rules

add to DEB_CONFIGURE_EXTRA_FLAGS

–with-openssl \
–enable-ssl-crtd \

dpkg-buildpackage -rfakeroot -b

dpkg -i *.deb

Squid is now installed, next step is to generate the required self signed certificates:

openssl req -new -newkey rsa:2048 -sha256 -days 365 -nodes -x509 -extensions v3_ca -keyout myCA.pem  -out myCA.pem

openssl x509 -in myCA.pem -outform DER -out myCA.der

Deploy the generated der file to client browers/devices

But upon starting the Squid service, it died stating that the ssl db directory was not initialized so I used the ssl_crtd from the build directory to initialize it.

sudo /home/manatails/squid/squid3-3.5.12/src/ssl/ssl_crtd -c -s /var/lib/ssl_db

Following is minimalist config file for running squid with SSLBump, self-explanatory.

acl home_ip src 192.168.28.0/24
http_access allow home_ip
http_port 3128 ssl-bump cert=/etc/squid/ssl_cert/myCA.pem generate-host-certificates=on dynamic_cert_mem_cache_size=4MB

acl step1 at_step SSlBump1

ssl_bump peek step1
ssl_bump bump all

파도타기 피카츄 배포

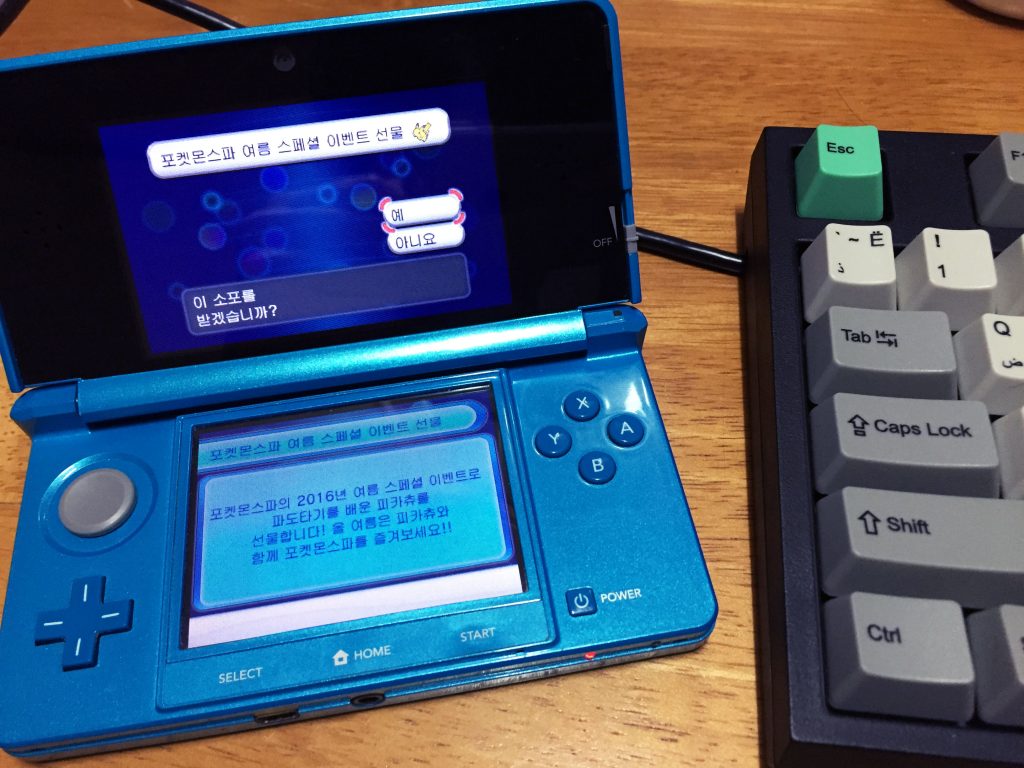
이번에 포켓몬스파에서 파도타기를 배운 피카츄를 배포한다는 광고를 보았습니다.

그런데 멀기도 멀고 가격도 매우 비싸네요.
그냥 만들어야겠습니다.

예전에 뚫어놓았던 npfl 서버의 선물목록을 확인하니 미리 테스트 중이였는지 이미 올라와 있었습니다.

2016-07-01 04_50_32-Mozilla Firefox

뭐 일단 예전에 제가 포켓몬스터 선물 배포서버에 대해 올린 이후로 별다른 소프트웨어 업데이트도 없었기에 예전과 같은 방식으로 배포를 진행하겠지 생각하며 선물 파일을 다운로드 받아 사설 선물서버에 올렸습니다.

IMG_9924

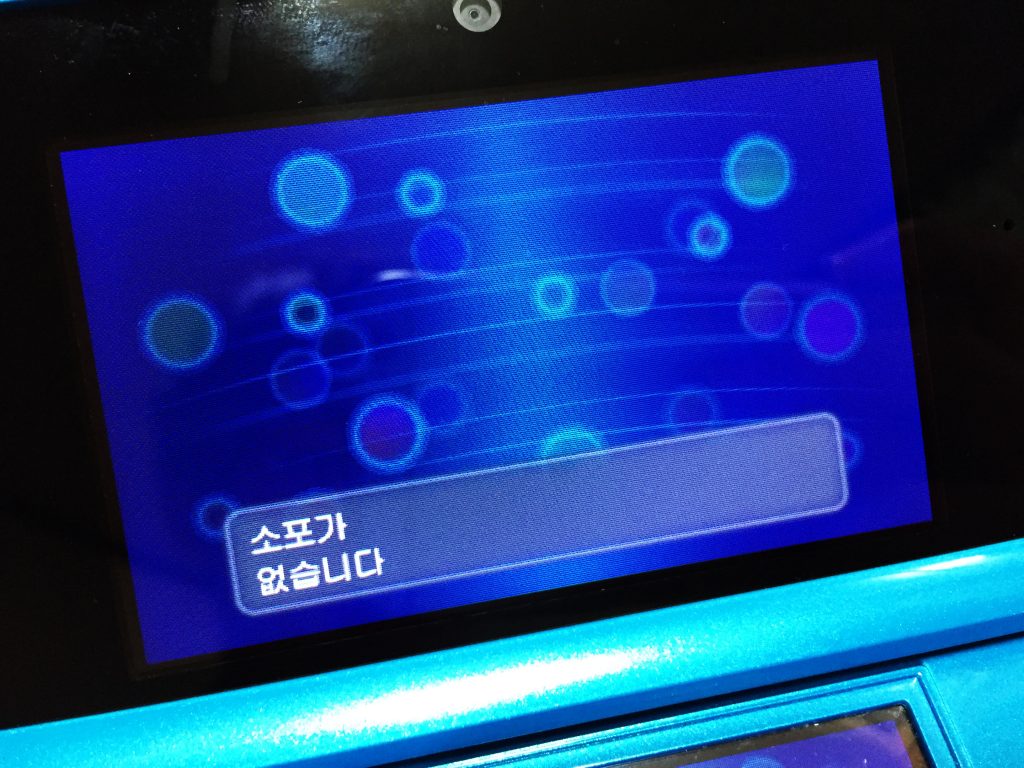
그런데 이상하게도 소포가 없다는 말만 덩그러니 남긴 채 선물을 받는것이 불가능해 지더군요

이것은 제가 처음 작업을 시작할 때에는 전혀 못 보던 현상이였습니다.

그래서 좀 더 알아보기로 했죠.

사실 한참동안 서버와의 프로토콜을 분석한다고 시간을 허비했습니다.

전에 제가 언급했던 서버 말고 npul 등과 같은 많은 서버들이 3ds와 교신하기 때문에 혹시나 그쪽에서 별도의 인증 과정을 거치지는 않나 싶었습니다.

그리고 한가지 파일을 비교하면서 찾아낸 것이

2016-07-01 04_59_56-Binary(fast) Compare - UltraCompare Professional

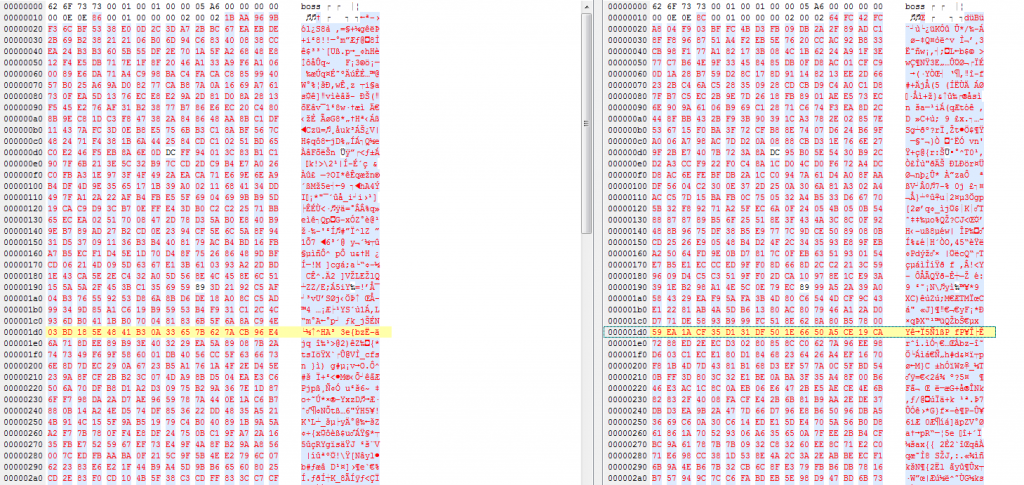
그때 당시에 받은 선물 파일과 지금 다시받은 선물 파일이 다르다는 것이였습니다.

조금 놀랐죠, 단순히 정적일것 같았던 파일이 그때와는 다른 형식을 취하고 있었습니다.

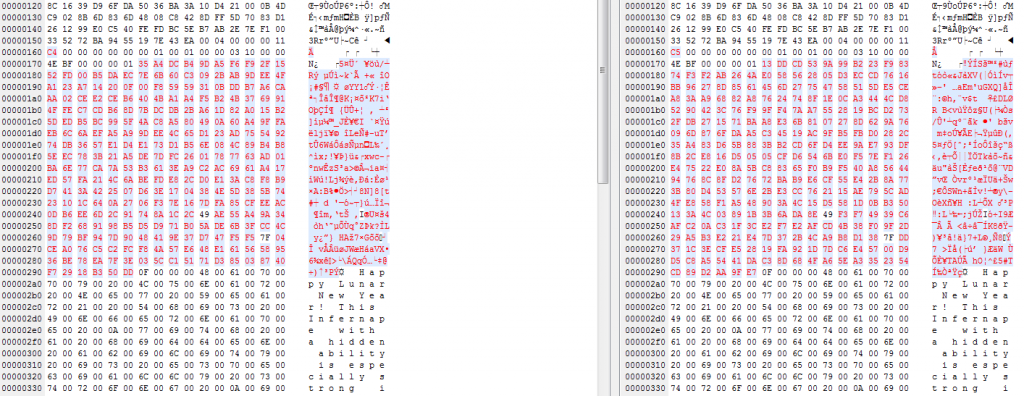
예전과 같이 AES-CTR로 복호화를 해 보았습니다.

2016-07-01 05_02_24-Binary(fast) Compare - UltraCompare Professional

앞의 헤더값이 틀려지면서 뒤에 암호화된 부분이 완전히 달라집니다.

몇 개의 파일을 돌려가며 분석해보니 맨 앞의 비트값에 따라 게임이 인식하여 선물이 비활성화 되는 듯 합니다.
ORAS는 해당 값이 C5이여야 선물을 받을 수 있습니다.

하지만 BOSS형식 파일 내부의 포켓몬 선물 데이터 자체도 닌텐도가 서명을 하기때문에 임의로 내용을 변경하면 게임 자체에서 오류를 내고

어느 단계에서 선물의 활성화 비활성화를 결정할지 생각해 보았습니다.

문득 npdl 서버에서 선물 파일을 다운로드 받을 때 보내는 요청문이 떠올랐습니다.

2016-07-01 05_11_16-C__Windows_system32_cmd.exe

npdl 서버로 요청을 보낼 때는 변형된 http 프로토콜을 사용하는 데 유저에이전트에 상당한 양의 정보를 포함시킵니다.

그래서 여기서 아마 재인증을 시도할 것이라 생각하고 그 값을 실제 3ds에서 나온 값과 동일하게 맞춰서 파일을 다운로드 하는 클라이언트를 만들어 보았습니다.

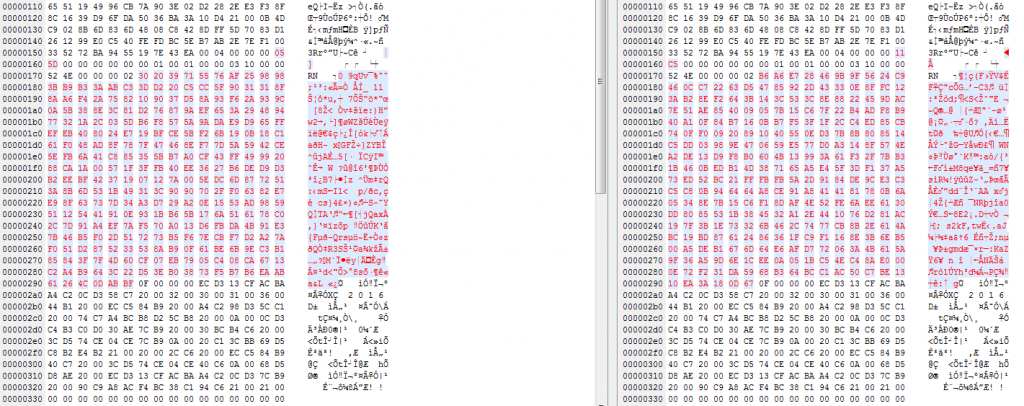
2016-07-01 05_17_32-Binary(fast) Compare - UltraCompare Professional

예측은 정확했습니다.

유저에이전트를 조작해주자 그에 맞춘 선물 파일을 서버가 되돌려 줍니다.

이제는 게임 종류 언어 종류에 따라 해당하는 기기에서만 활성화가 되도록 즉석에서 파일을 조작하여 전달해 주는 듯 합니다.

분명 예전에는 그렇지 않았는데 지금은 이런 식으로 바뀐 것을 보면

닌텐도에서 제 이전글을 보고 나름대로의 조치를 취한 것으로 생각되기도 합니다.

예전에는 단순히 클라이언트 인증서만 확인했기 때문에 ssl 인증이 성공하면 선물파일의 캐쉬를 무한정 생성할 수 있었는데

이제는 게임별 기기별로 파일을 다 가지고 있어야 하니 아마도 그것을 방지하기 위한 것이 아니였나 생각이 듭니다.

IMG_9925

삽질 끝에 이제 선물 받기를 시작합니다.

https://youtu.be/yS5n1_5oI_Y

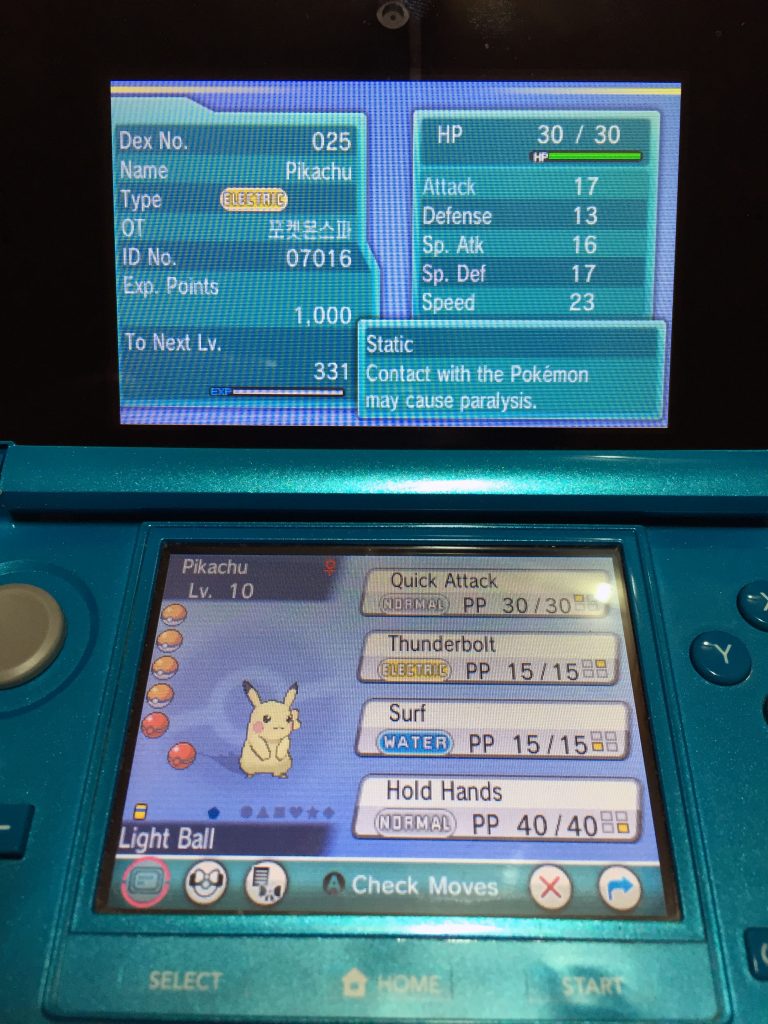
여튼 파도타기를 배운 피카츄를 받는 영상입니다.

중요한 피카츄의 스탯은 이렇습니다.

IMG_9926

pkx 파일은 선물 배포일에 맞추어서 블로그에 따로 업로드 할 예정입니다.

매너티는 최고 존엄입니다.

OpenSSL hacks

Quick command snippets for managing an SSL CA:

Generating a private key:

openssl genrsa -des3 -out www.mananet.net.key 2048

Generating a CRL:

openssl req -new -key www.mananet.net.key -out www.mananet.net.csr -days 3650 -sha256

Signing:

openssl ca -in www.mananet.net.csr -out www.mananet.net.pem -config /root/ca/config.txt

Generating a pfx file for windows:

openssl pkcs12 -export -out www.mananet.net.pfx -inkey www.mananet.net.key -in www.mananet.net.pem

Revoking a certificate:

openssl ca -revoke /root/ca/newcerts/0E.pem -config /root/ca/config.txt