And uncomment the deb-src from main repository as we need to download the source. After that download the squid3 source package and edit the rules file:
Deploy the generated der file to client browers/devices
But upon starting the Squid service, it died stating that the ssl db directory was not initialized so I used the ssl_crtd from the build directory to initialize it.
A week ago I decided to make use of the HP deskjet 1010 that I received for free when I bought my microserver.
It is pretty basic one but supports color and prints fairly fast. But the only problem I had with it is that the USB cable is too short so that I have to take my laptop near the printer every time I wanted to print something.
So I decided to connect the printer to my old server box and set up CUPS for printing over the network.
Everything went through fine but after I installed the printer opening the printer dialog box took an eternity every time I tried using it.
The problem seems to lie in the IPP handler of Windows. Somehow there is a bug in Windows that makes IPP settings and Windows internet security settings get mixed up resulting delays.
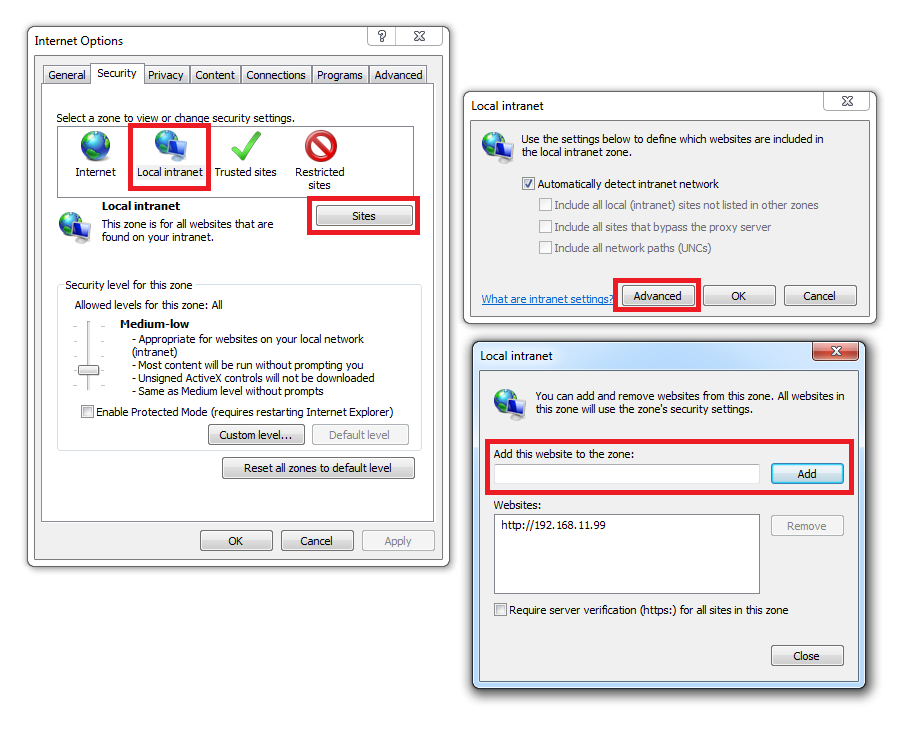
Adding the CUPS server to Internet Explorer’s Intranet zone can be a workaround.
Open Internet Explorer -> Tools -> Internet options and add the following:
where the address is the CUPS server’s IP address. You may skip this step if the printer is in your LAN but I decided to do it anyway.
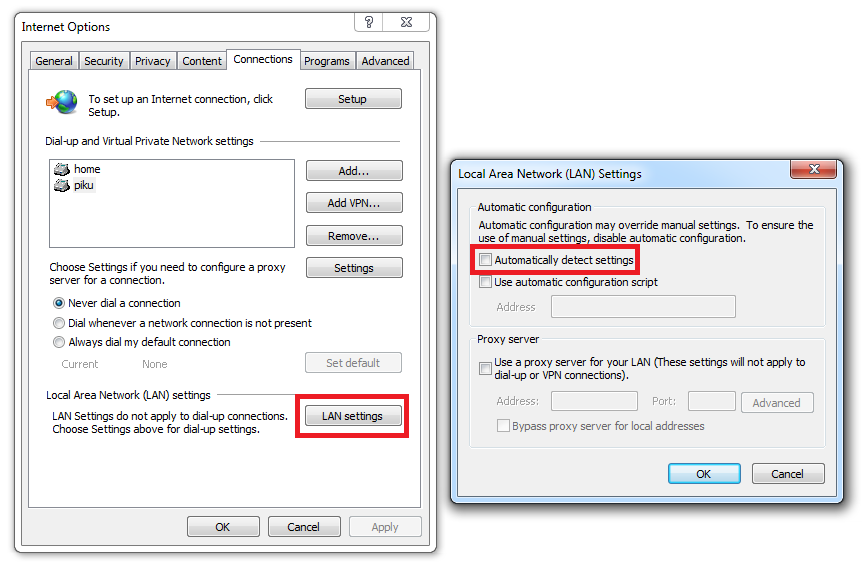
Then go to LAN settings and uncheck “Automatically detect settings”
While receiving the Hoopa gift from the 18th Pokemon movie series, I suddenly felt like hacking into how this entire mystery gift process works.
I looked up on GBATemp and Project Pokemon but interestingly I could not find any technical insights on it. People had pretty much no progress after capturing the encrypted connections.
So, challenge accepted.
First, I went down to the basics like everyone else; Packet capture.
I used my laptop as a bogus wifi network to capture the packets from the 3DS
The 3DS was communicating with Nintendo servers with SSL as I expected.
I guess that it might be storing the certificate chain in the game file, as far as I know Wii games store their certificates within the game file.
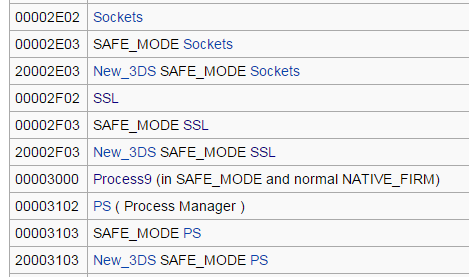
I wasted a day trying to decompile the rom filesystem and searching for any meaningful information using grep. But eventually I found out that the certificates are not stored in the game file but it is embedded within the firmware SSL module.
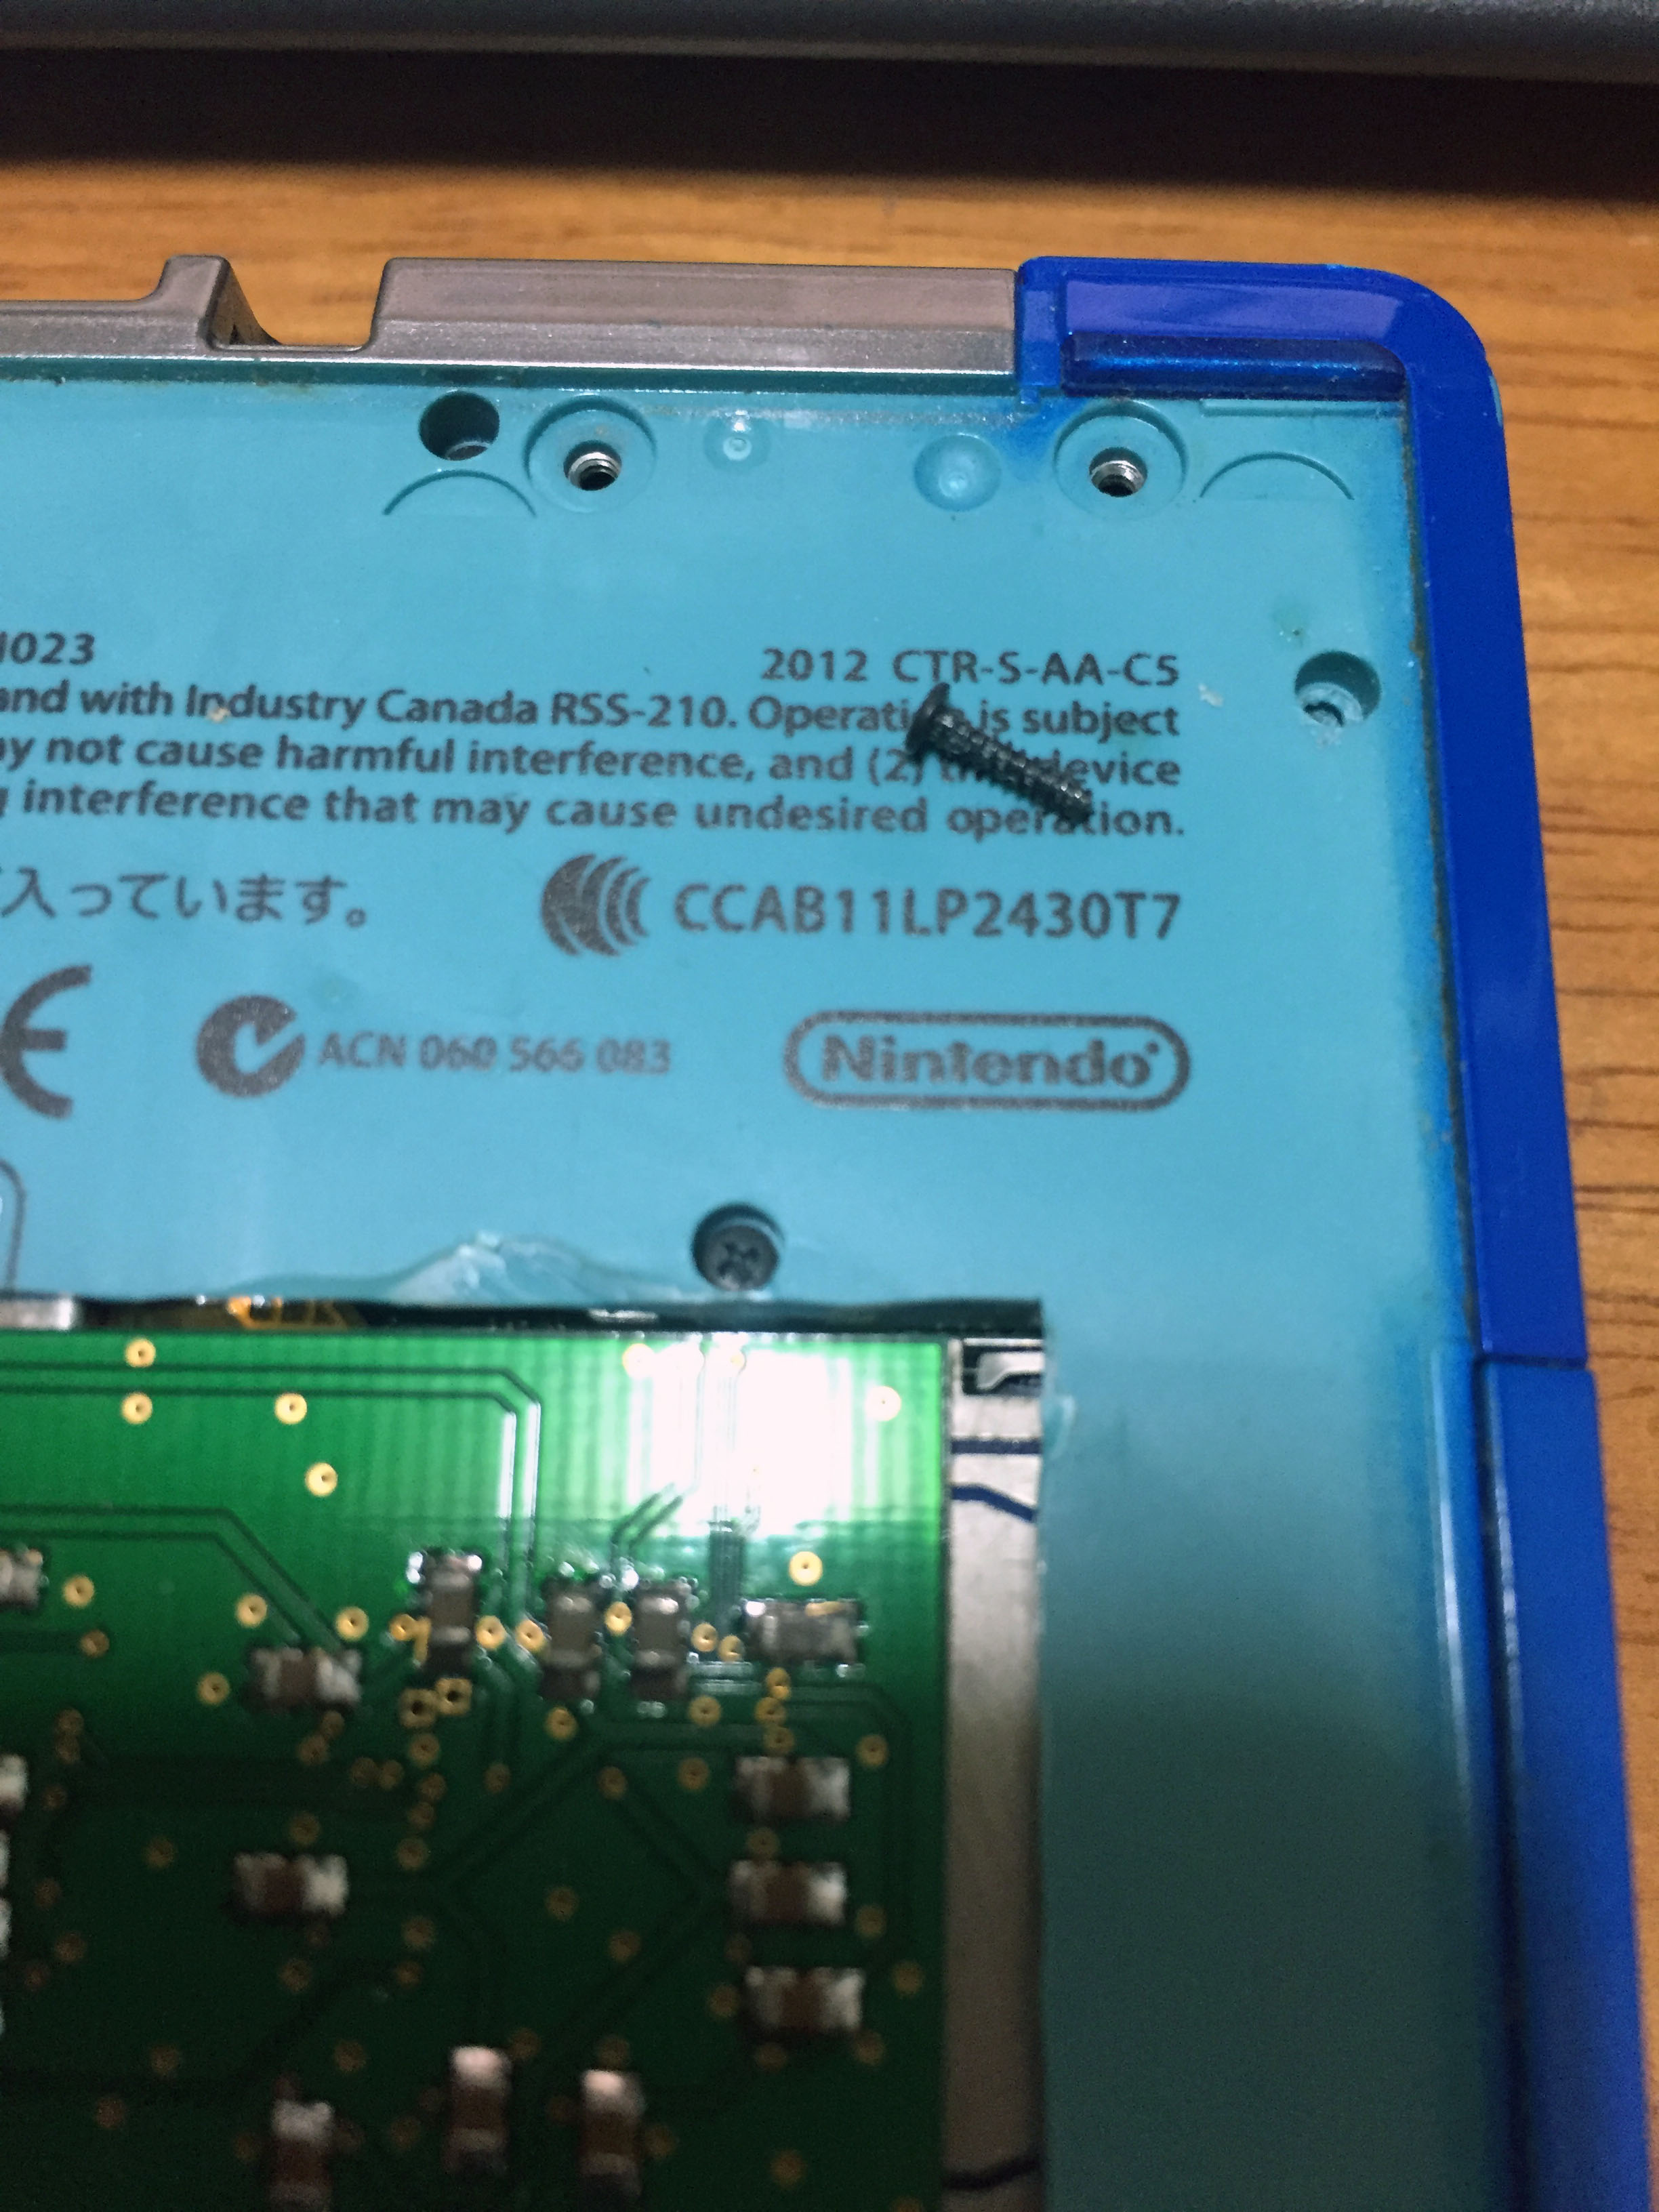
I looked up for the ID of the SSL module and extracted the cia file from nintendo update server.
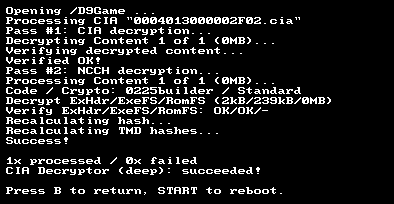
As all the update cias are encrypted, I needed to decrypt them using a 3DS.
Using Decrypt9, I retrieved the decrypted CIA file.
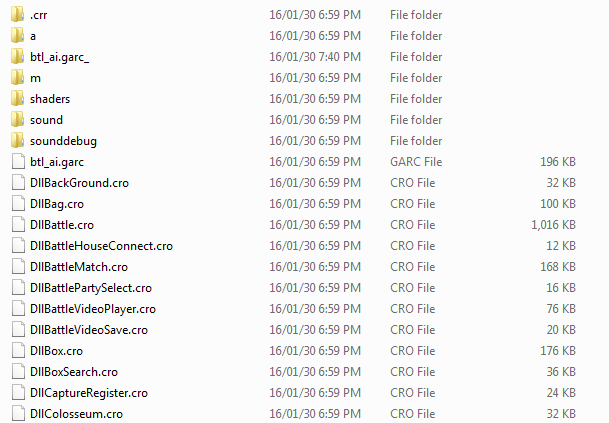
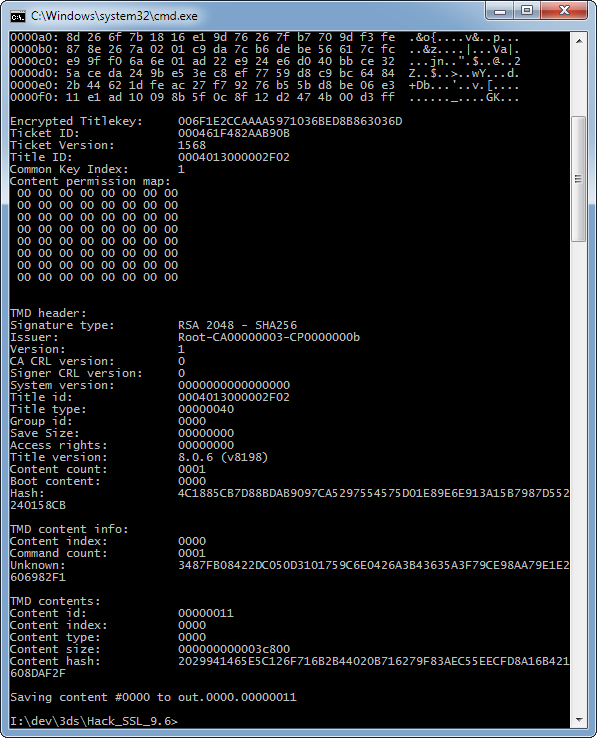
Lets get into the actual data using ctrtool.
Extracted the CXI portion from the dumped CIA file.
Now we need to get it splitted into proper partition.
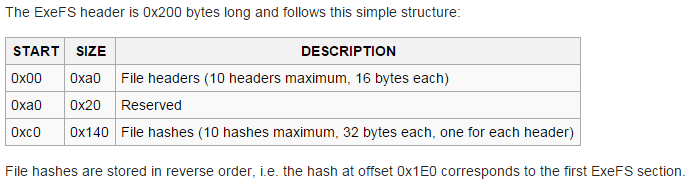
I extracted the executable code from the exefs.
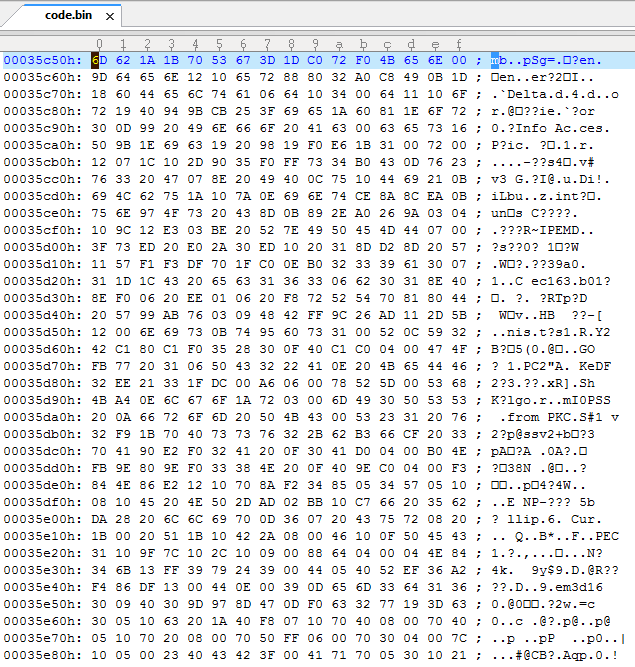
Lets take a look…
It is compressed with reverse LZ77 so lets uncompress it again.
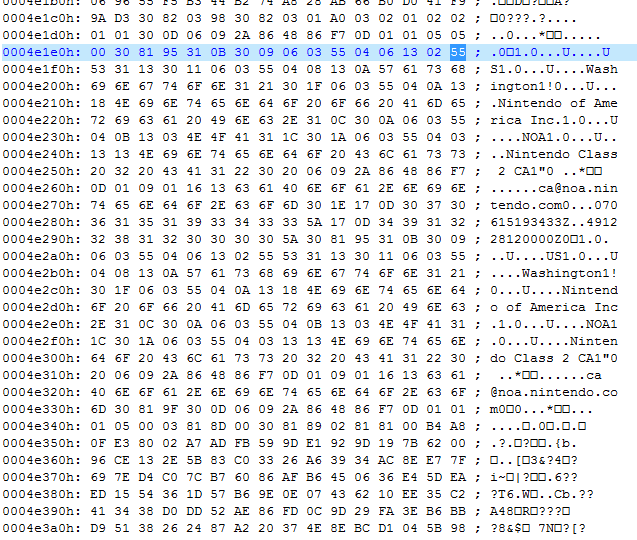
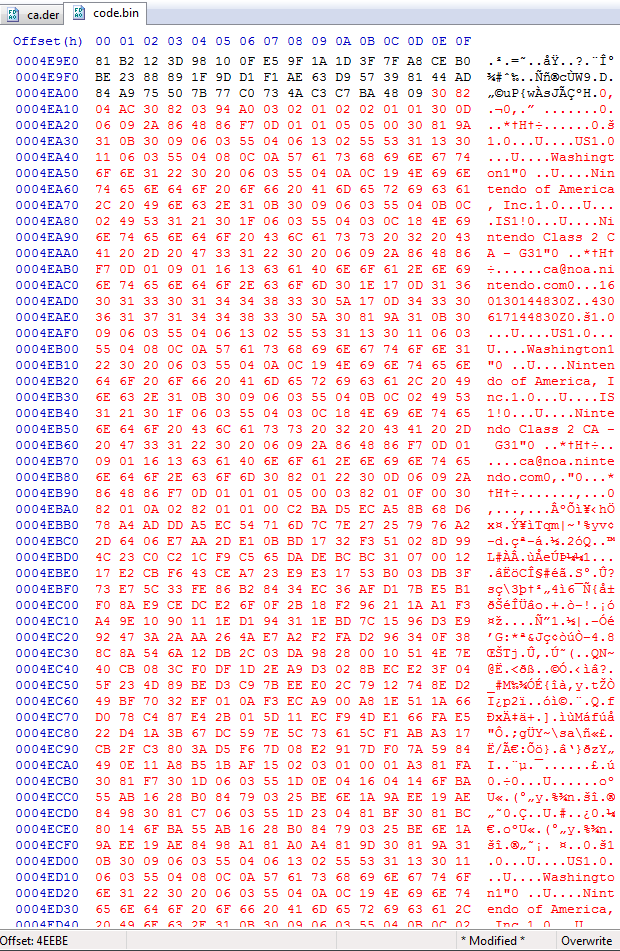
After a bit of skimming I located the actual root certificate used for connection to 3ds-fushigi server.
Thank god Nintendo didn’t use complicated cert chain. As the root certificate is directly used for the communication we replace that and the work here is done.
The format seemed to be DER so I carefully exported the corresponding bytes.
Successfully retrieved the certificate in one shot.
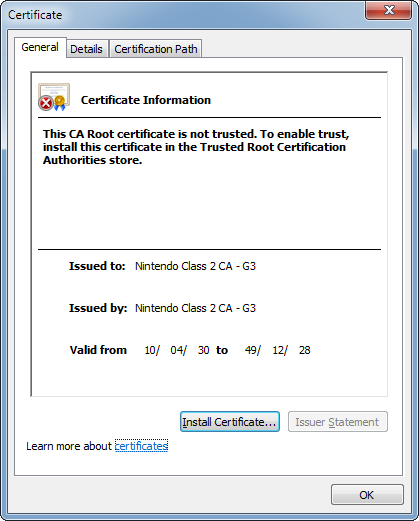
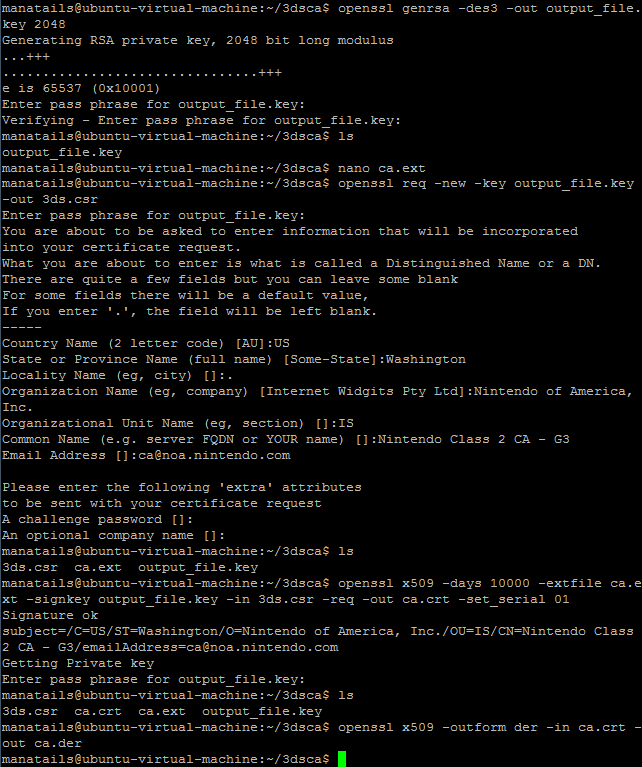
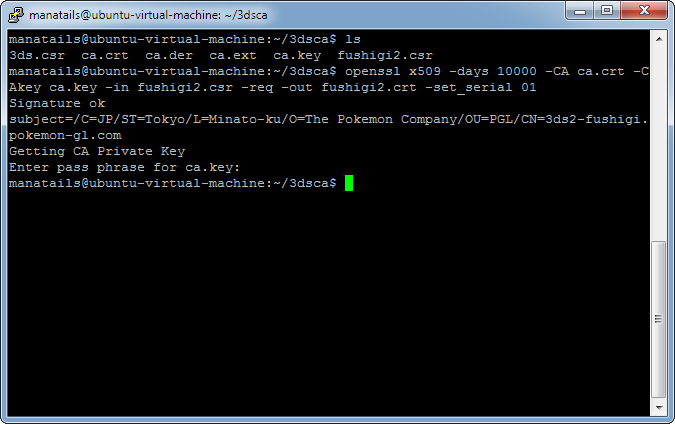
Now lets create a certificate that is almost the same except that it will use MY private key.
Using OpenSSL I created the copy of the certificate, self signed it and converted it to DER format again.
I replaced the certificate in the code binary with the new one then I recompressed the code.bin with reverse LZ77.
But the header of the exefs requires the hash of the code.bin file, as I could not find any software that does the job for me I ended up patching the hash myself.
Then I redid the entire CIA decompiling process in the reverse order to create the new modified CIA file.
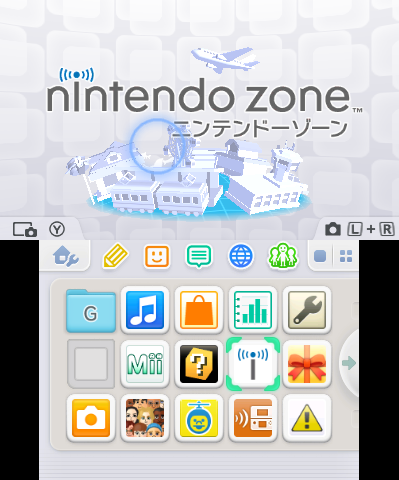
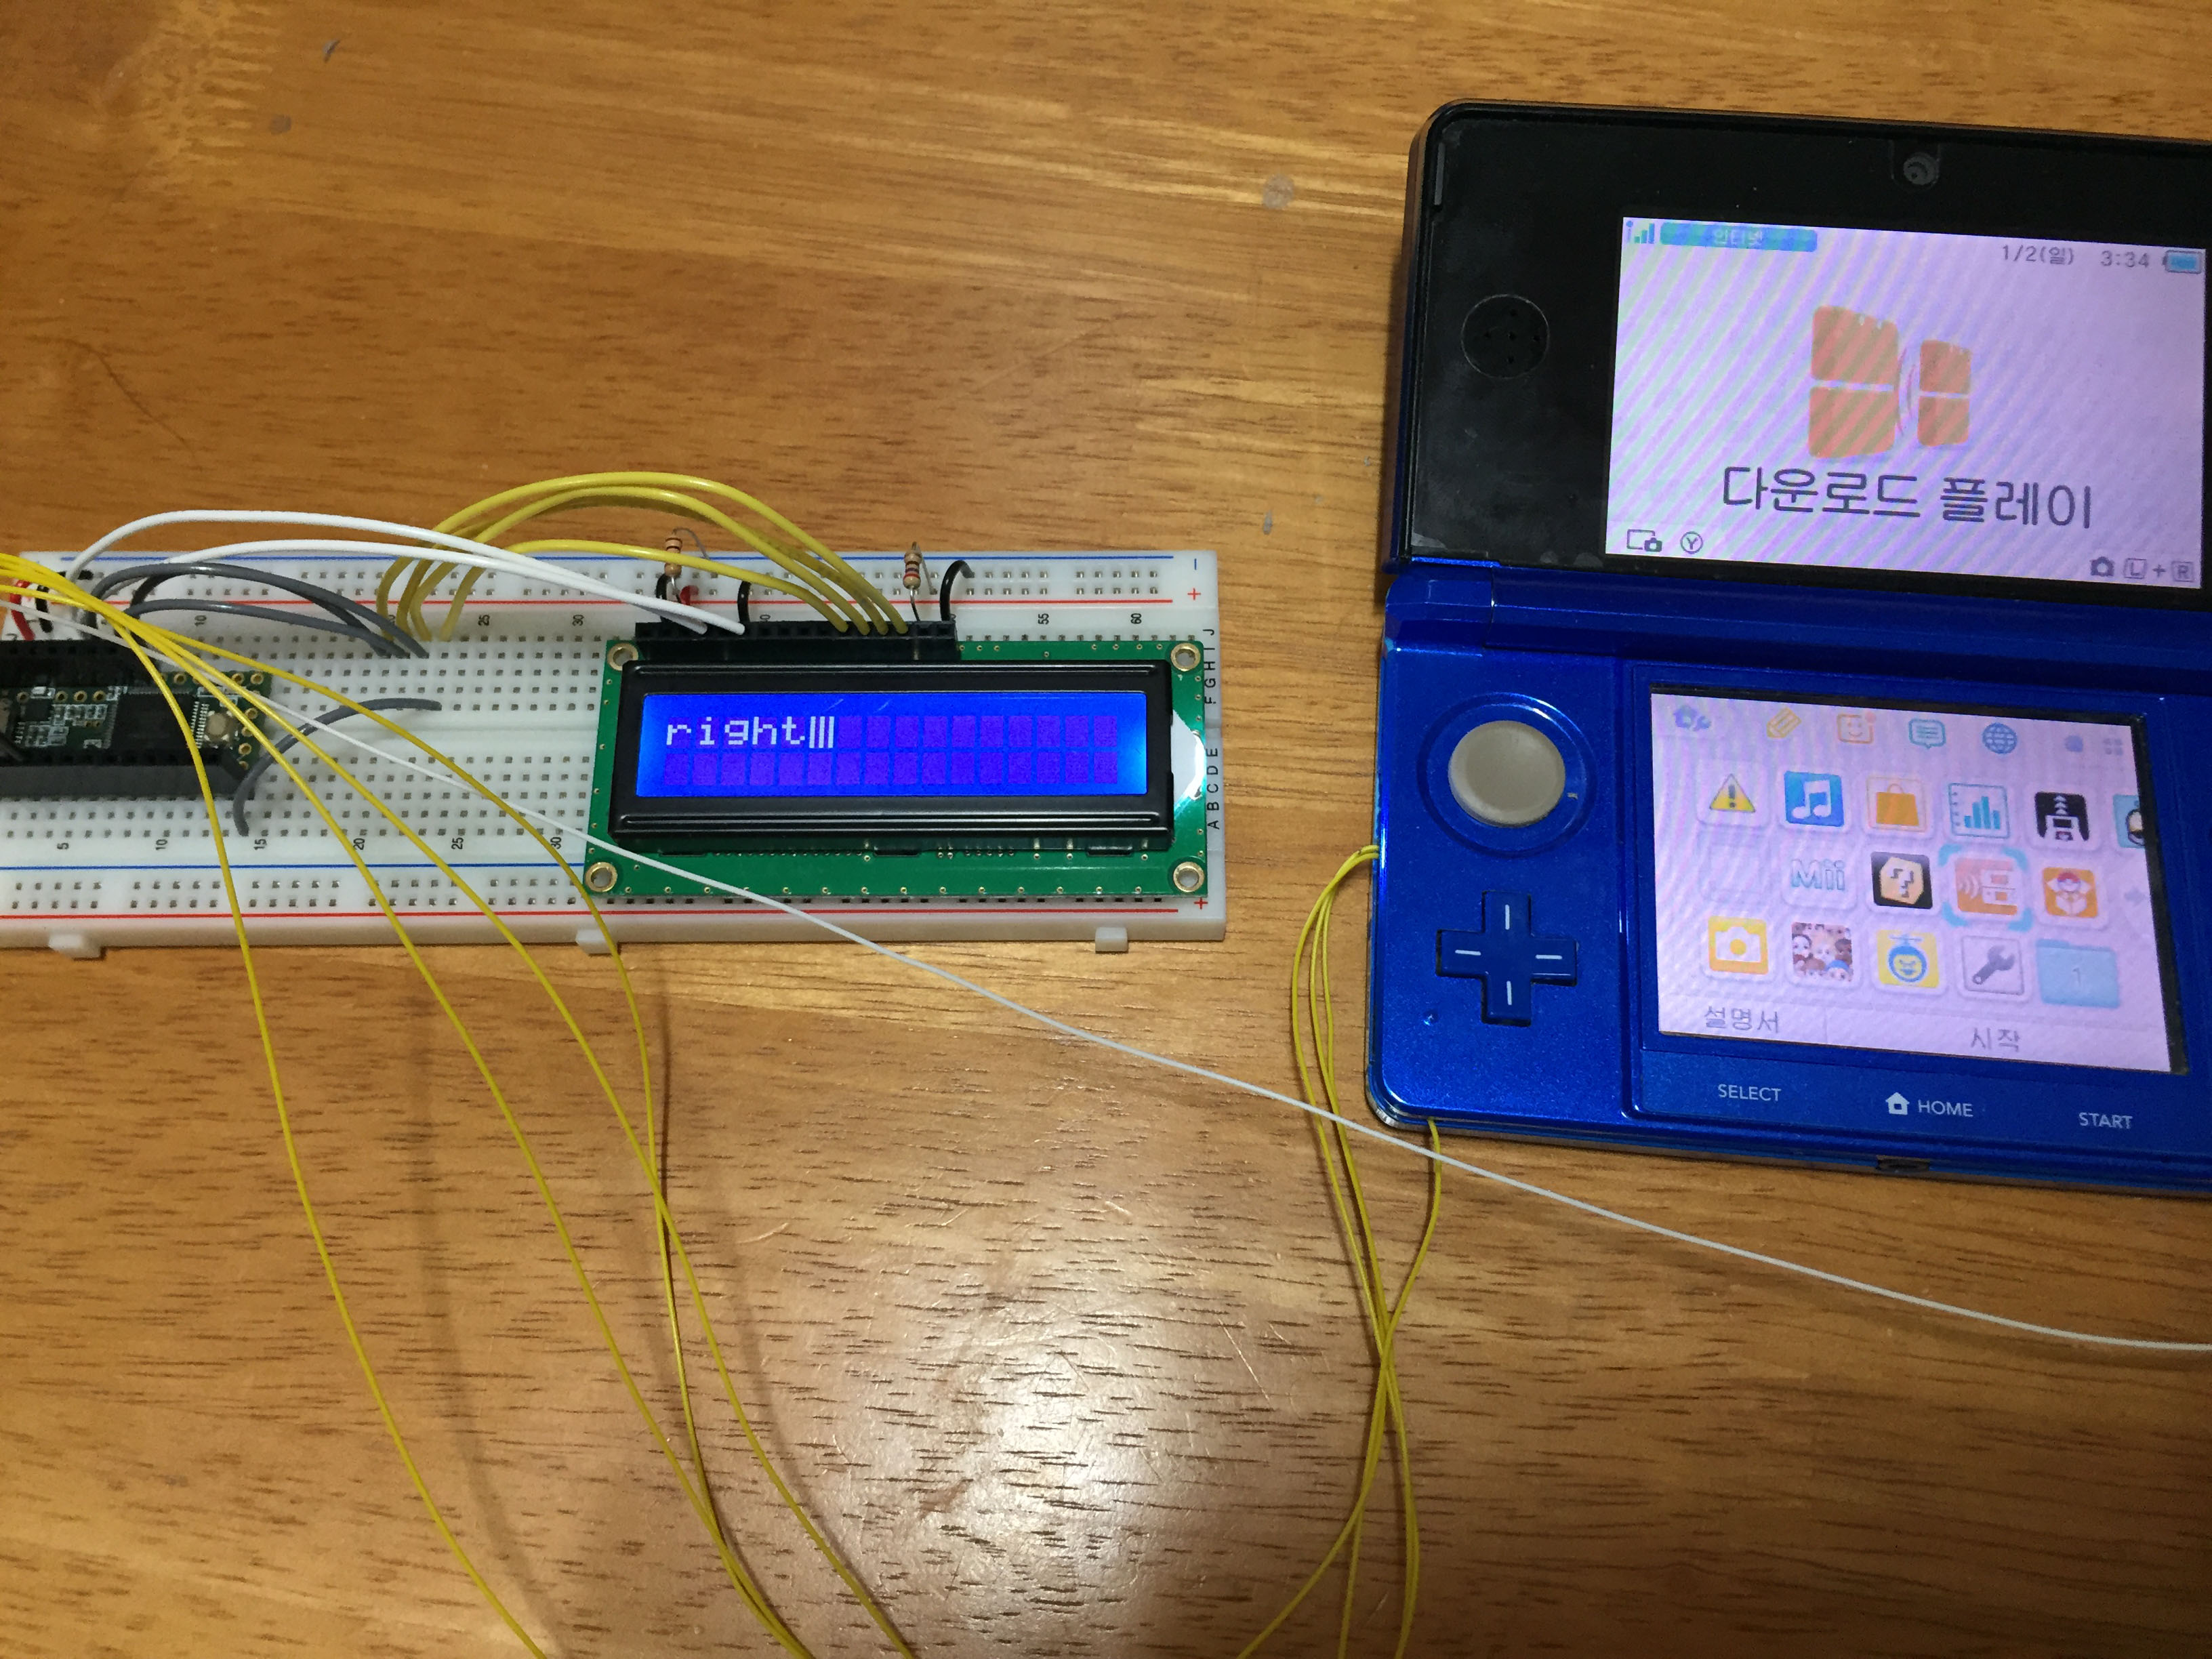
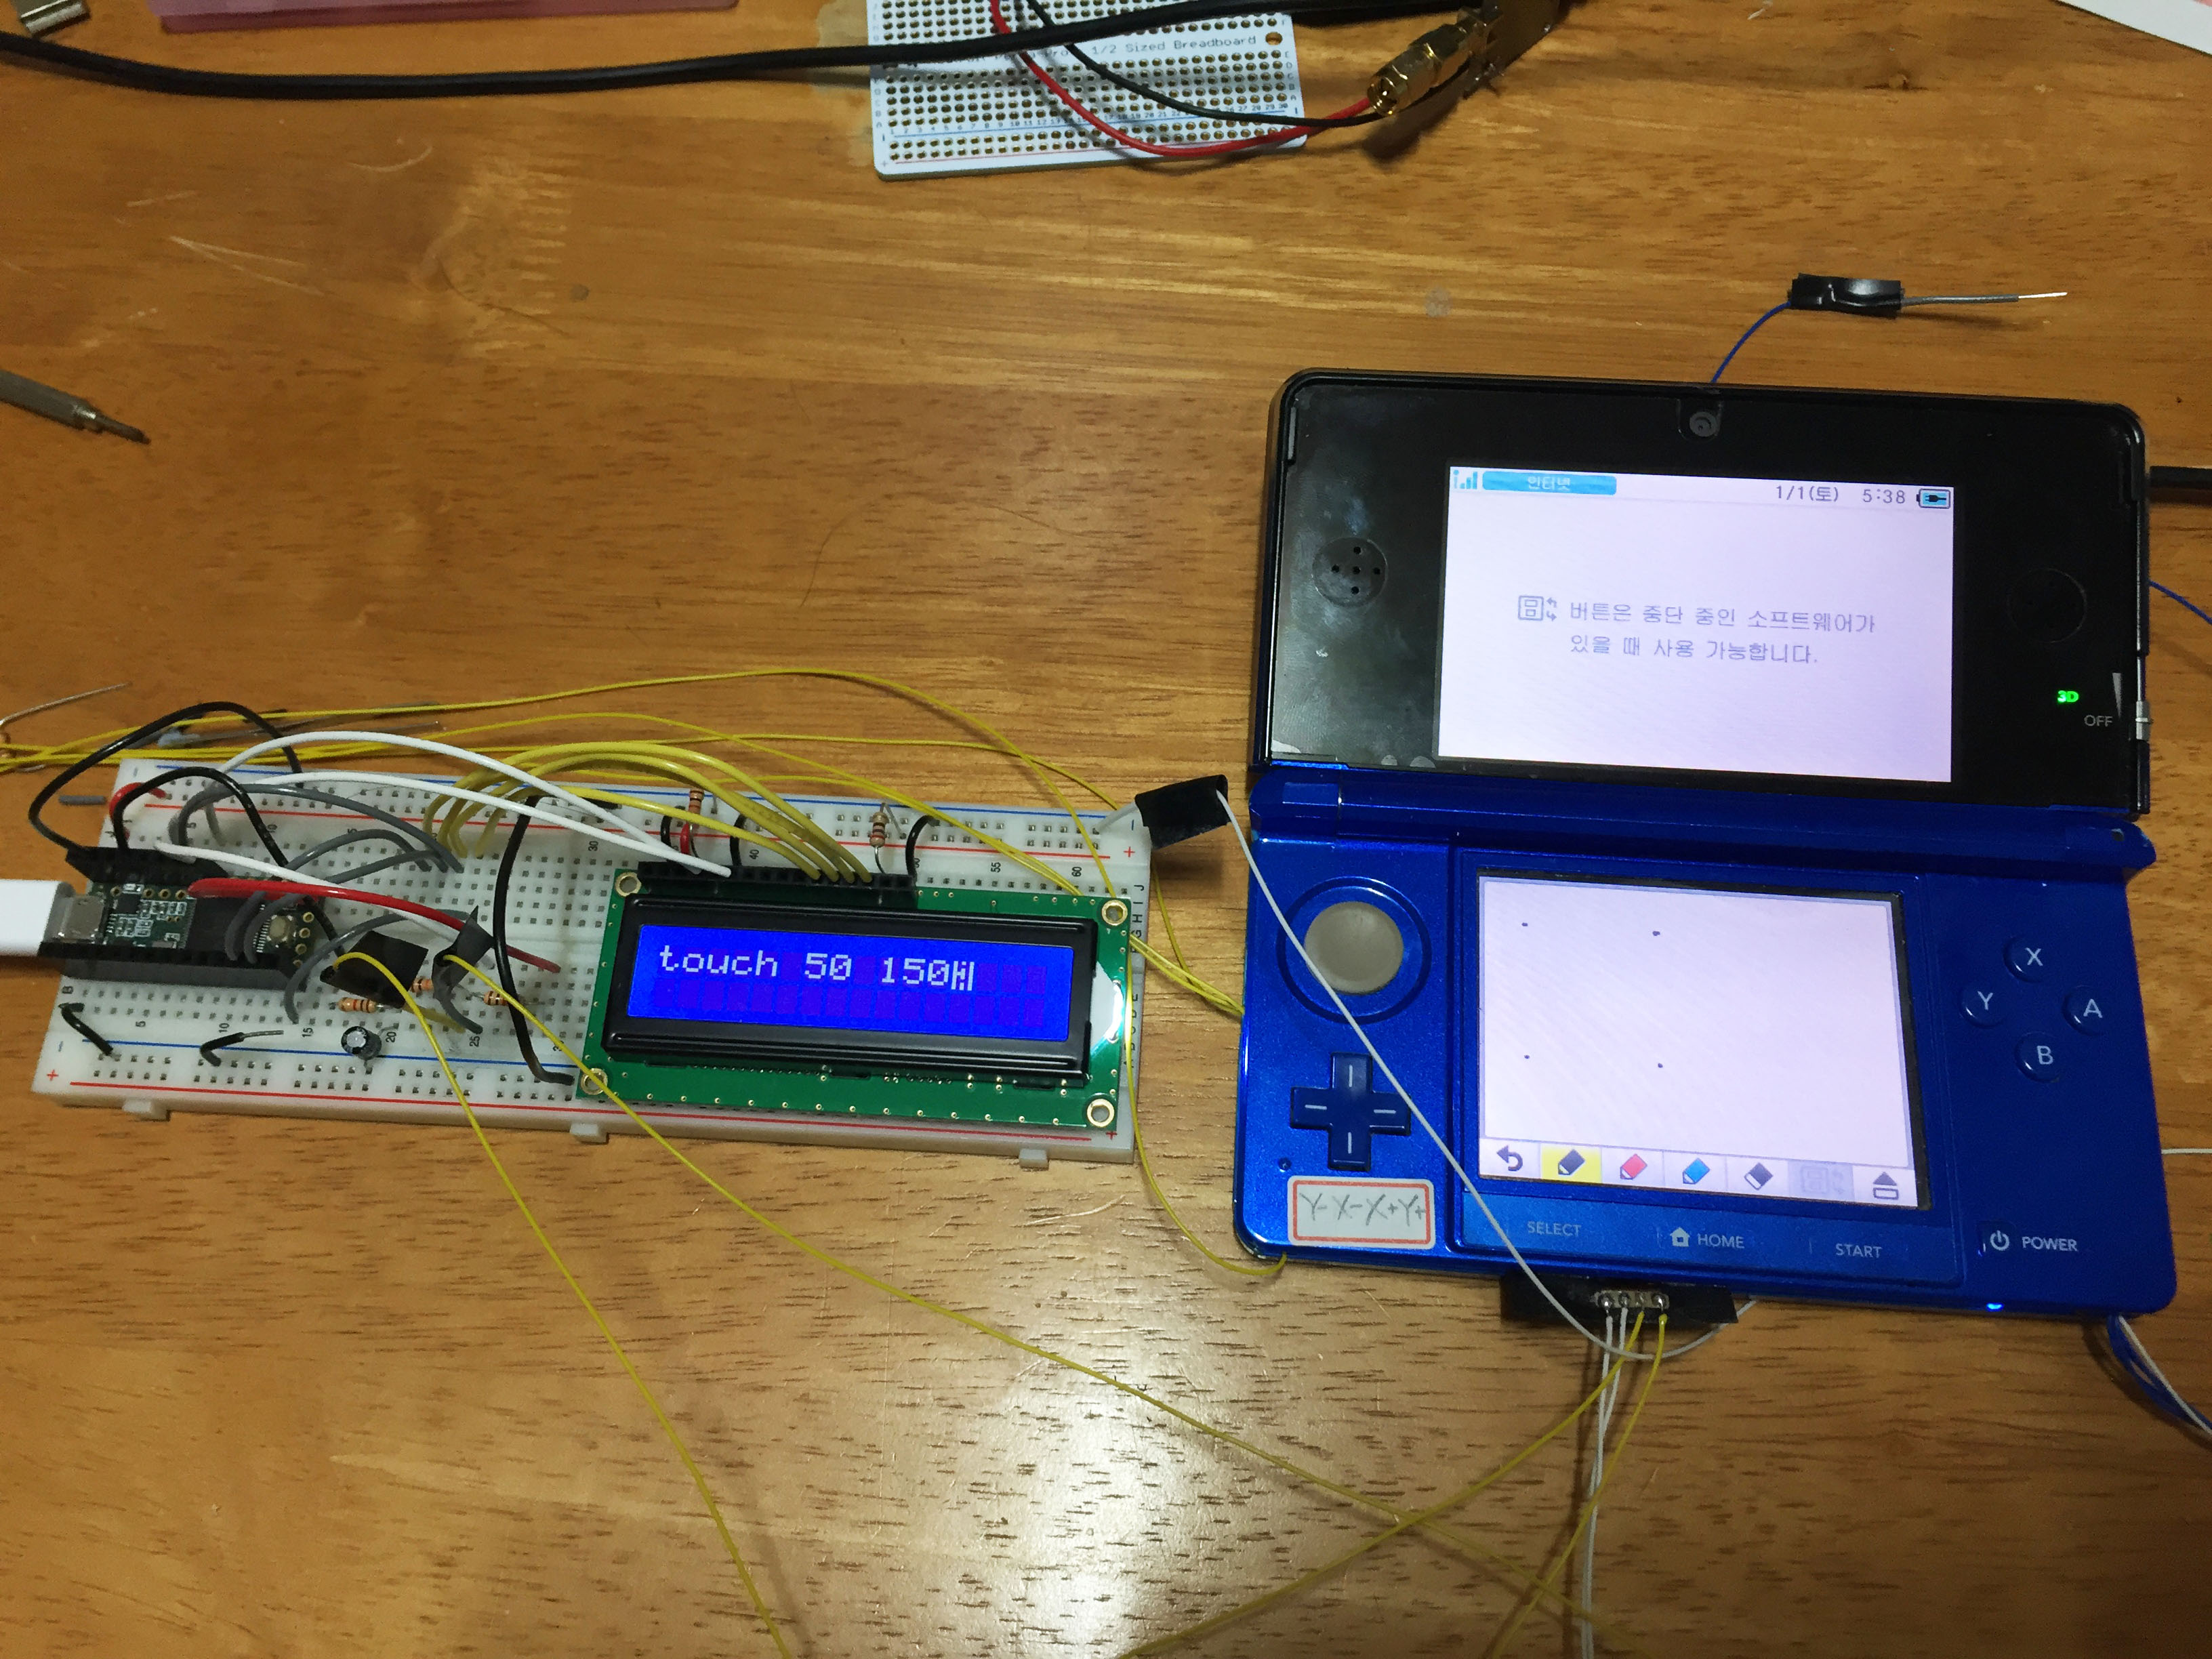
I installed the new CIA file onto the 3DS using devtool but it half bricked the 3DS upon reboot.
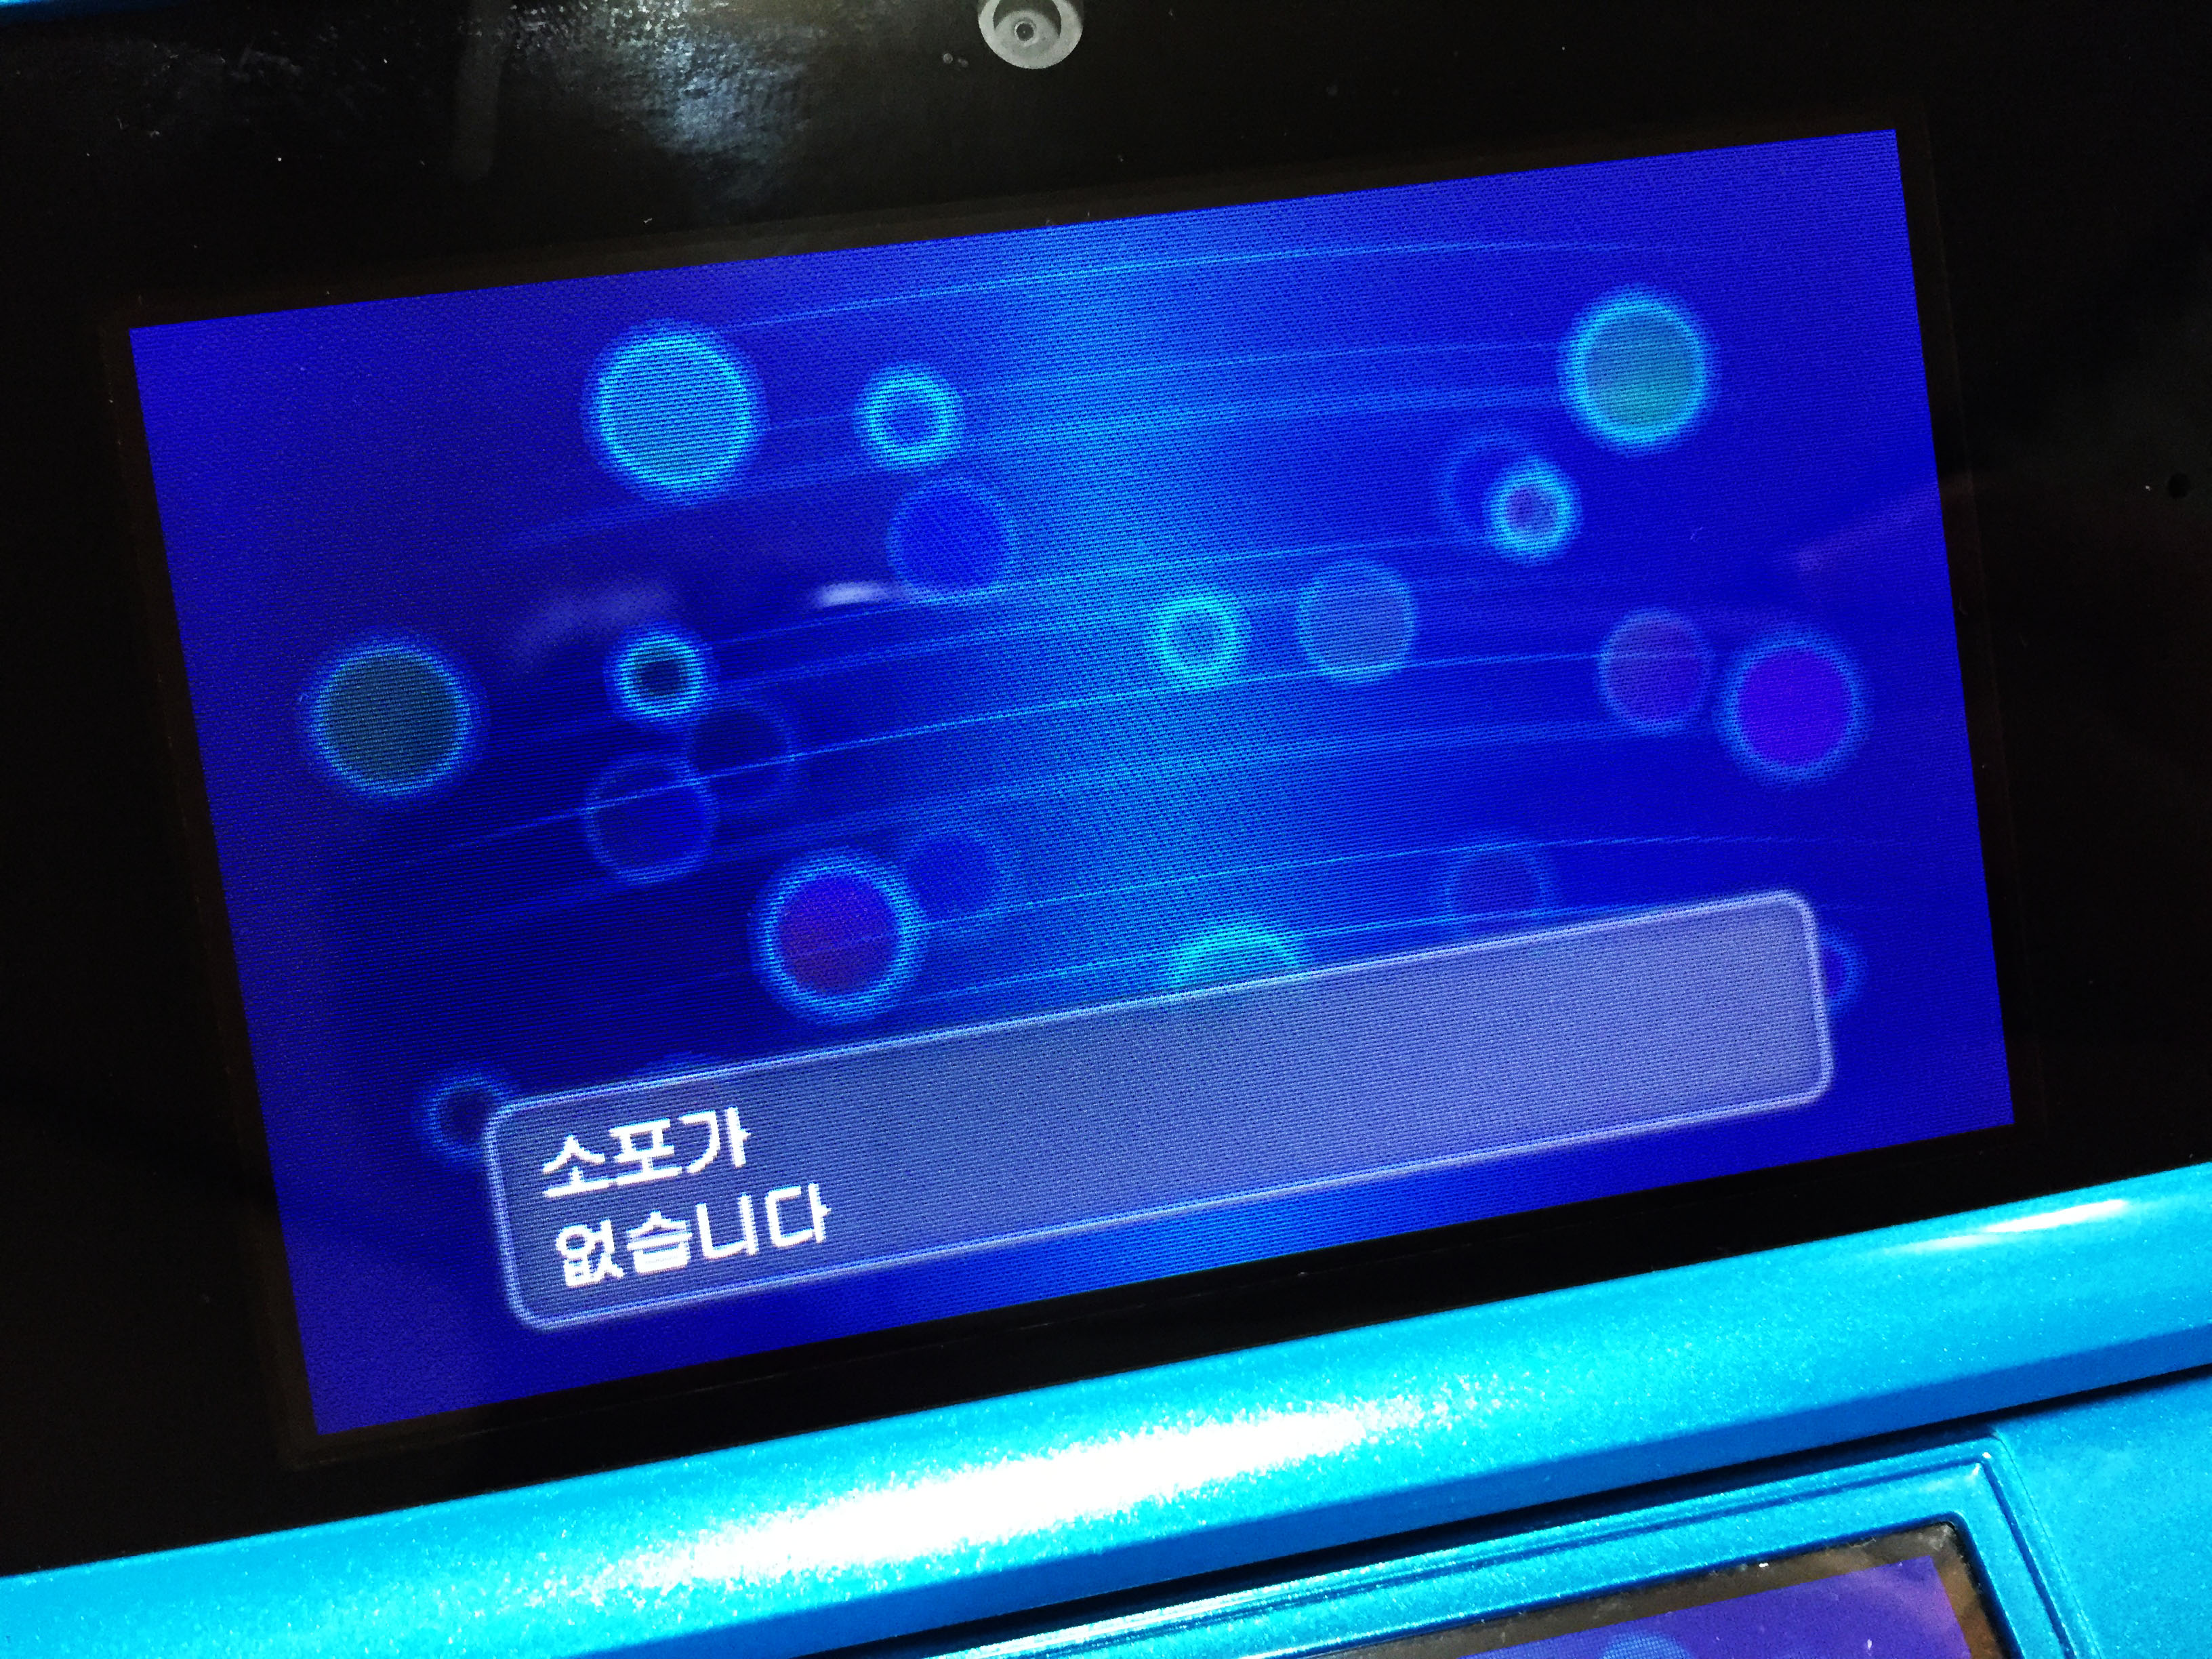
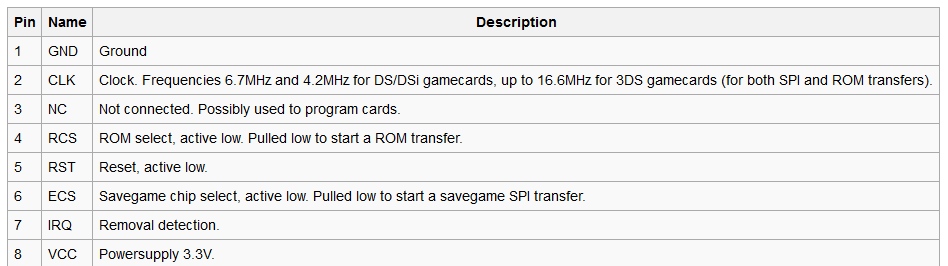
This is what a half bricked 3DS looks like. there is no menu on the bottom and it refuses to execute any of the softwares.
Trying to run Camera app using L+R freezes the console.
I wasted another 2 days trying to figure out what is going wrong, then I eventually found out that encrypting the CXI in the CIA file and using a sigpatched firmware could get around the problem.
By the time I worked on this there was no software capable of doing this but now one can use Decrypt9 to encrypt the CXI.
Anyway as the patched certificate is now in position we are moving onto server setup.
I changed the DNS settings of my 3DS and used redirected 3dsX-fushigi.pokemon-gl.com to my server’s IP address.
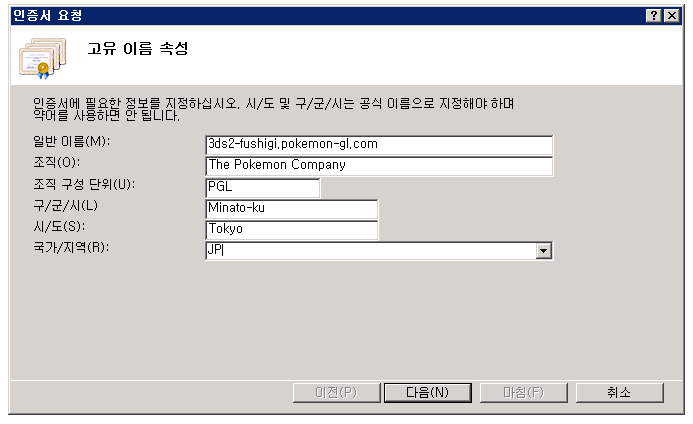
I created the certificate for secure https using IIS.
Then I started the mystery gift from the 3DS to see what happens.
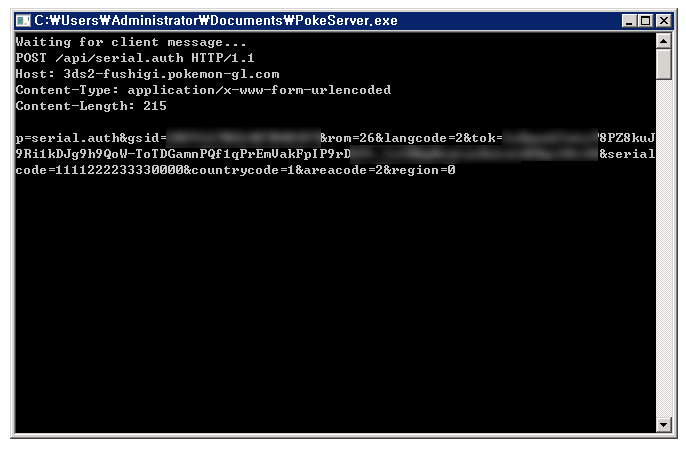
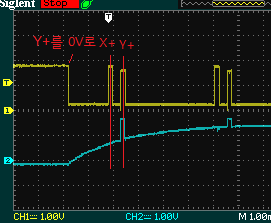
Looking into the log I found that the 3DS was sending a request using a non-standard http format.
This is the request sent from the 3DS for validating the gift code with Nintendo servers.
It contains the player’s GameSync ID, language settings, rom type, country code and etc.
Also the gift code in plain format, in this case 1111222233330000.
At this point I thought pretty much everything is over… and I was wrong.
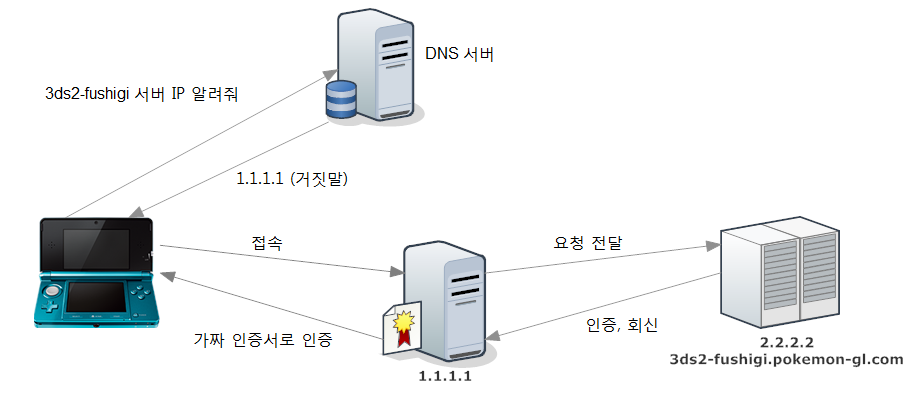
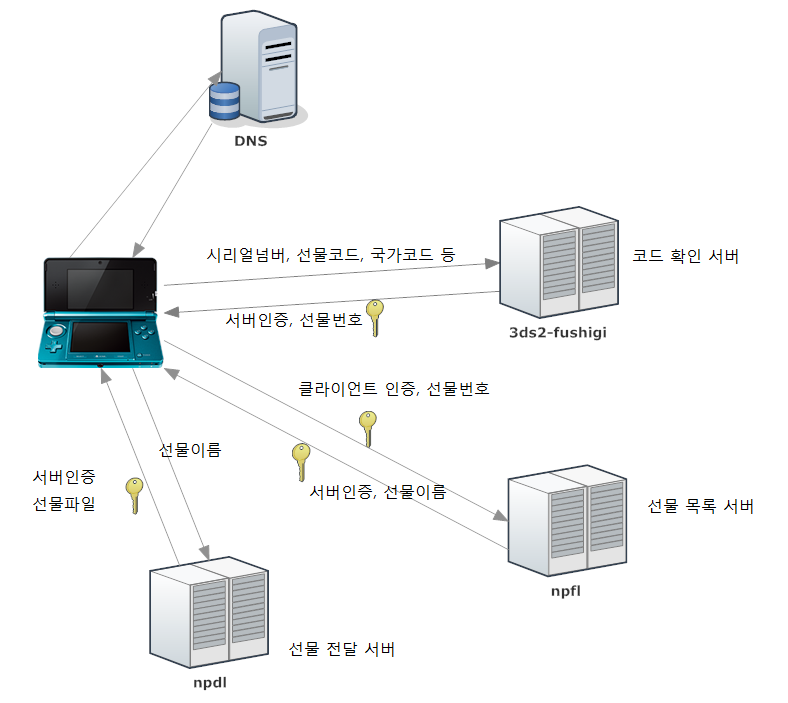
A simple diagram for non-techy users.
I used a rogue DNS to redirect the traffic to my server and my server is behaving as the Man-in-the-Middle.
But strangely the response from the Nintendo server did not contain any information about the gift Pokemon.
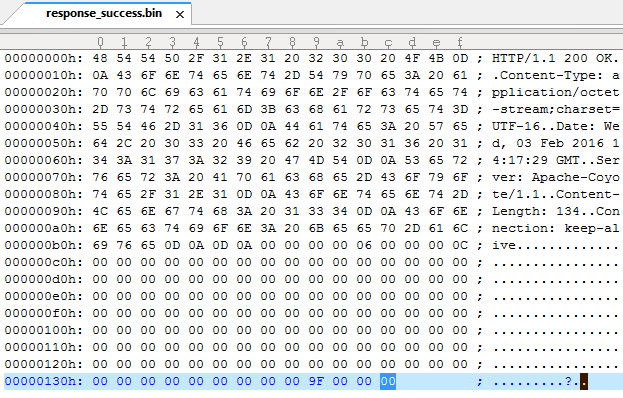
This is the original response from the fushigi server.
I used a couple different working keys for comparison and discovered that it only tells the 3DS if the code is correct or the gift number on successful validation.
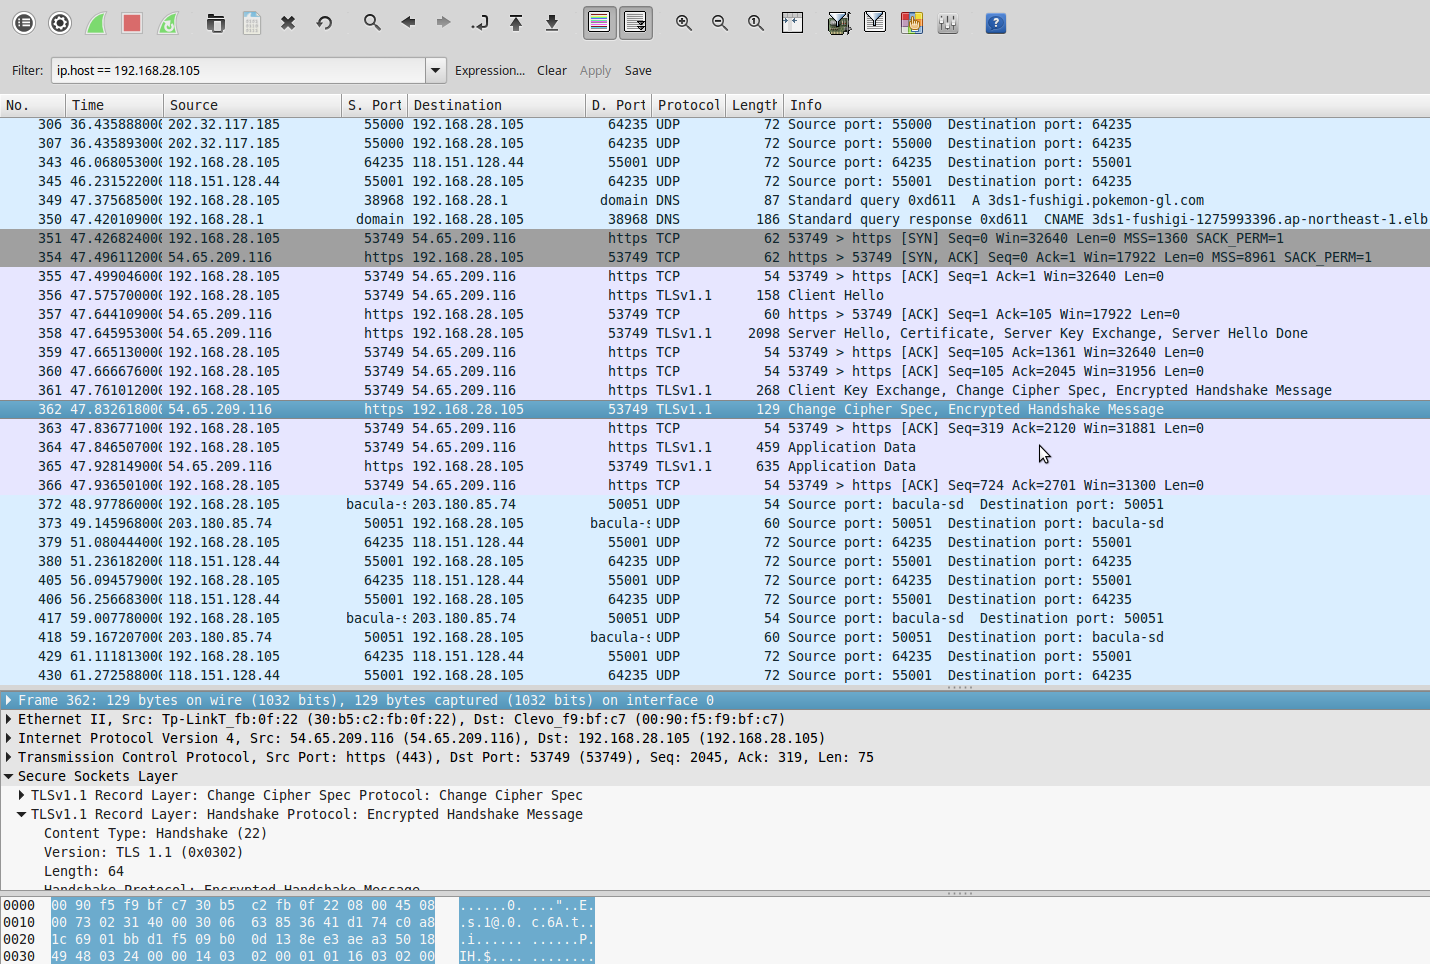
I did the packet capture again to see what it does after getting the response from fushigi server.
After disconnecting from fushigi the 3DS was connecting to npfl.c.app.nintendowifi.net.
But unlike fushigi, npfl server requires client authentication using a clientside certificate.
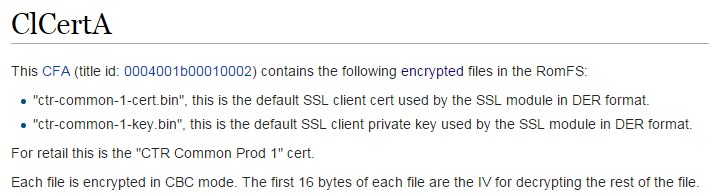
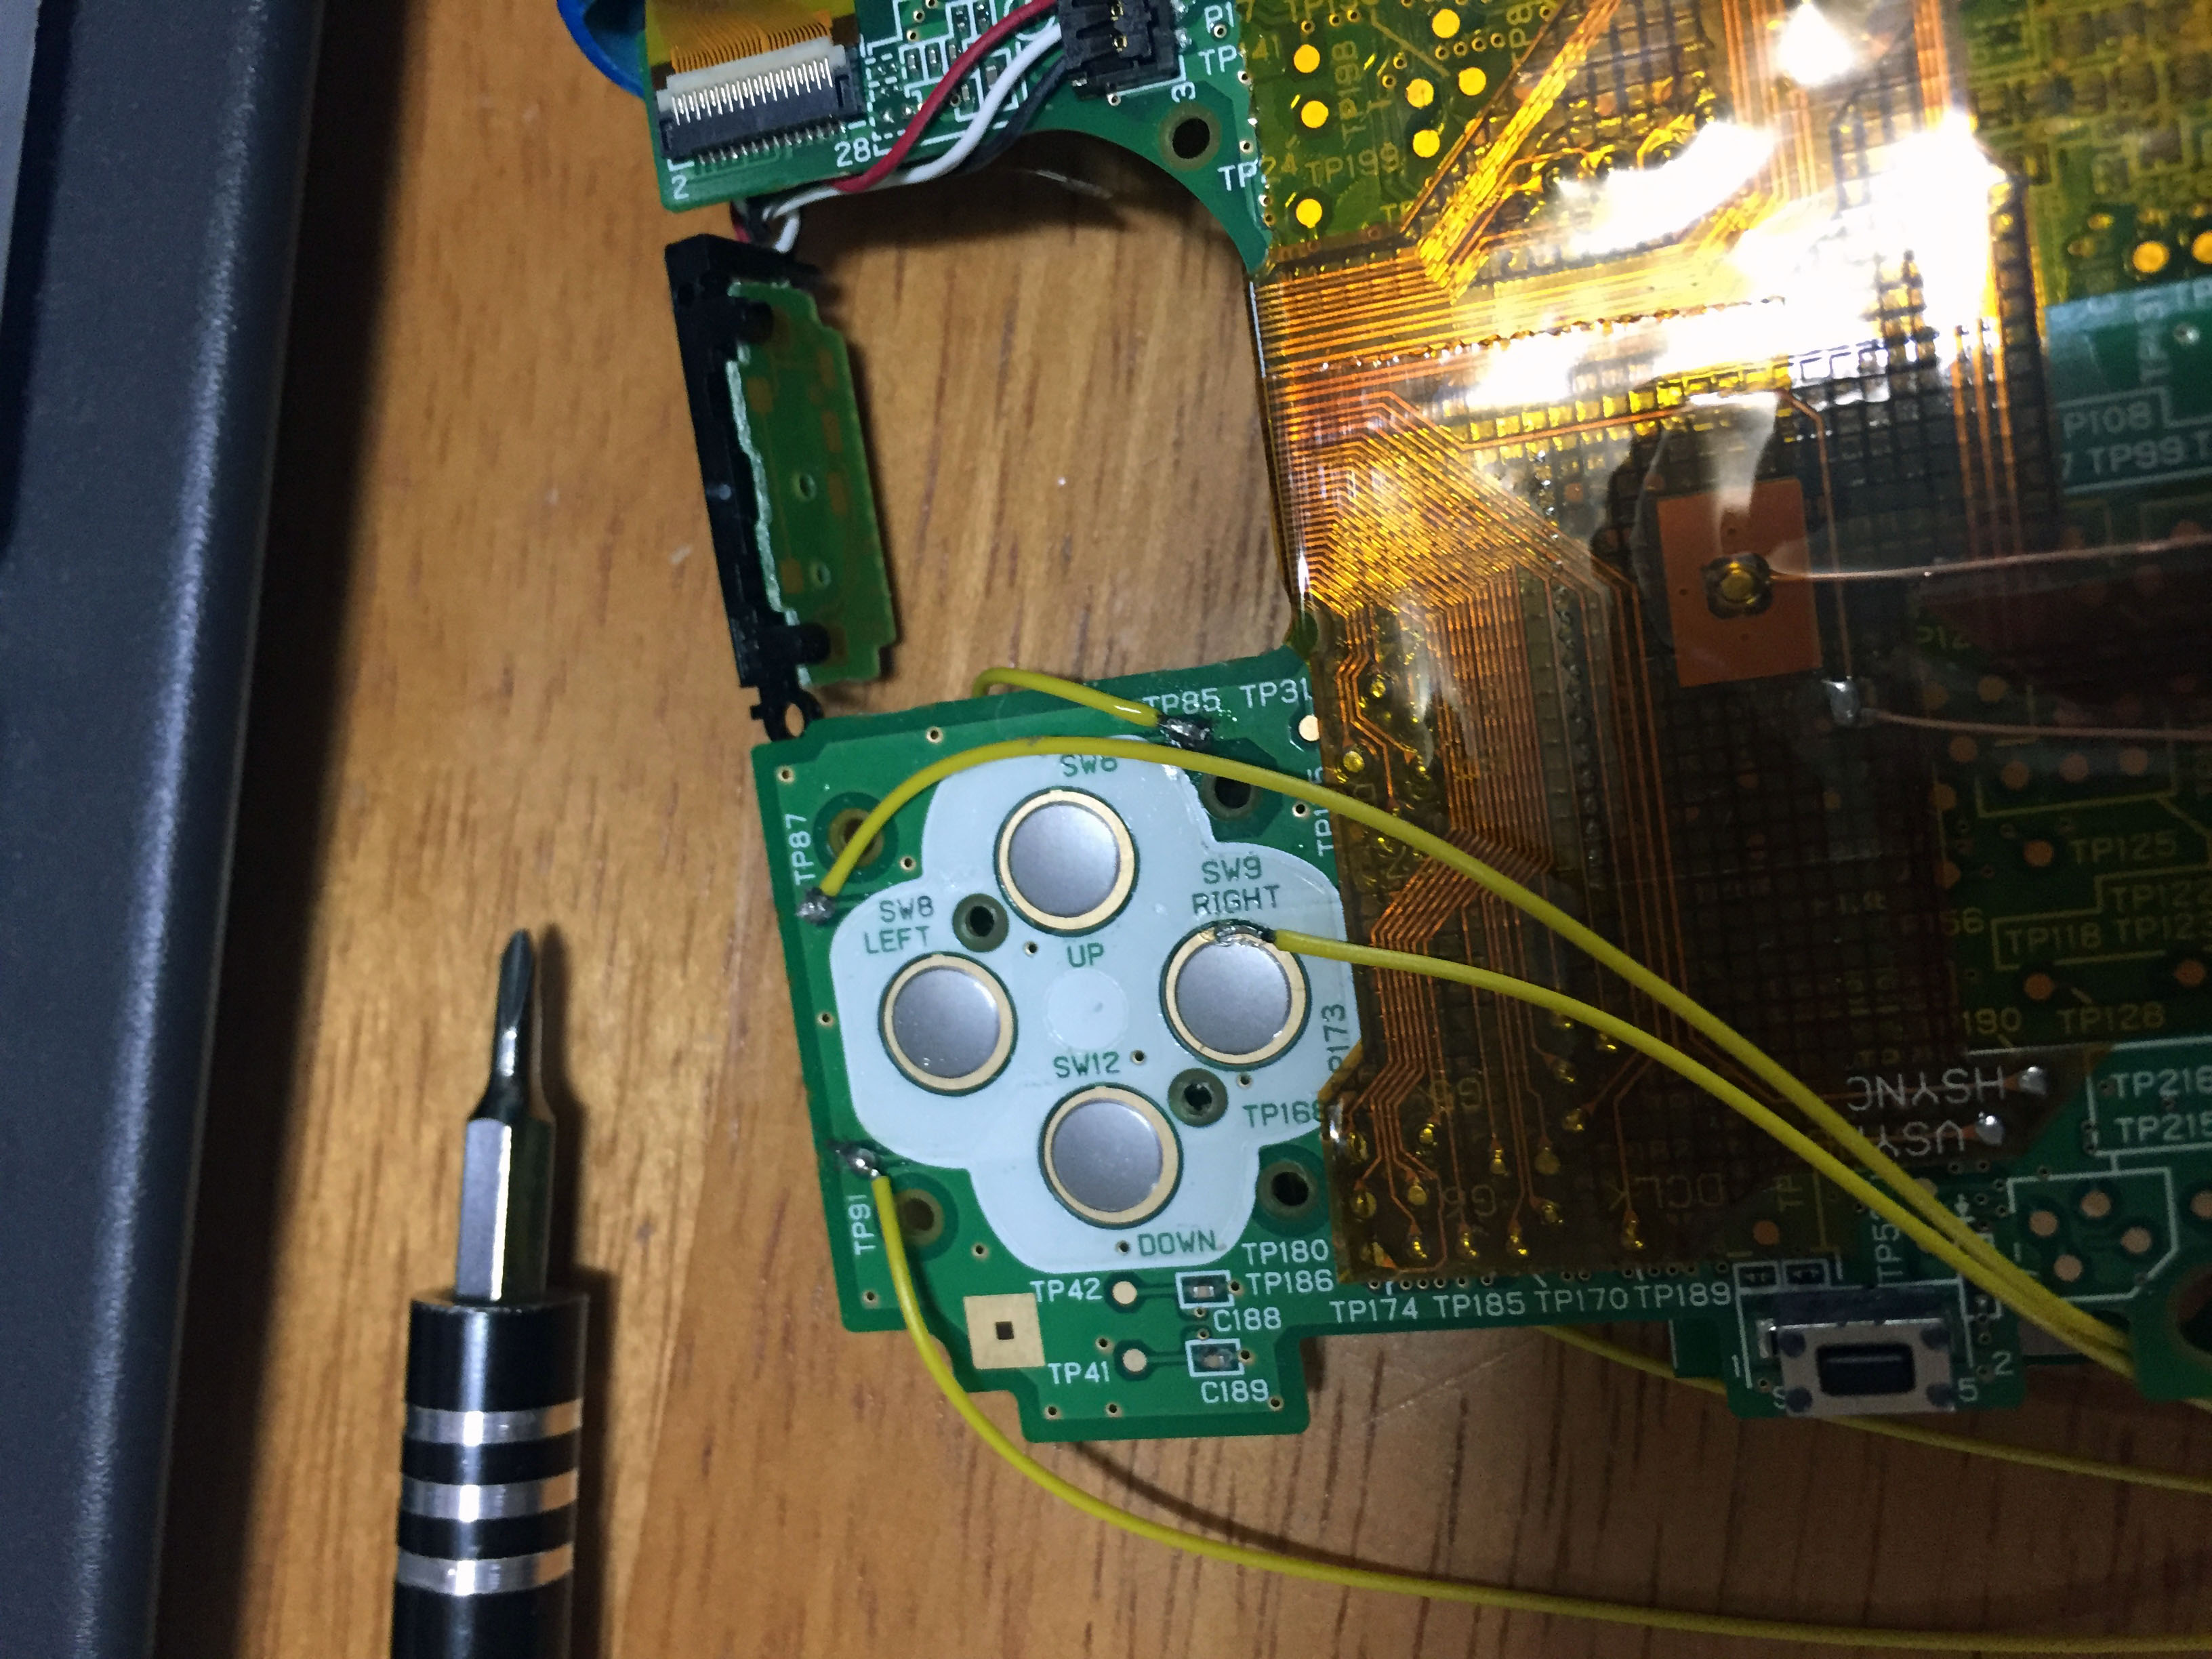
The client SSL certificate resides in a module called ClCertA
Extracting the certificate is done the same way as extracting the root certificate. But unlike the latter the client certificate is encrypted with AES-CBC, but thankfully we have a tool for that purpose.
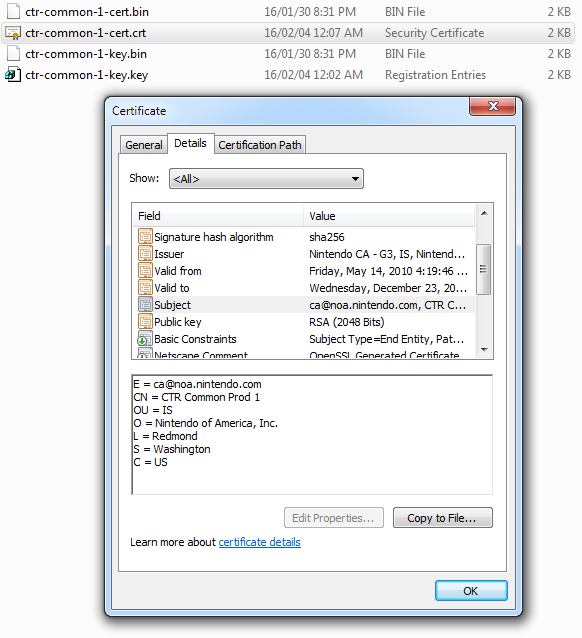
Successfully extracted the certificate and key from the module
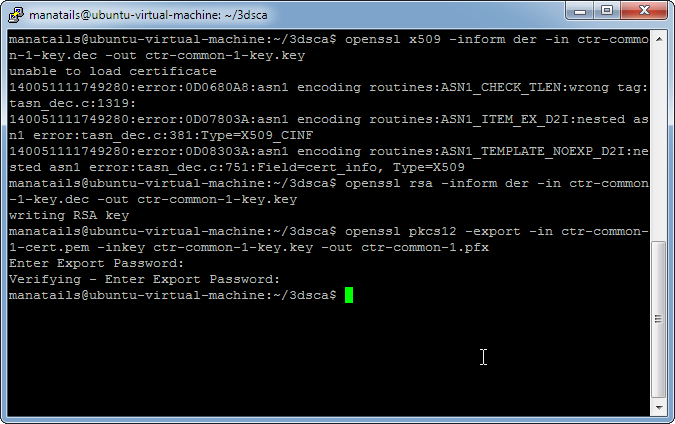
let’s convert the certificate into a more PC-friendly format.
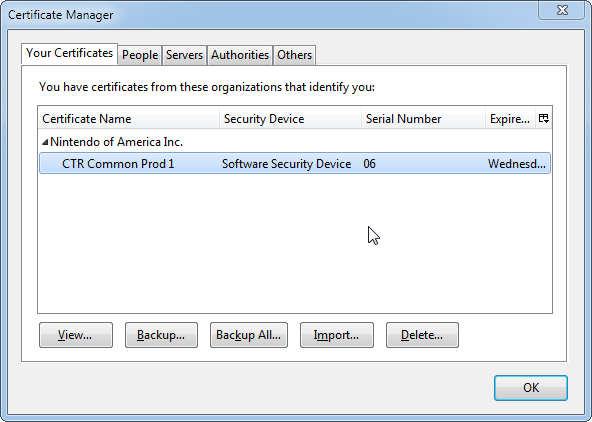
Importing the certificate into the browser now enables us to impersonate as legit nintendo 3DS’s
Now let’s see what the server has to show us.
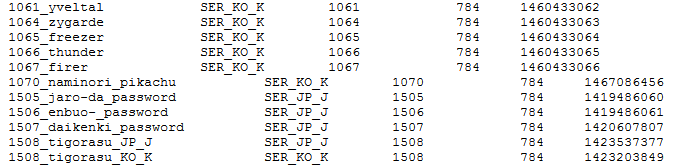
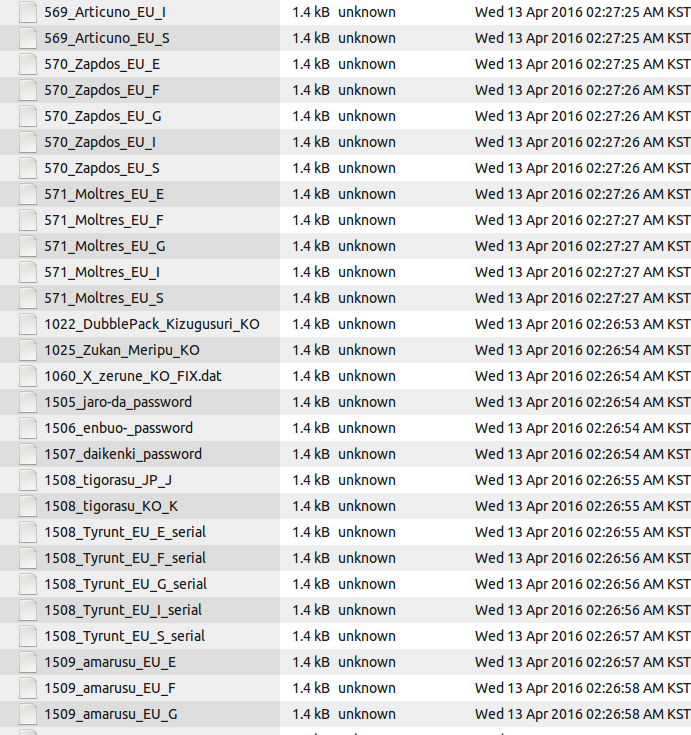
I see that the NPFL server holds the list of available gifts.
If given a gift number it will output the corresponding gift name for that number, if no input is given it shows all the available gifts.
File names are pretty much self-explanatory, although there are a couple of confusing names like M18KO_A, M18KO_HU. Which I guess means Arceus and Hoopa for the 18th Pokemon movie in Korean region.
One interesting thing to note is that when a 3DS connects to this server, it displays “Searching for gift…” message. It is _literally_ doing it.
If NPDL server gives a response and 3DS does find a gift, it will then connect to NPDL server to download the actual gift file.
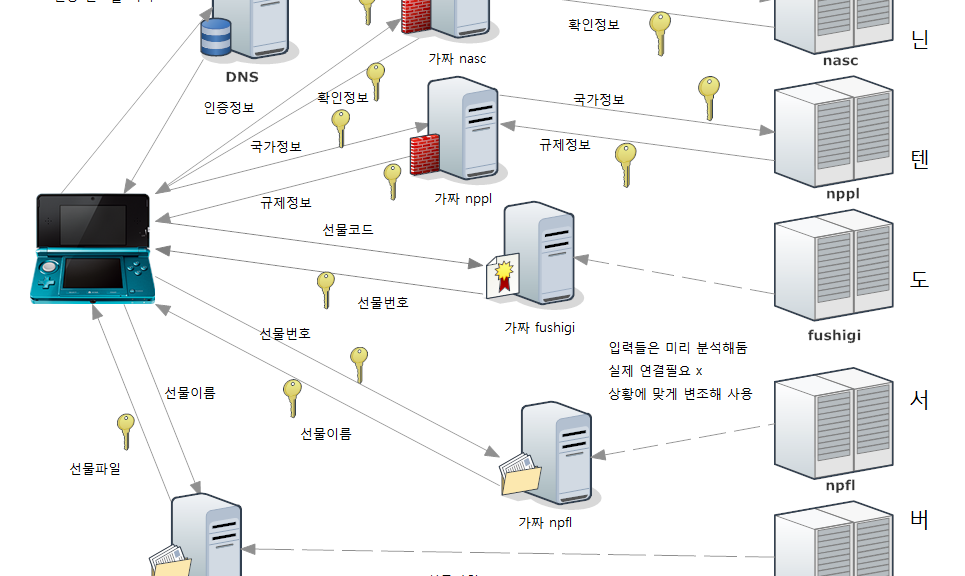
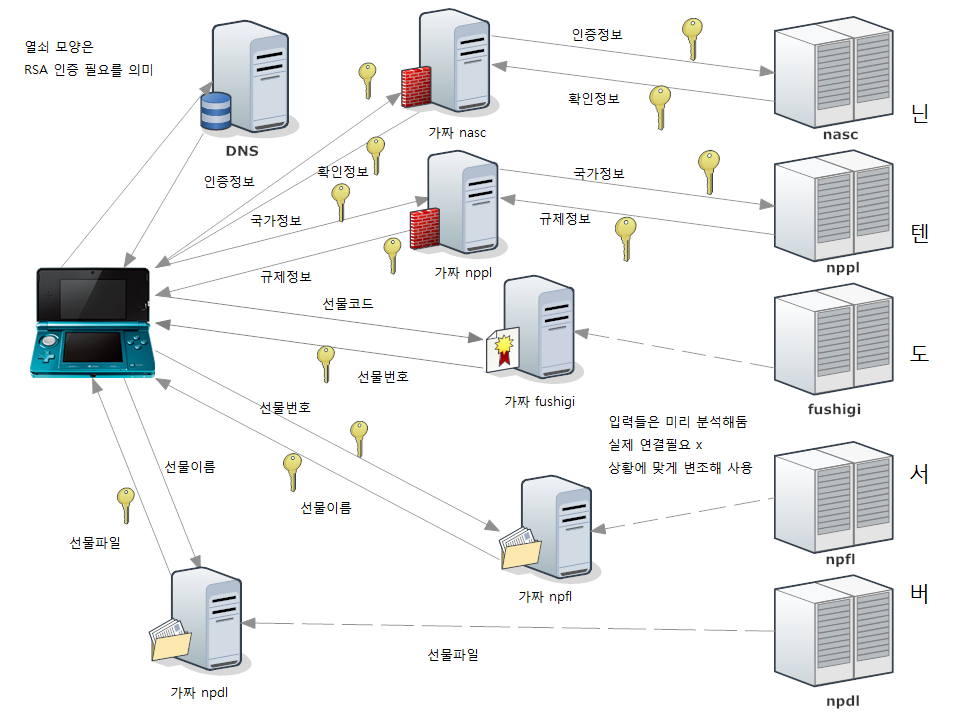
To summarize, The process is like the diagram above.
I coded a program for simulating each of the servers, but I discovered that NPFL server is using a different certificate chain than others. It is authenticated using Nintendo G3 root certificate as opposed to other servers using Nintendo Class 2 cert. I can also replace the G3 certificate in the same way I did for Class 2, but as G3 certificate is also used for connecting to NASC and NPPL server, which is used to authenticate the nintendo 3ds and the cartridge itself everytime it tries to connect to the internet. I couldn’t figure out a way to emulate those servers due to their cryptic response format, so I ended up coding a secure proxy server that redirects all the information to the legit servers.
So this is the final diagram.
fushigi, npfl and npdl servers are accessed consecutively, so there is no problem running everything on a single server. But nppl and nasc servers are accessed randomly during connection, somethimes even simultaneously so they must be ran on different machines.
Anyway now I proceed to analyzing the output of the npdl server.
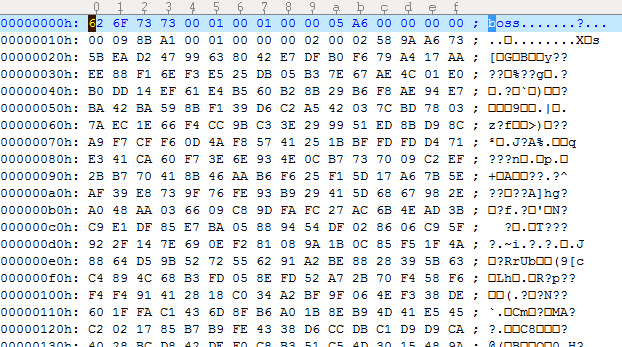
Despite so many steps it is still encrypted…
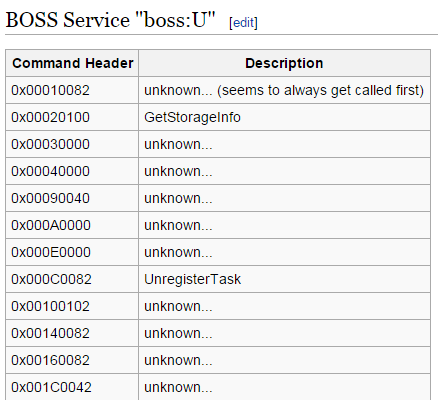
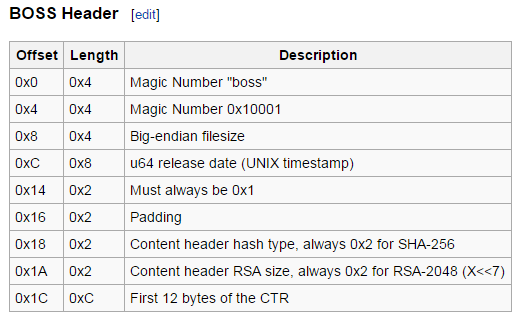
It is the BOSS format used in SpotPass, but to this date nobody bothered to document anything about the service.
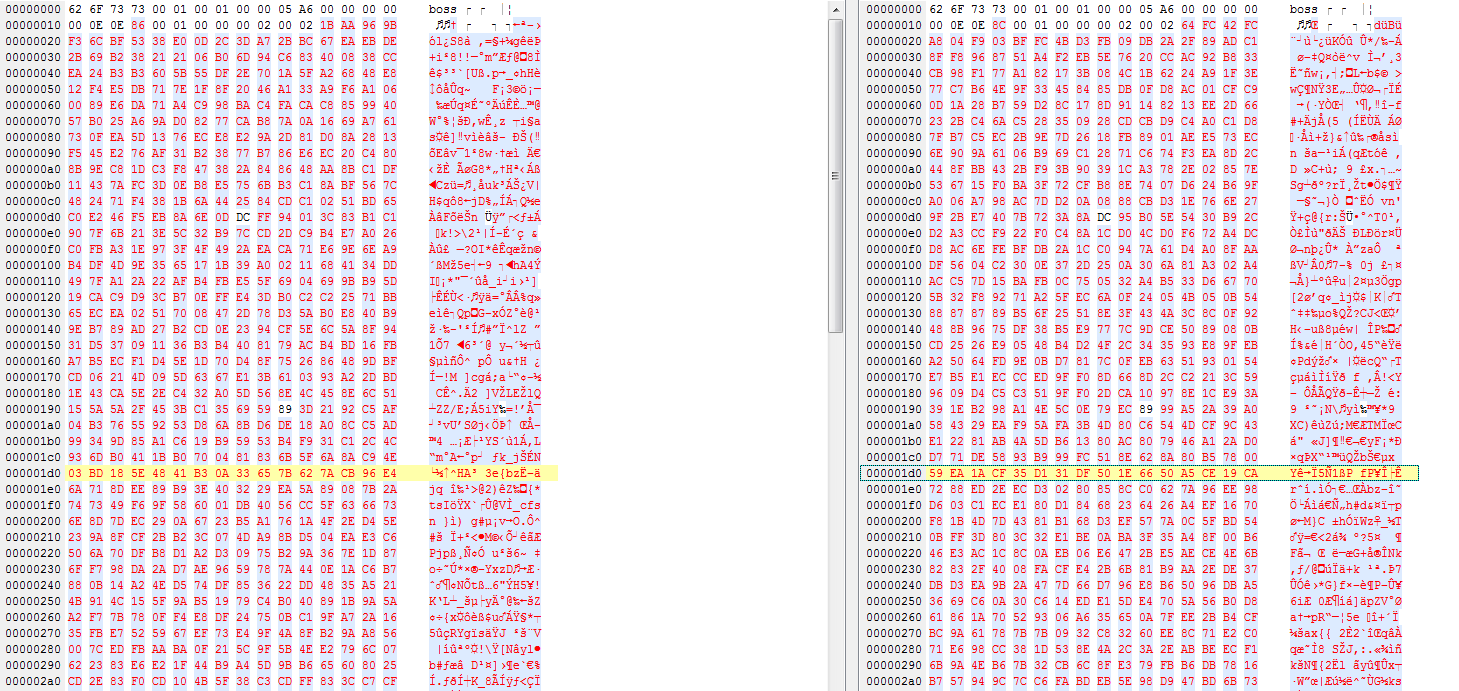
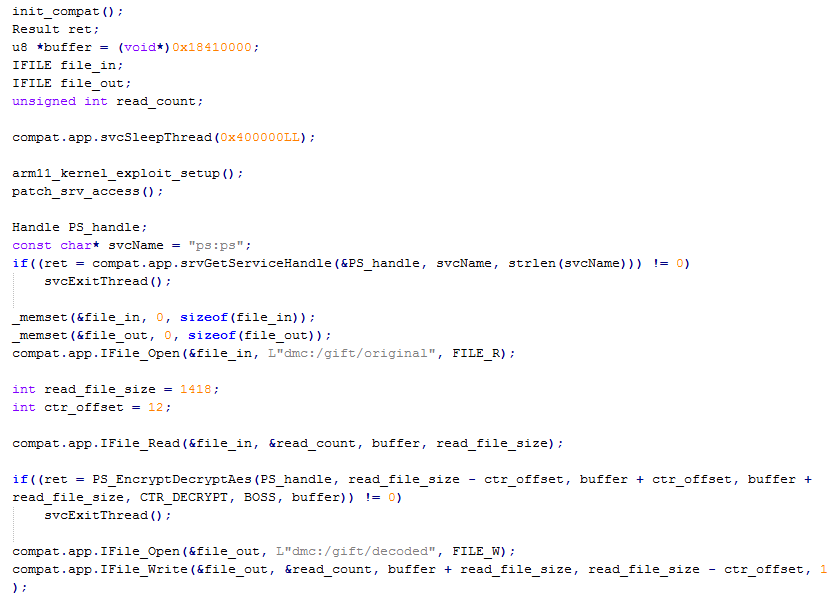
But thankfully the specs for the header are documented, I coded a boss format decrypter from the information.
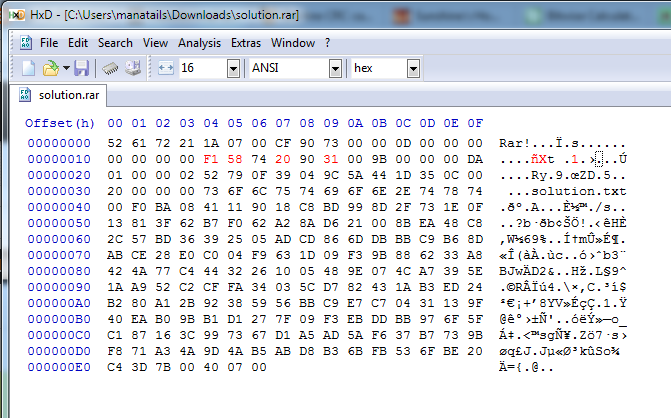
It is encrypted almost the same way as the client certificate execpt that it used AES-CTR and different set of private key. I coded another homebrew that is capable of decrypting AES-CTR from the raw data. the starting bytes of the CTR is the 12 bytes following the header plus 1 in big endian, so for this file the starting bytes will be 58 9A A6 73 5B EA D2 47 99 63 80 42 E7 01 00 00 00.
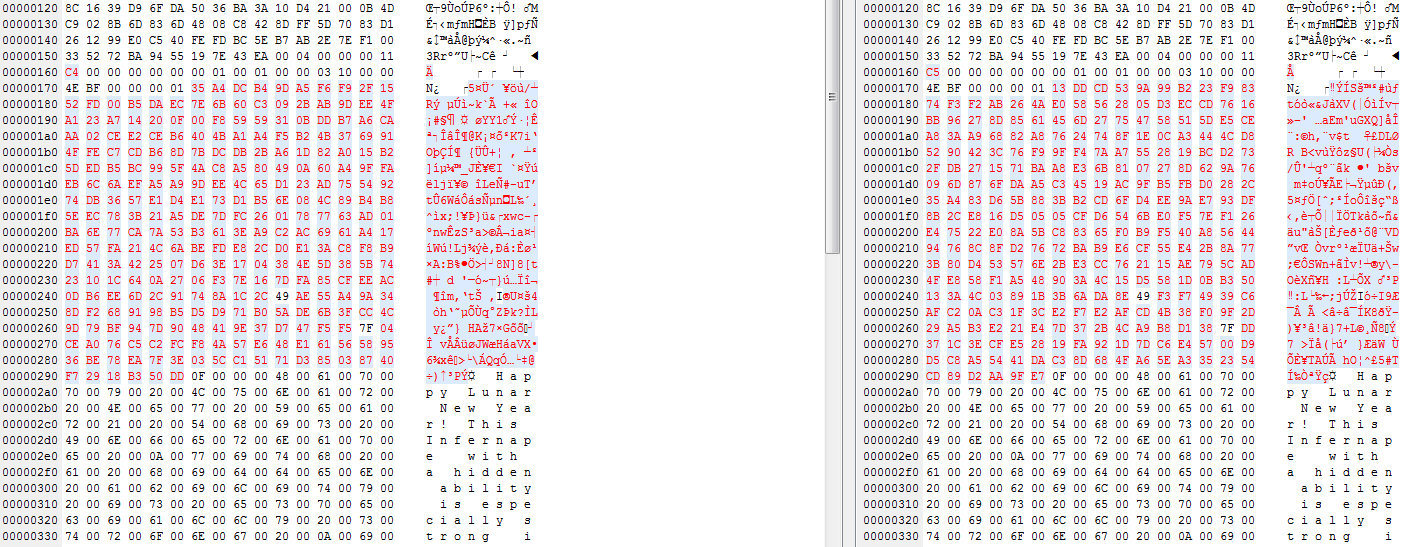
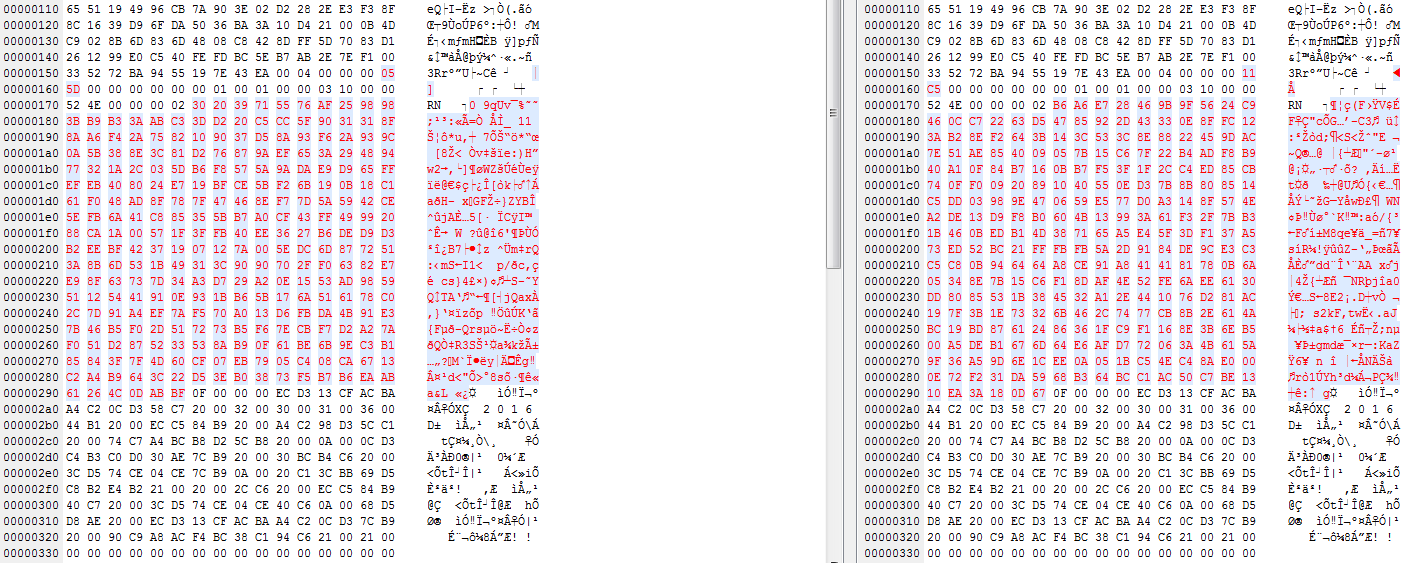
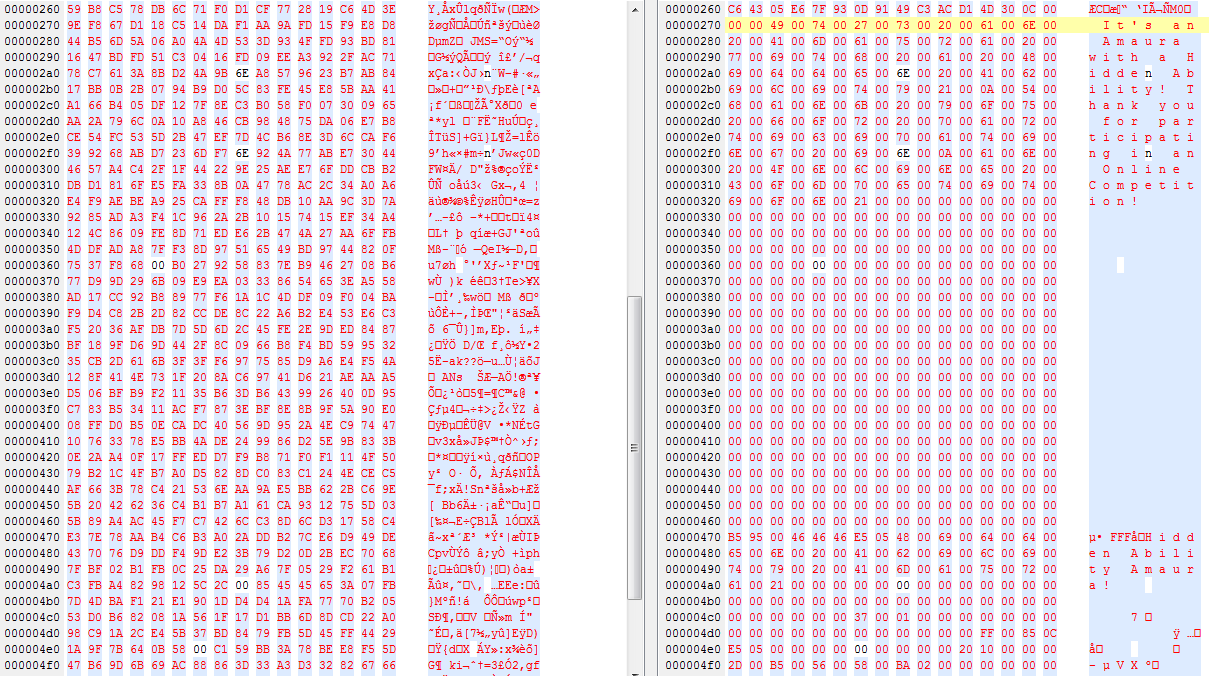
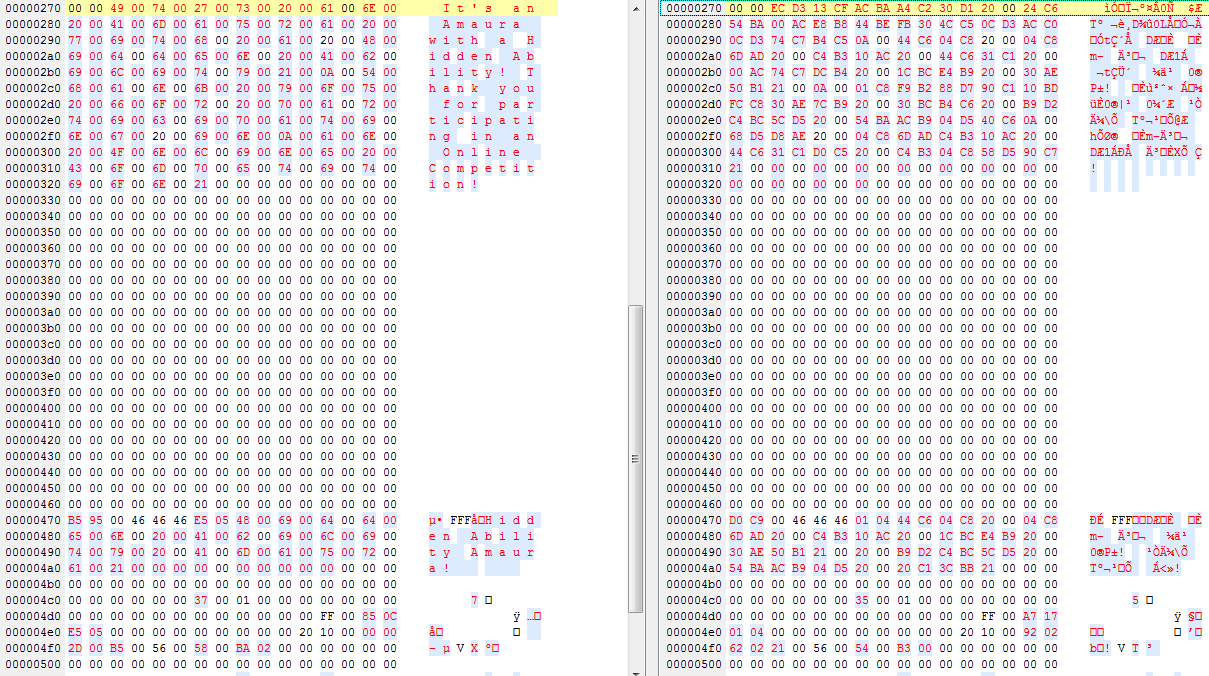
Presto! the gift is successfully decrypted. Although the actual format of the gift I will investigate later.
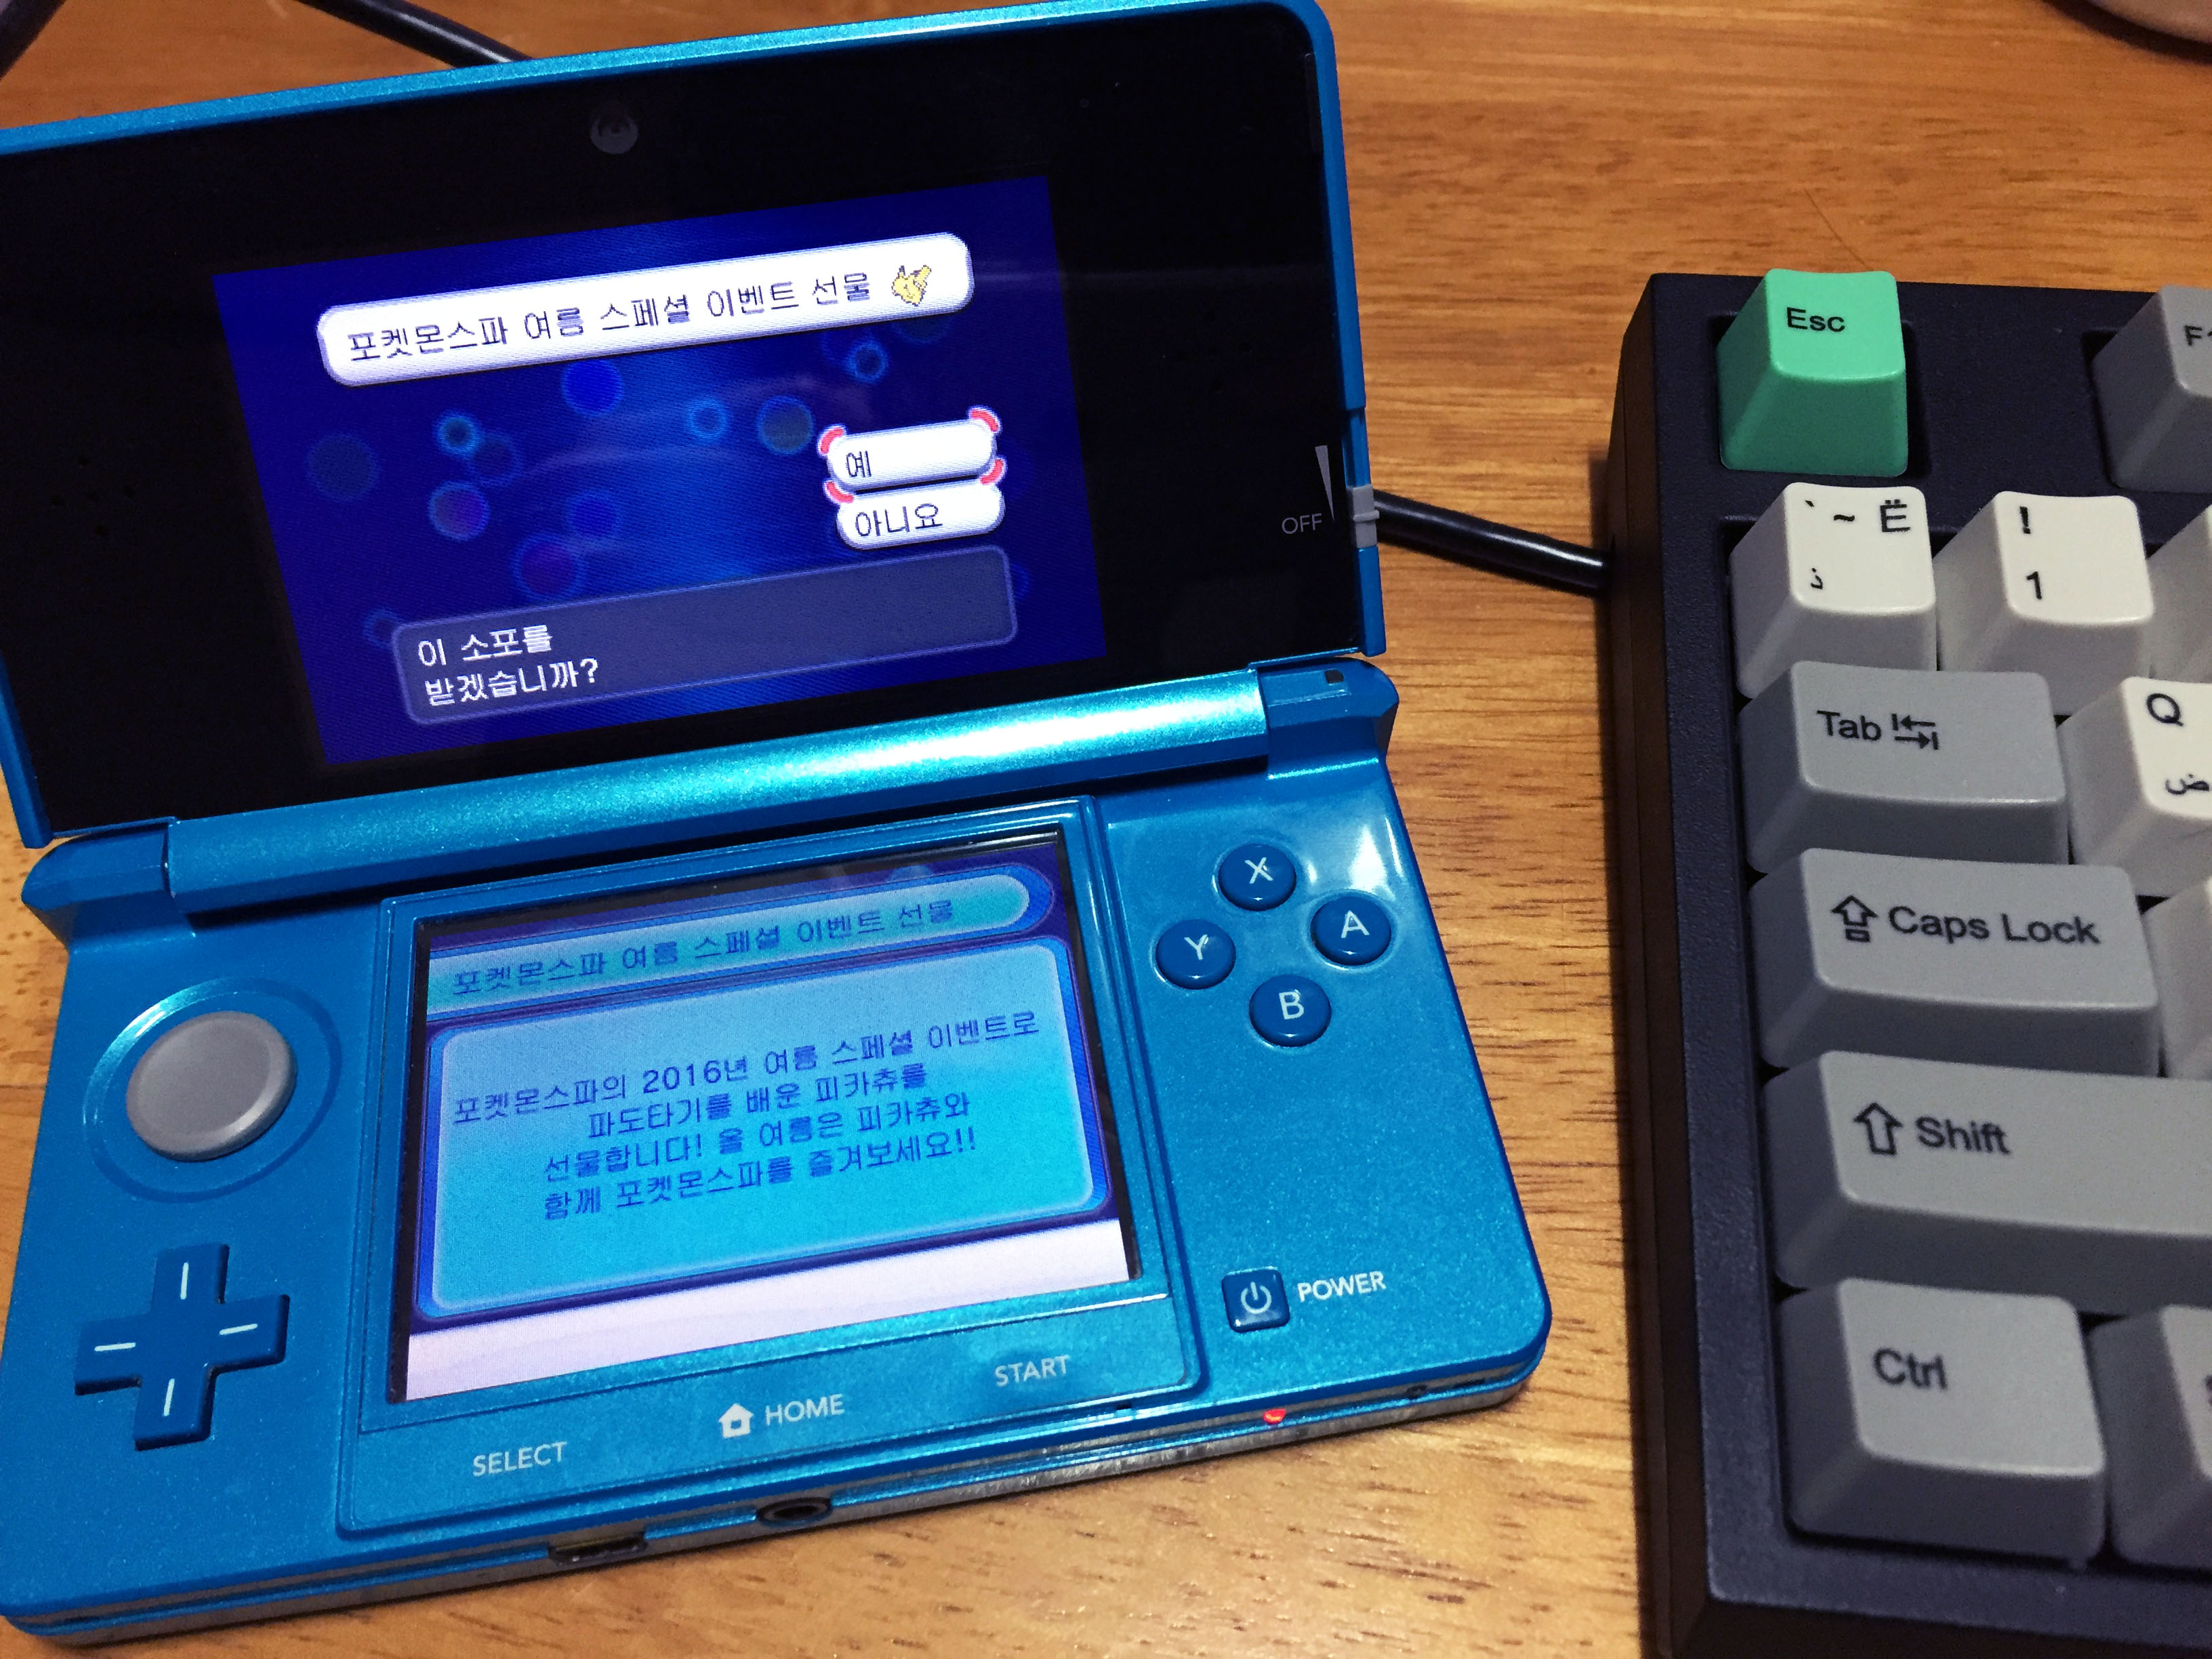
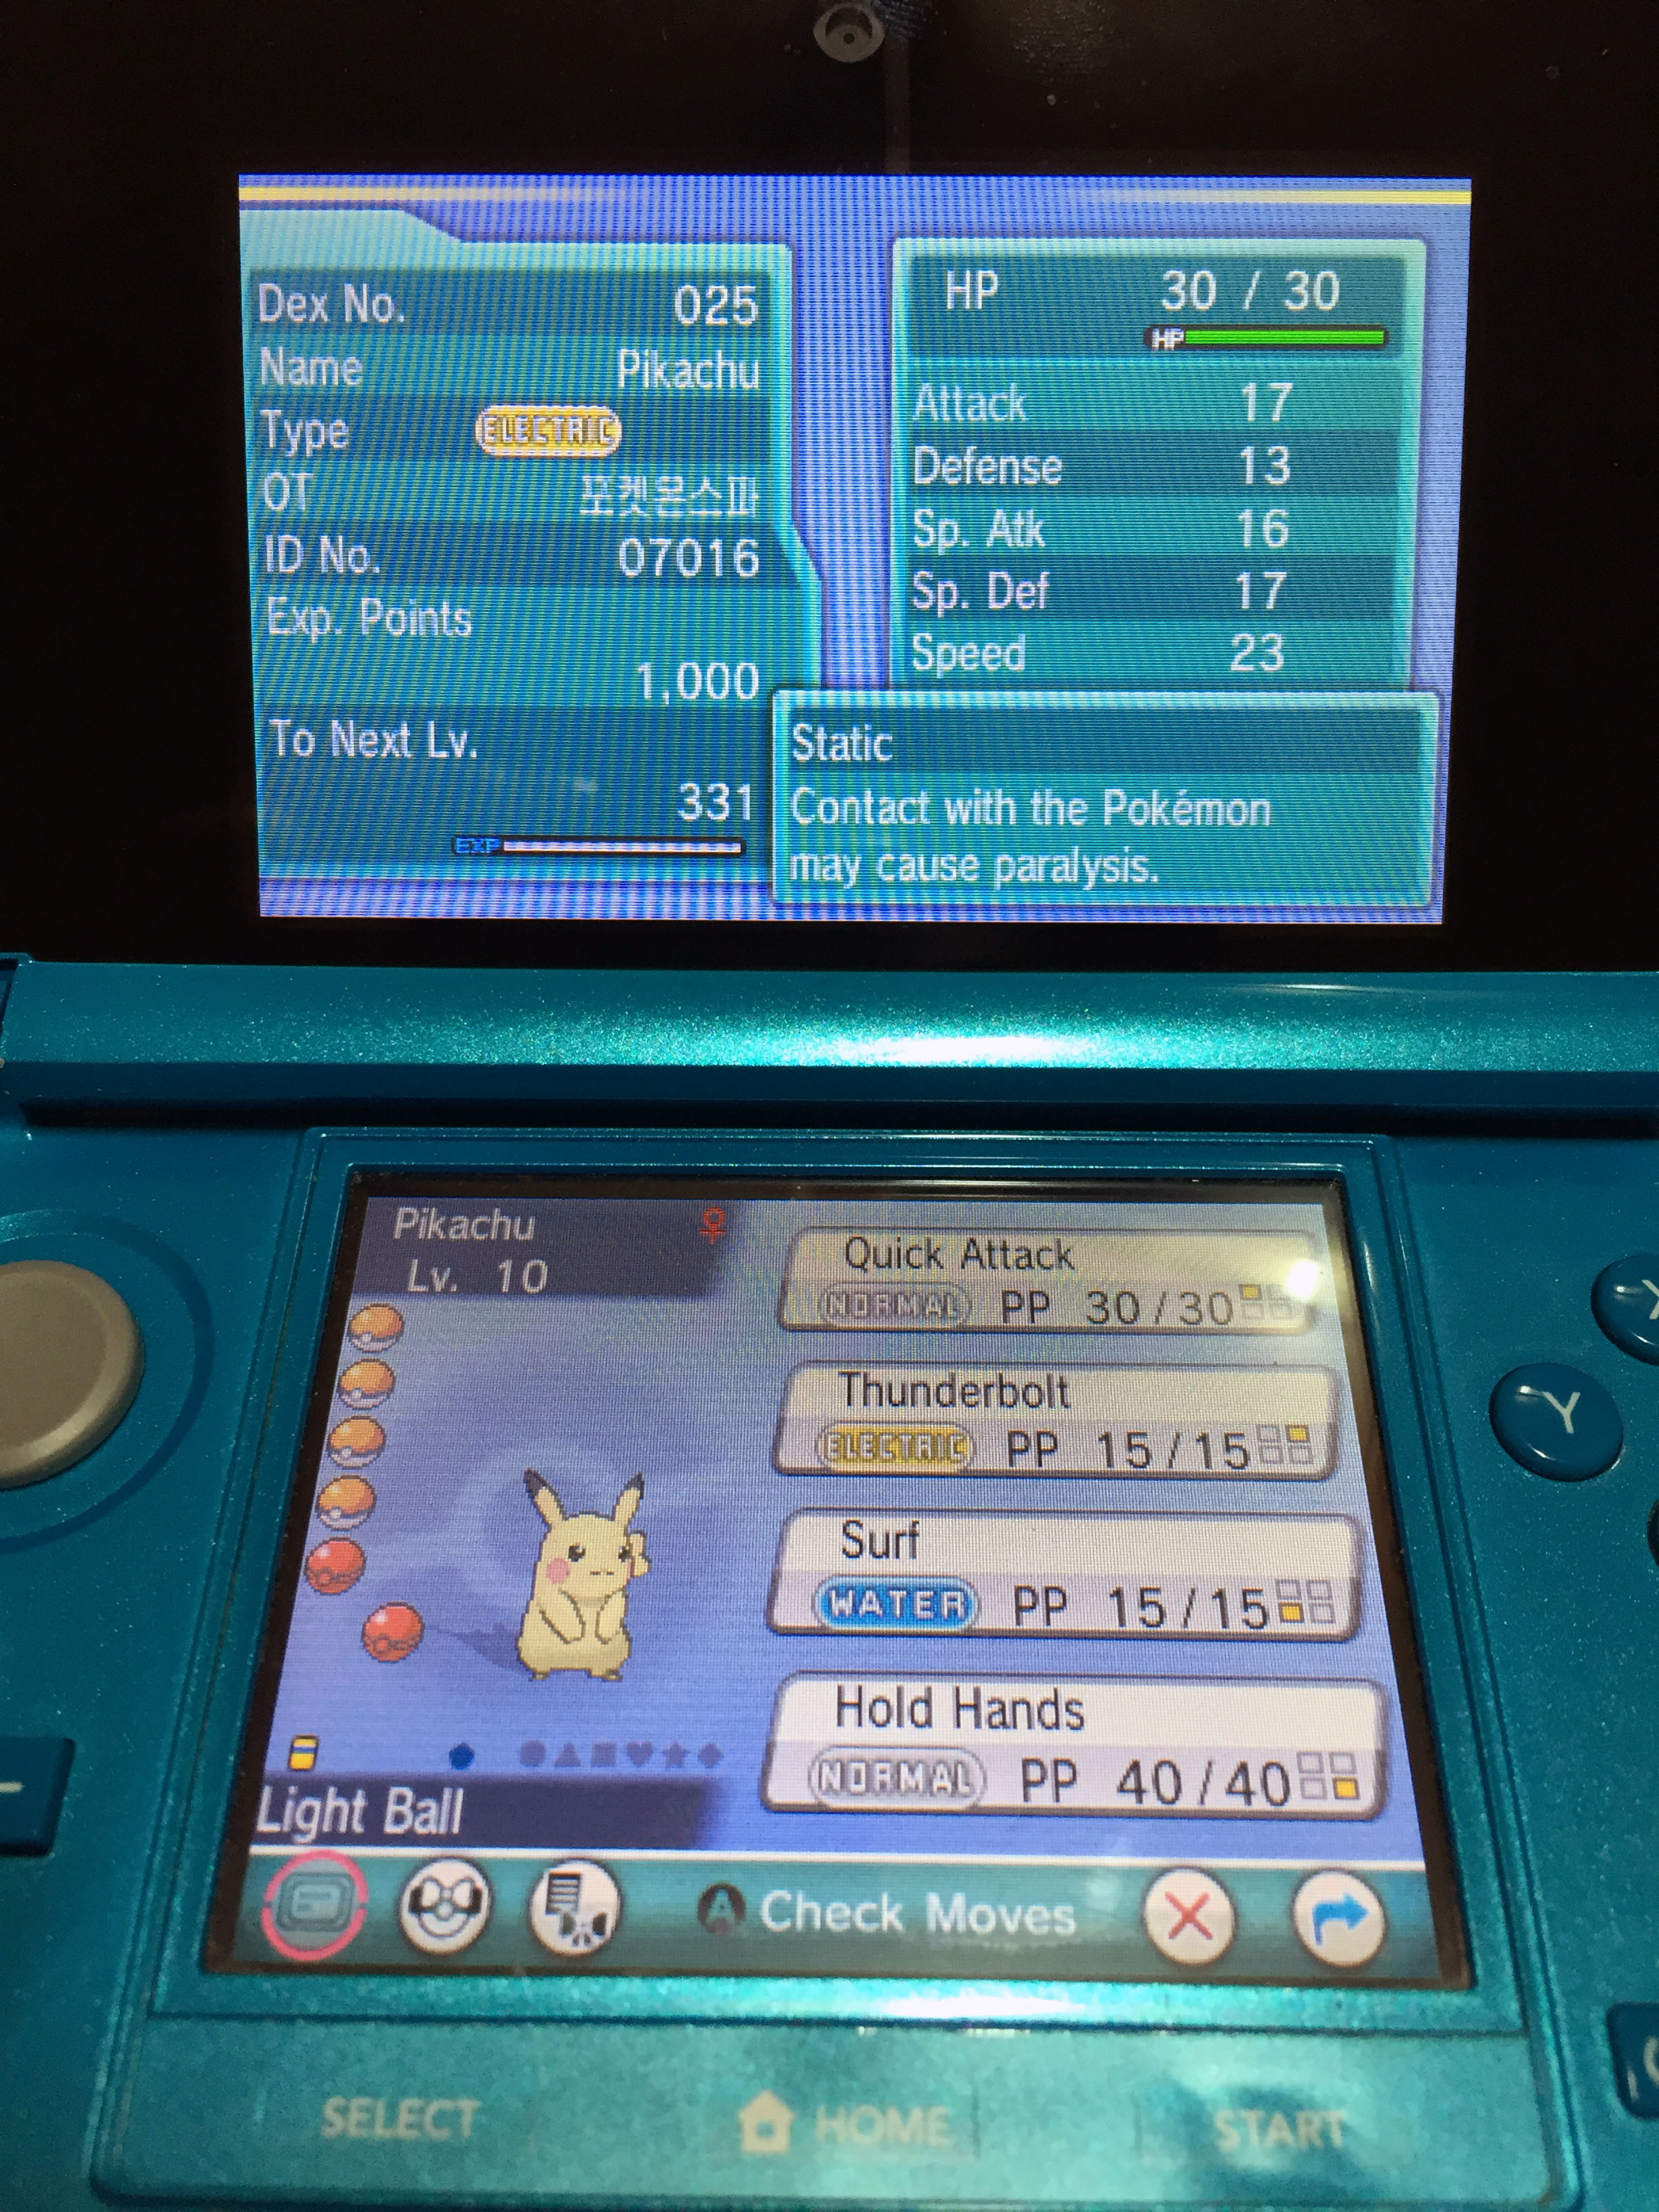
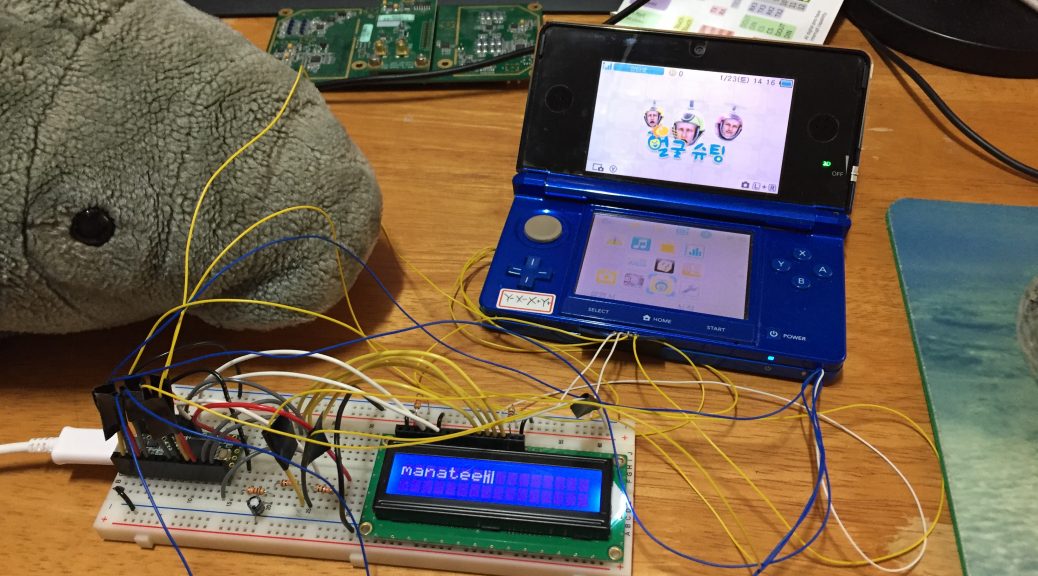
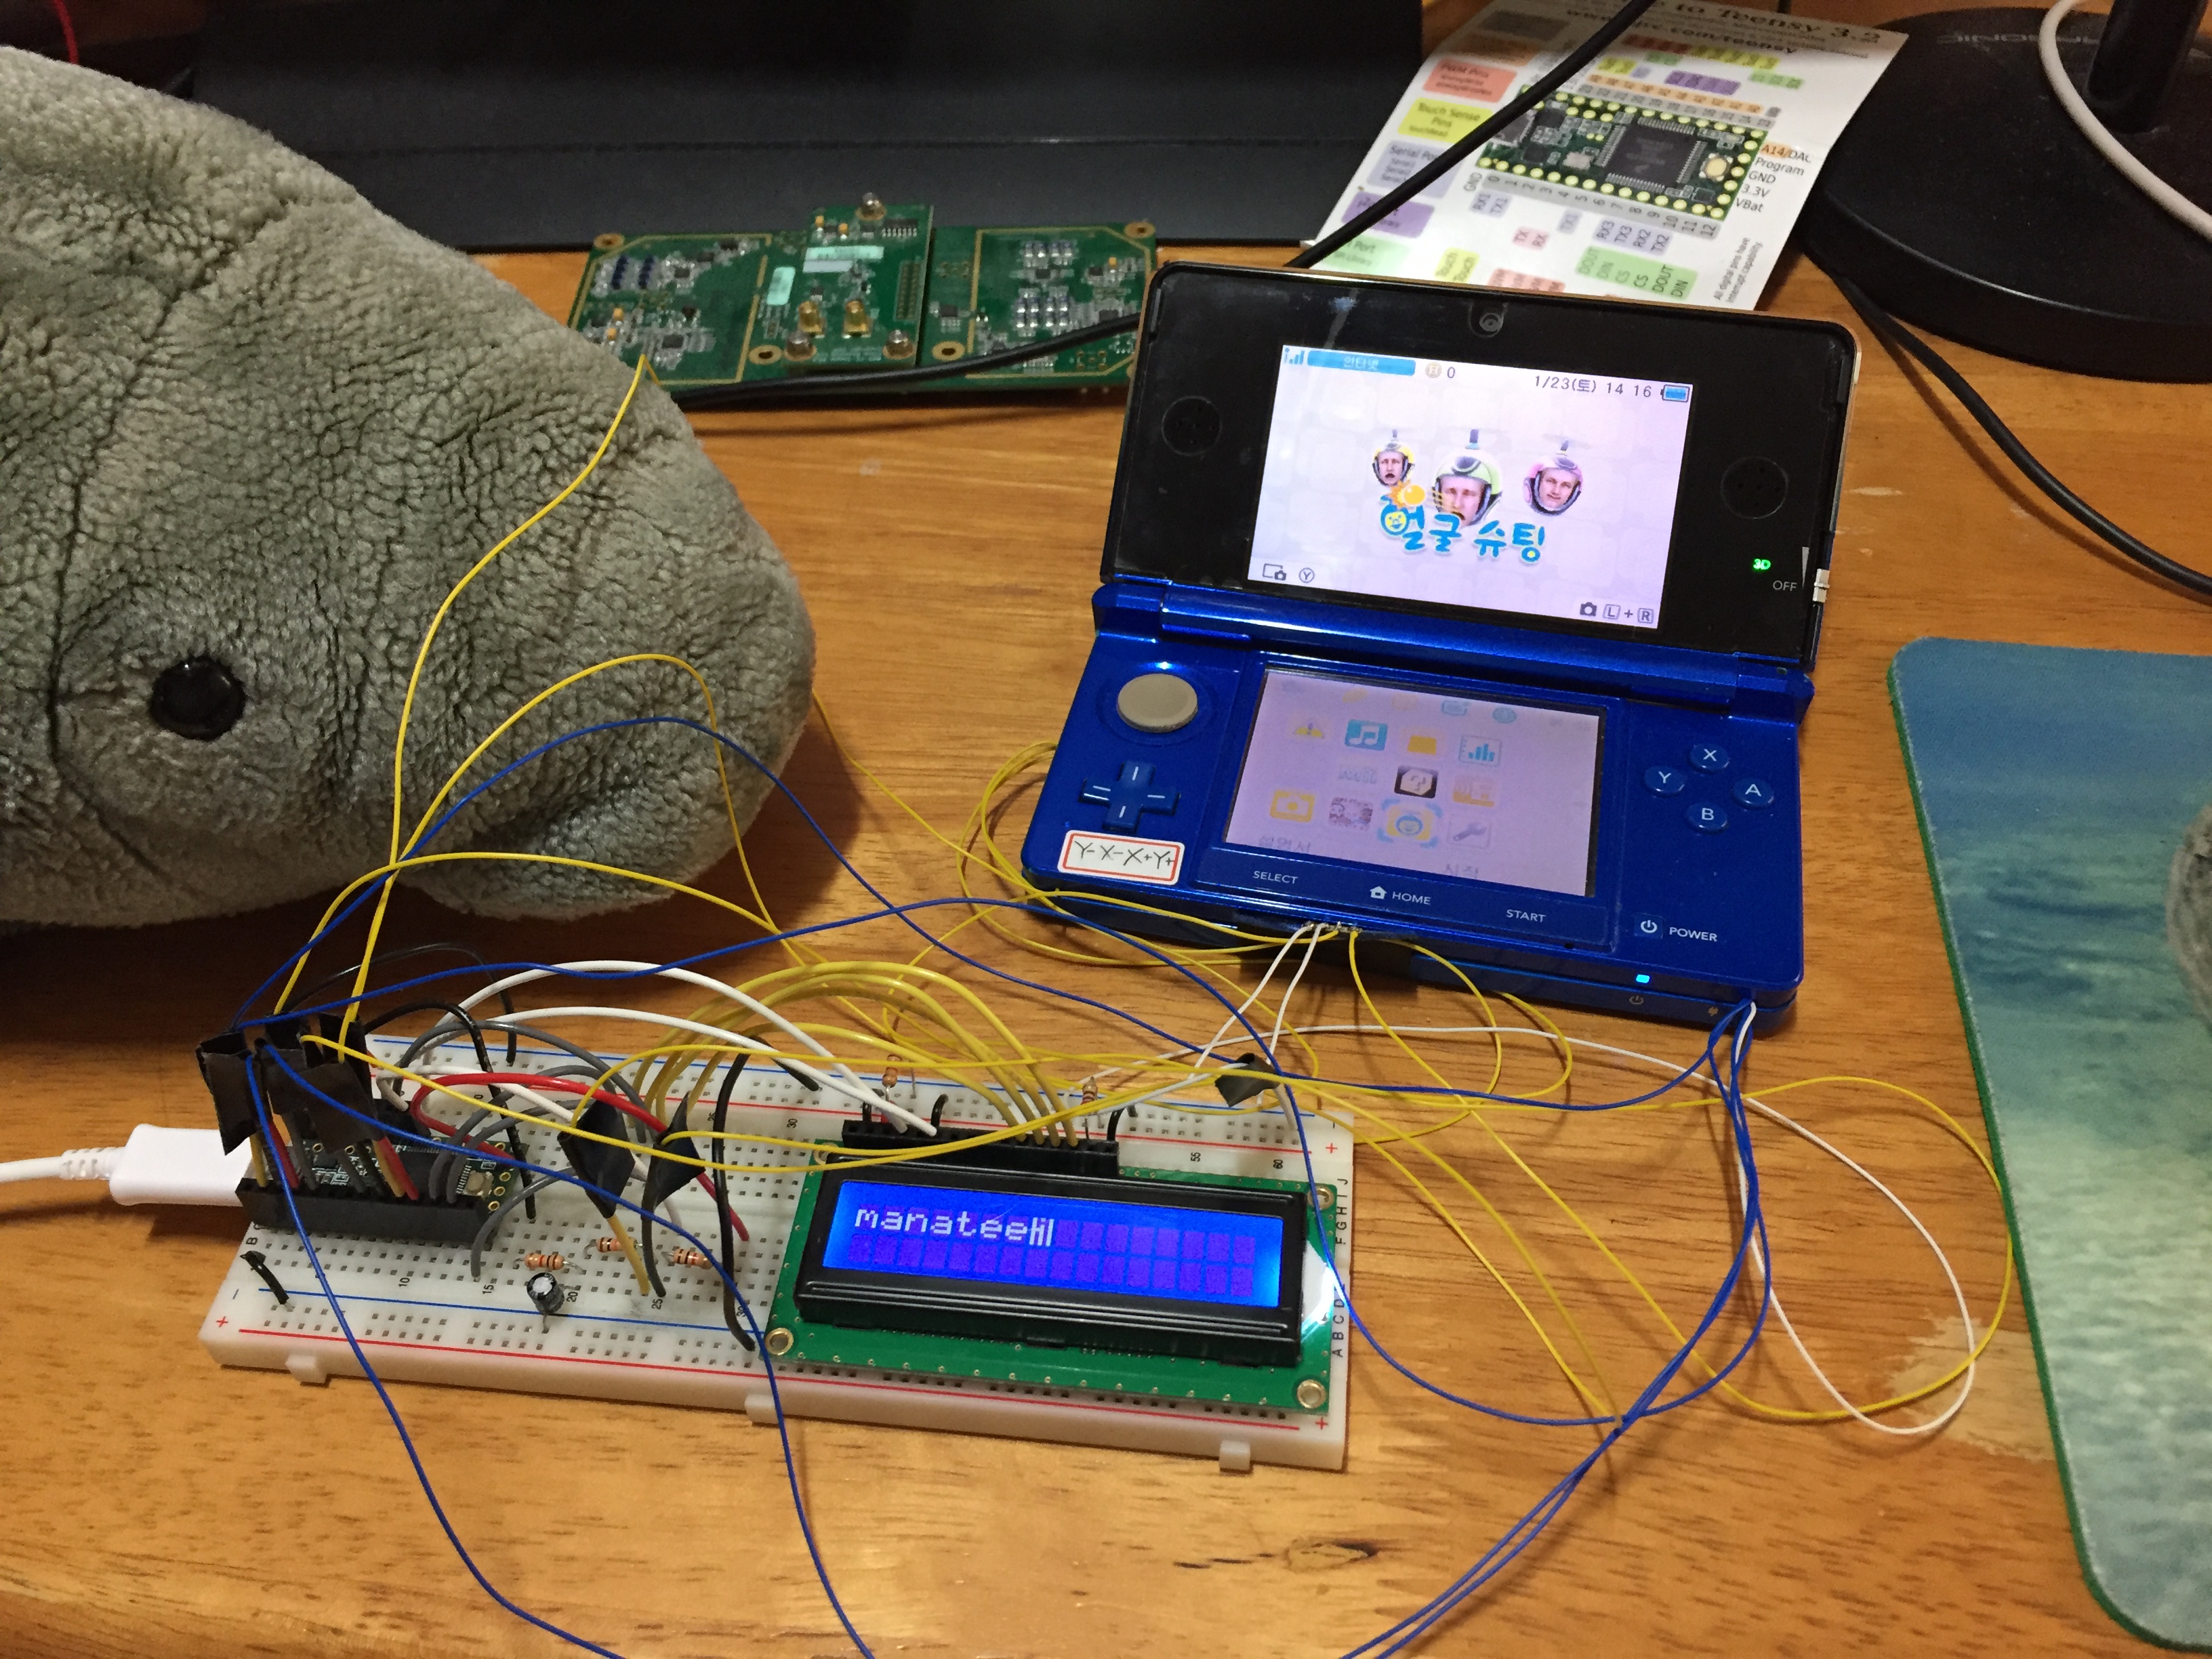
Now finally we can give ourselves a gift…
This is Amaura which my servers are gifting to my nintendo 3DS, with an arbitary gift code of MANATEE.
But as the gift file itself is also signed by nintendo, I guess there will be more stuff to be done before we can start creating our own giveaway pokemon.
The source code of the server emulators and AES-CTR decryptor will be released soon.
CRC of fields from HEAD_TYPE to FILEATTR and file name
HEAD_TYPE
1
Header Type: 0x74
HEAD_FLAGS
2
Bit Flags (Please see ‘Bit Flags for File in Archive’ table for all possibilities)
HEAD_SIZE
2
File header full size including file name and comments
PACK_SIZE
4
Compressed file size
UNP_SIZE
4
Uncompressed file size
HOST_OS
1
Operating system used for archiving (See the ‘Operating System Indicators’ table for the flags used)
FILE_CRC
4
File CRC
FTIME
4
Date and time in standard MS DOS format
UNP_VER
1
RAR version needed to extract file (Version number is encoded as 10 * Major version + minor version.)
METHOD
1
Packing method (Please see ‘Packing Method’ table for all possibilities
NAME_SIZE
2
File name size
ATTR
4
File attributes
HIGH_PACK_SIZE
4
High 4 bytes of 64-bit value of compressed file size. Optional value, presents only if bit 0x100 in HEAD_FLAGS is set.
HIGH_UNP_SIZE
4
High 4 bytes of 64-bit value of uncompressed file size. Optional value, presents only if bit 0x100 in HEAD_FLAGS is set.
FILE_NAME
NAME_SIZE bytes
File name – string of NAME_SIZE bytes size
SALT
8
present if (HEAD_FLAGS & 0x400) != 0
EXT_TIME
variable size
present if (HEAD_FLAGS & 0x1000) != 0
But the actual implementation of HEAD_CRC is the lower bits of CRC32 of header defined as in HEAD_SIZE without HEAD_CRC part calculated with standard polynomial of 0xEDB88320. I write it up here because RAR spec documents are crap. I hope this saves a couple of hours for someone.